Basic handling of Napari
What is Napari?
Napariꜛ is a fast, interactive, multi-dimensional open-source image viewer based on Python. It’s designed for fast browsing, annotating, and analyzing large multi-dimensional images. With its high extensibility, Napari provides a user-friendly environment for performing state-of-the-art image analysis. You can perform basic image processing steps just like you would do in other image viewers such as ImageJ/Fiji. Like the latter, Napari can be easily extended with Plugins written by a vivid user communityꜛ to perform more advanced image analysis tasks such as deep learning-based image segmentation.
In this chapter, we explore Napari’s GUI and basic functionalities. We will learn how to load images, how to navigate through them, how to perform basic image processing steps, and how to save our results.
 The Napari logo.
How to start Napari
We assume that you have followed the provided installation instructions. To start Napari, proceed as follows:
- Open a new terminal (macos/Linux) or PowerShell (Windows).
- Activate the Napari conda environment by entering the command:
mamba activate napari - Start Napari by typing the command:
napari
If you want to open multiple instances of Napari, open another terminal window and repeat steps 2 and 3.
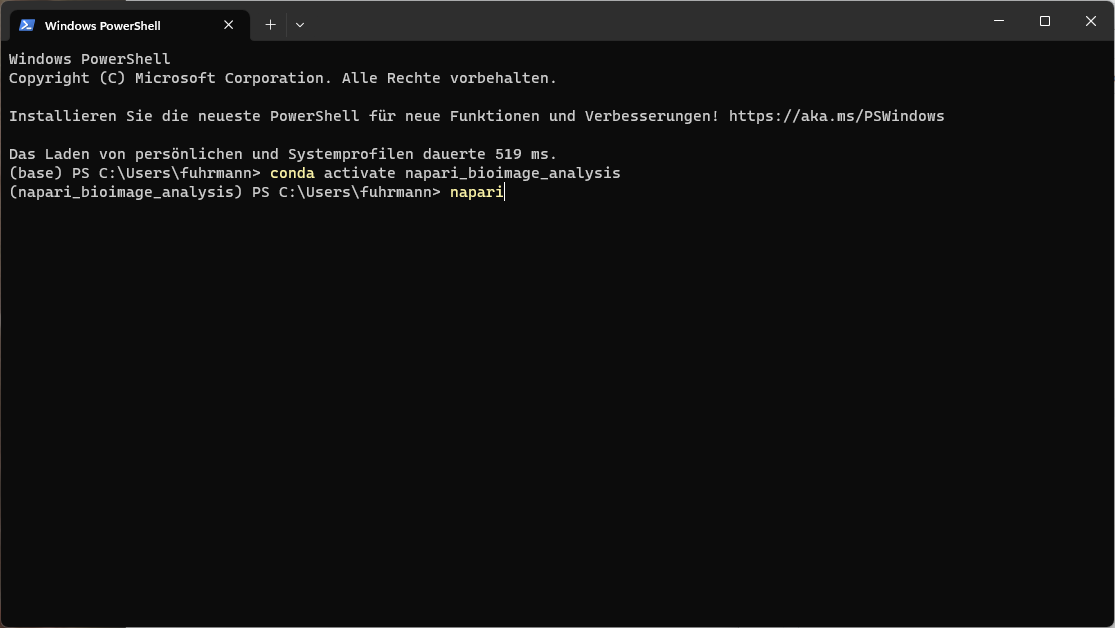 Starting Napari in the Windows PowerShell.
The graphical user interface (GUI)
Napari’s GUI is divided into three main parts: the main window or image viewer, the layer list (lower panel on the left), and the layer controls (upper panel on the left). The main window is the place where the images are displayed. The layer list shows all the images or annotation layers that are currently loaded. It also provides the option to toggle the visibility of each layers, as well as to change their order, or to delete them. The layer controls allow you to change the appearance of the images in the main window and for each layer individually.
Many plugins add additional panels, called “widgets” to the GUI, by default placed on the right side. The layer list and the layer controls are in principle also widgets.
The GUI is highly customizable. You can move the panels/widgets around, hide them, or even add new ones. You can also change the size of the panels by dragging the borders between them.
Loading images
Loading images in Napari is pretty simply. Either drag and drop the image file into the Napari main window or use the Open File(s) command from the File menu:
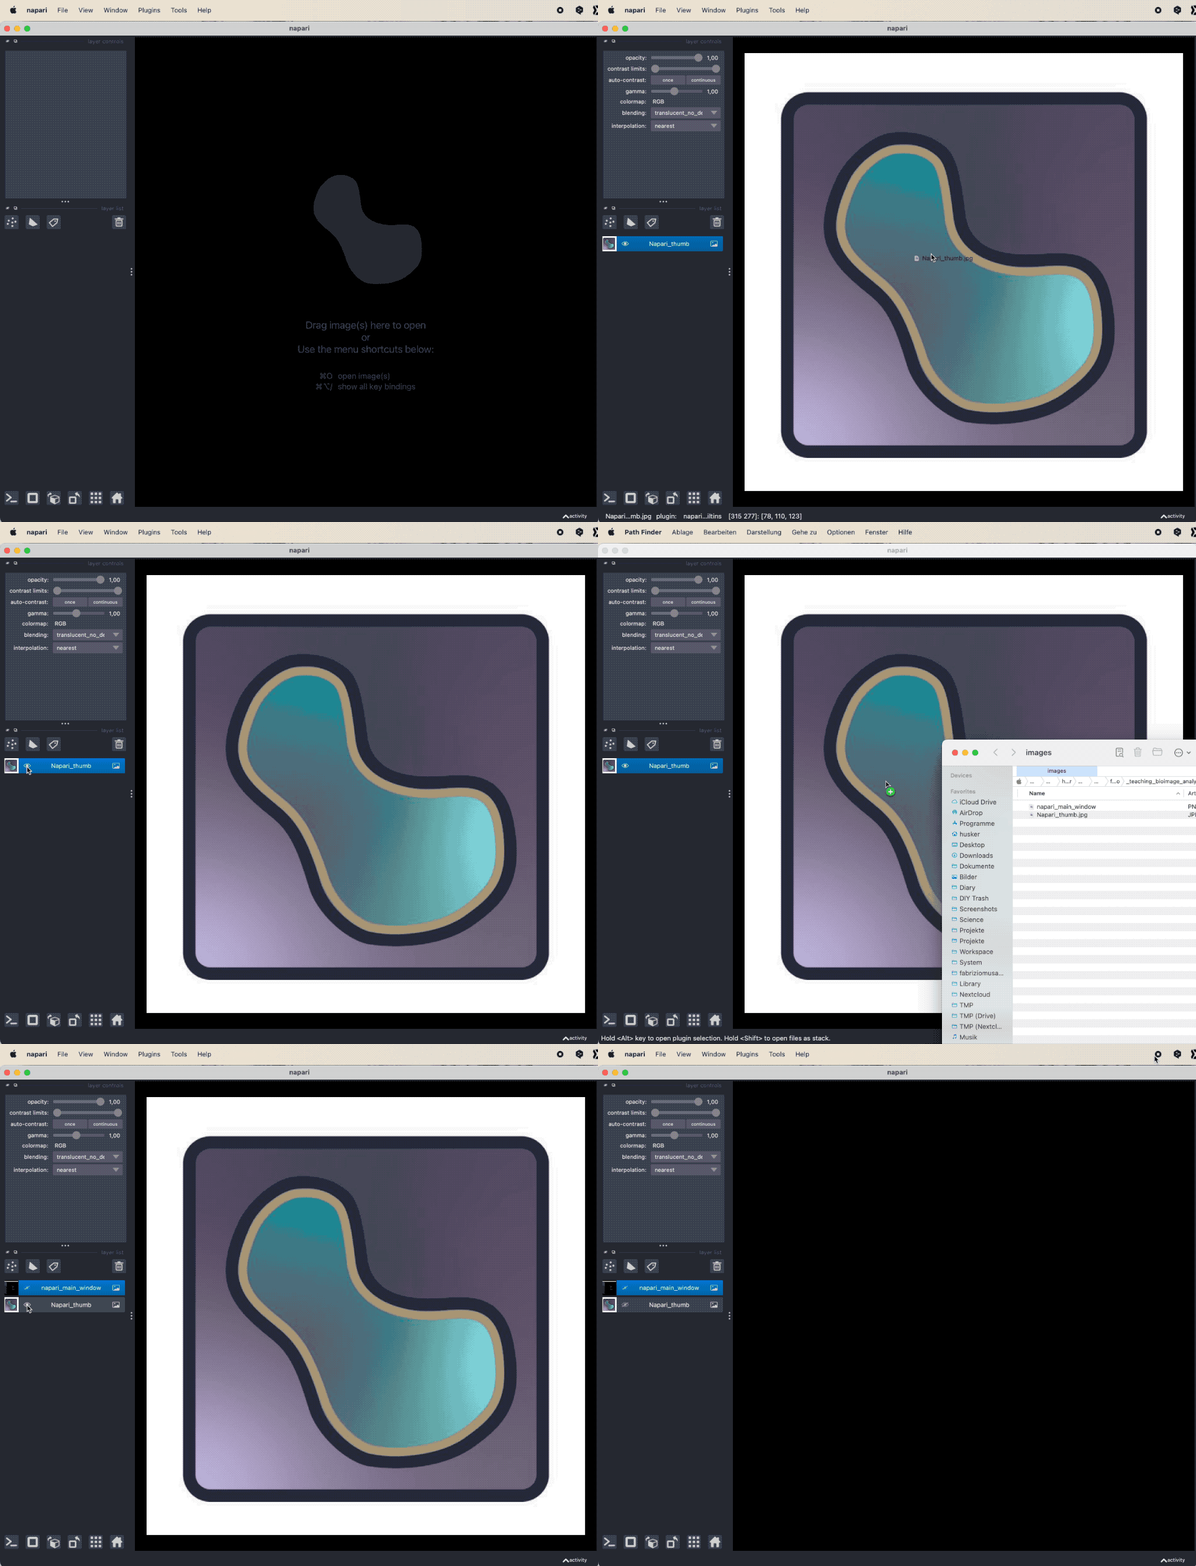 Loading images in Napari via drag and drop.
Napari supports a wide range of image formats such as TIFFs, OME-TIFFs, CZI, but also JPG, PNG, and many more. Its file format support can be even extended by installing additional plugins.
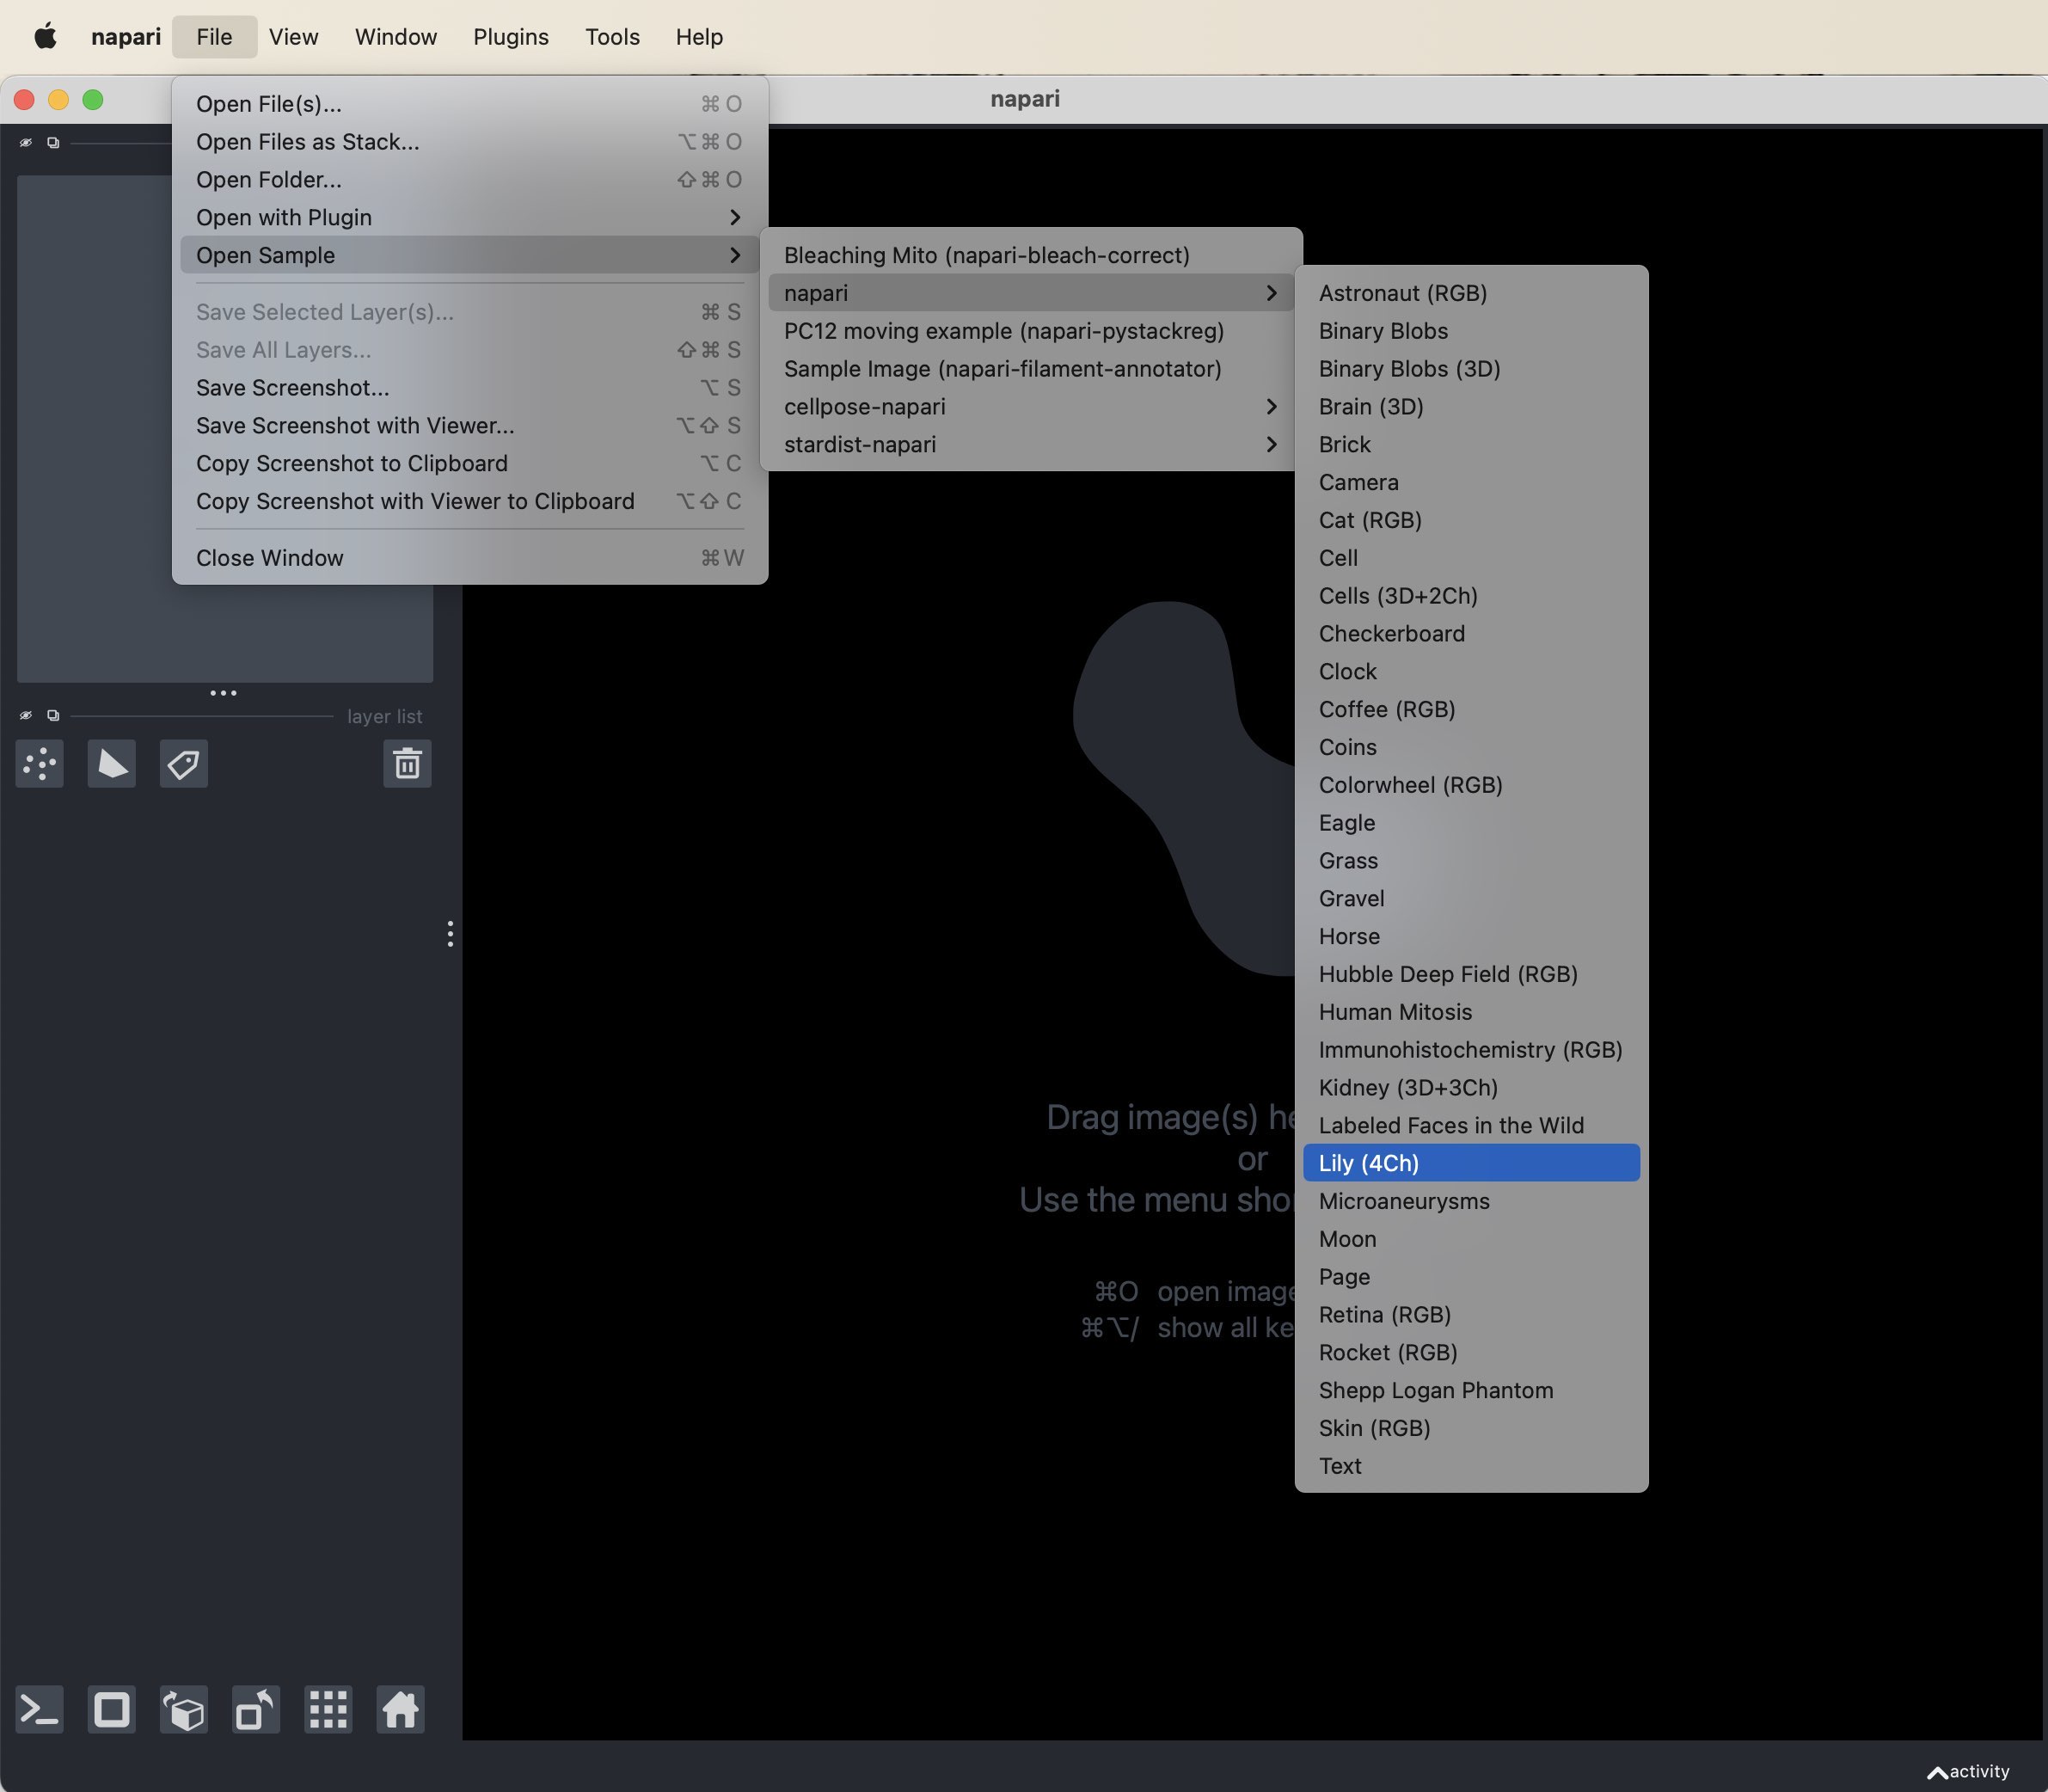
You can also load pre-installed sample images (File->Open sample image). By default, Napari comes with the sample image dataset from the scikit-image packageꜛ. Additional sample sets are sometimes added when you install new plugins.
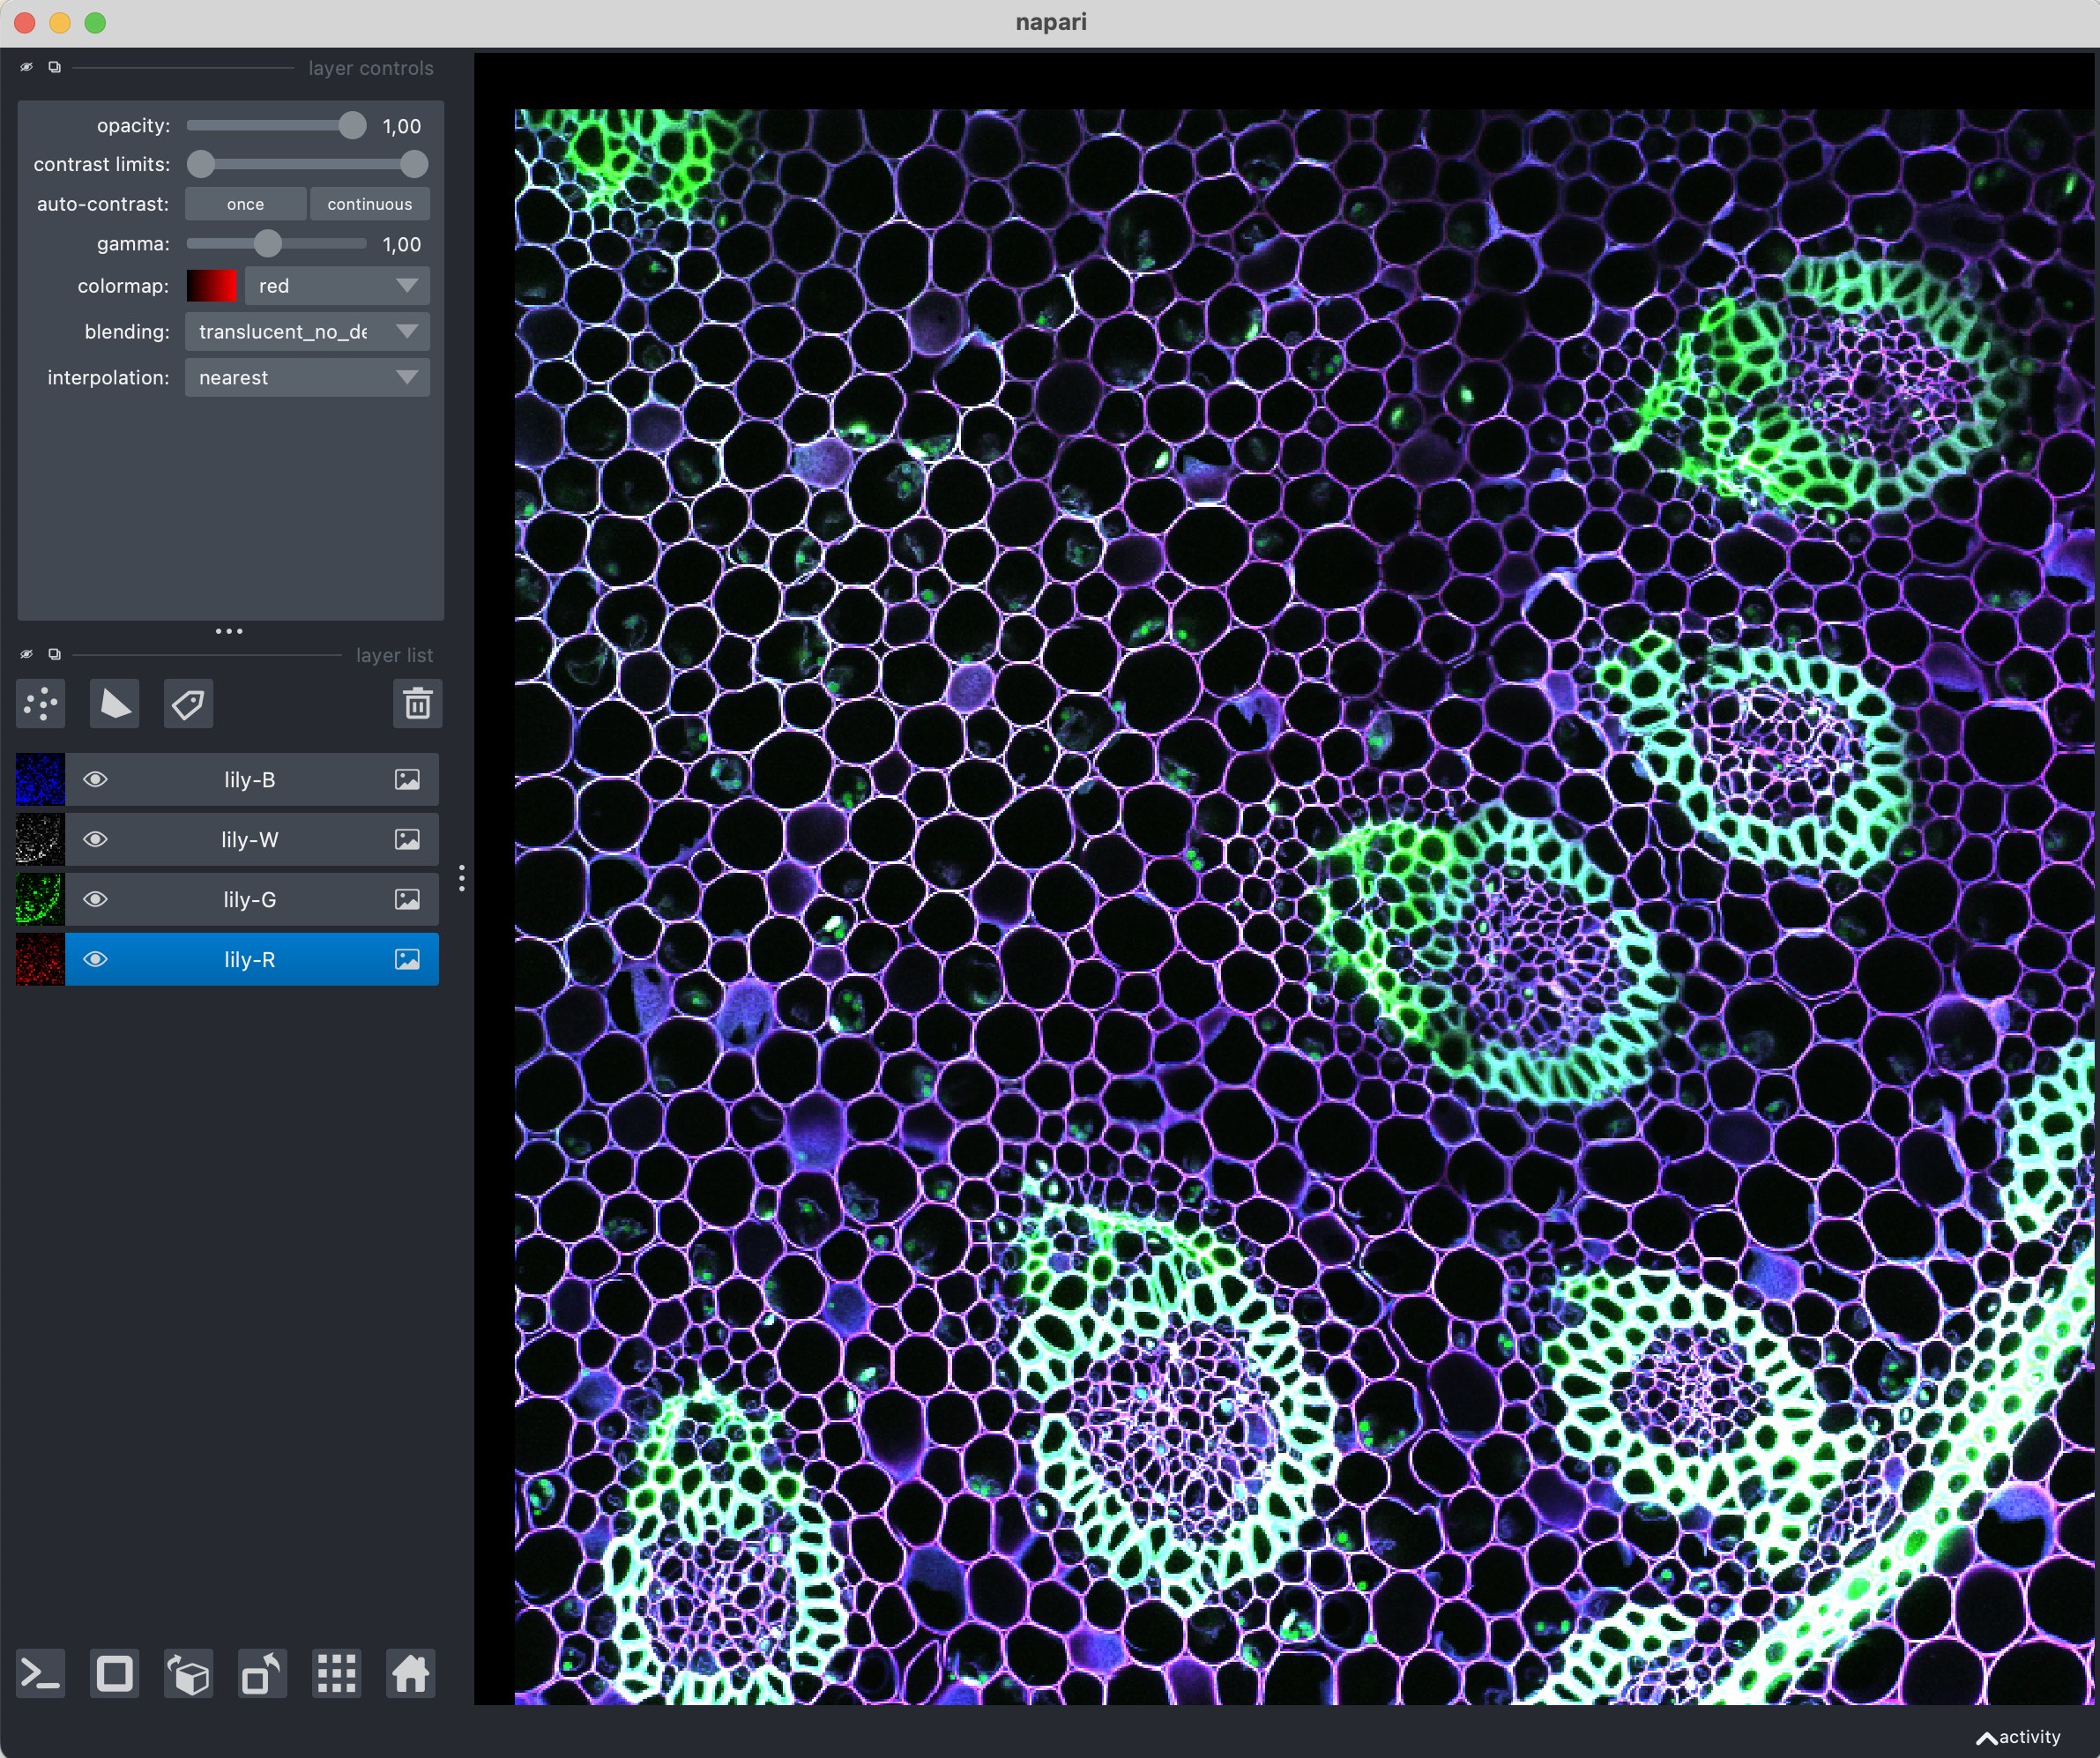 Loading sample images in Napari via the File menu.
Another source for images are the many free image repositories that are available online. For instance, in this course, we will use images from the Cell Image Libraryꜛ.
The layer list and layer control widget
With the layer list widget you can not only change the order of the opened layer and toggle their visibility, but merge and split them. To do so, simply select the desired layer(s) you want to merge or split and right-click on them. Choose the corresponding option (Split Stack or Merge to Stack) from the context menu:
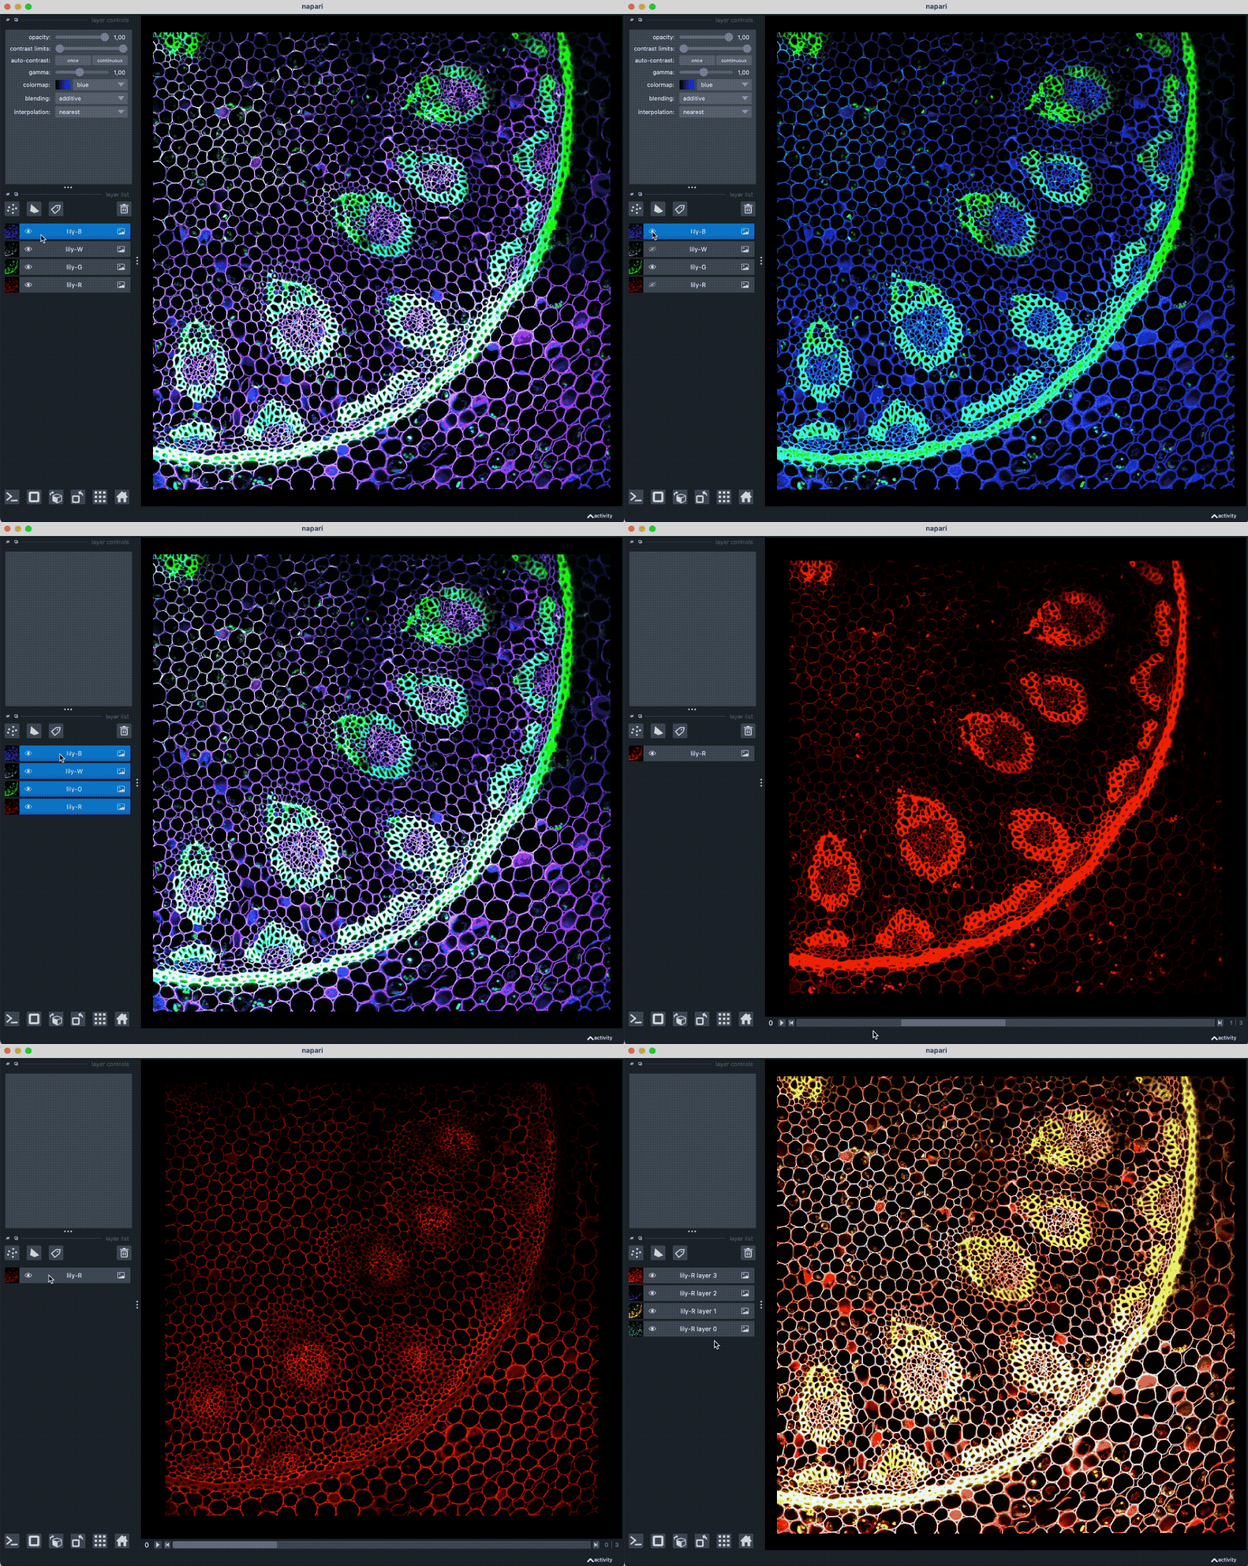 Merge and split layers in the layer list. Please not, that, as soon as we merges the four channels of the Lily sample image, Napari displays a slider at the bottom of the main window that allows us to switch between the channels.
Similarly, you can also project a selected layer onto one layer by right-clicking on it and choosing the Projections option from the context menu:
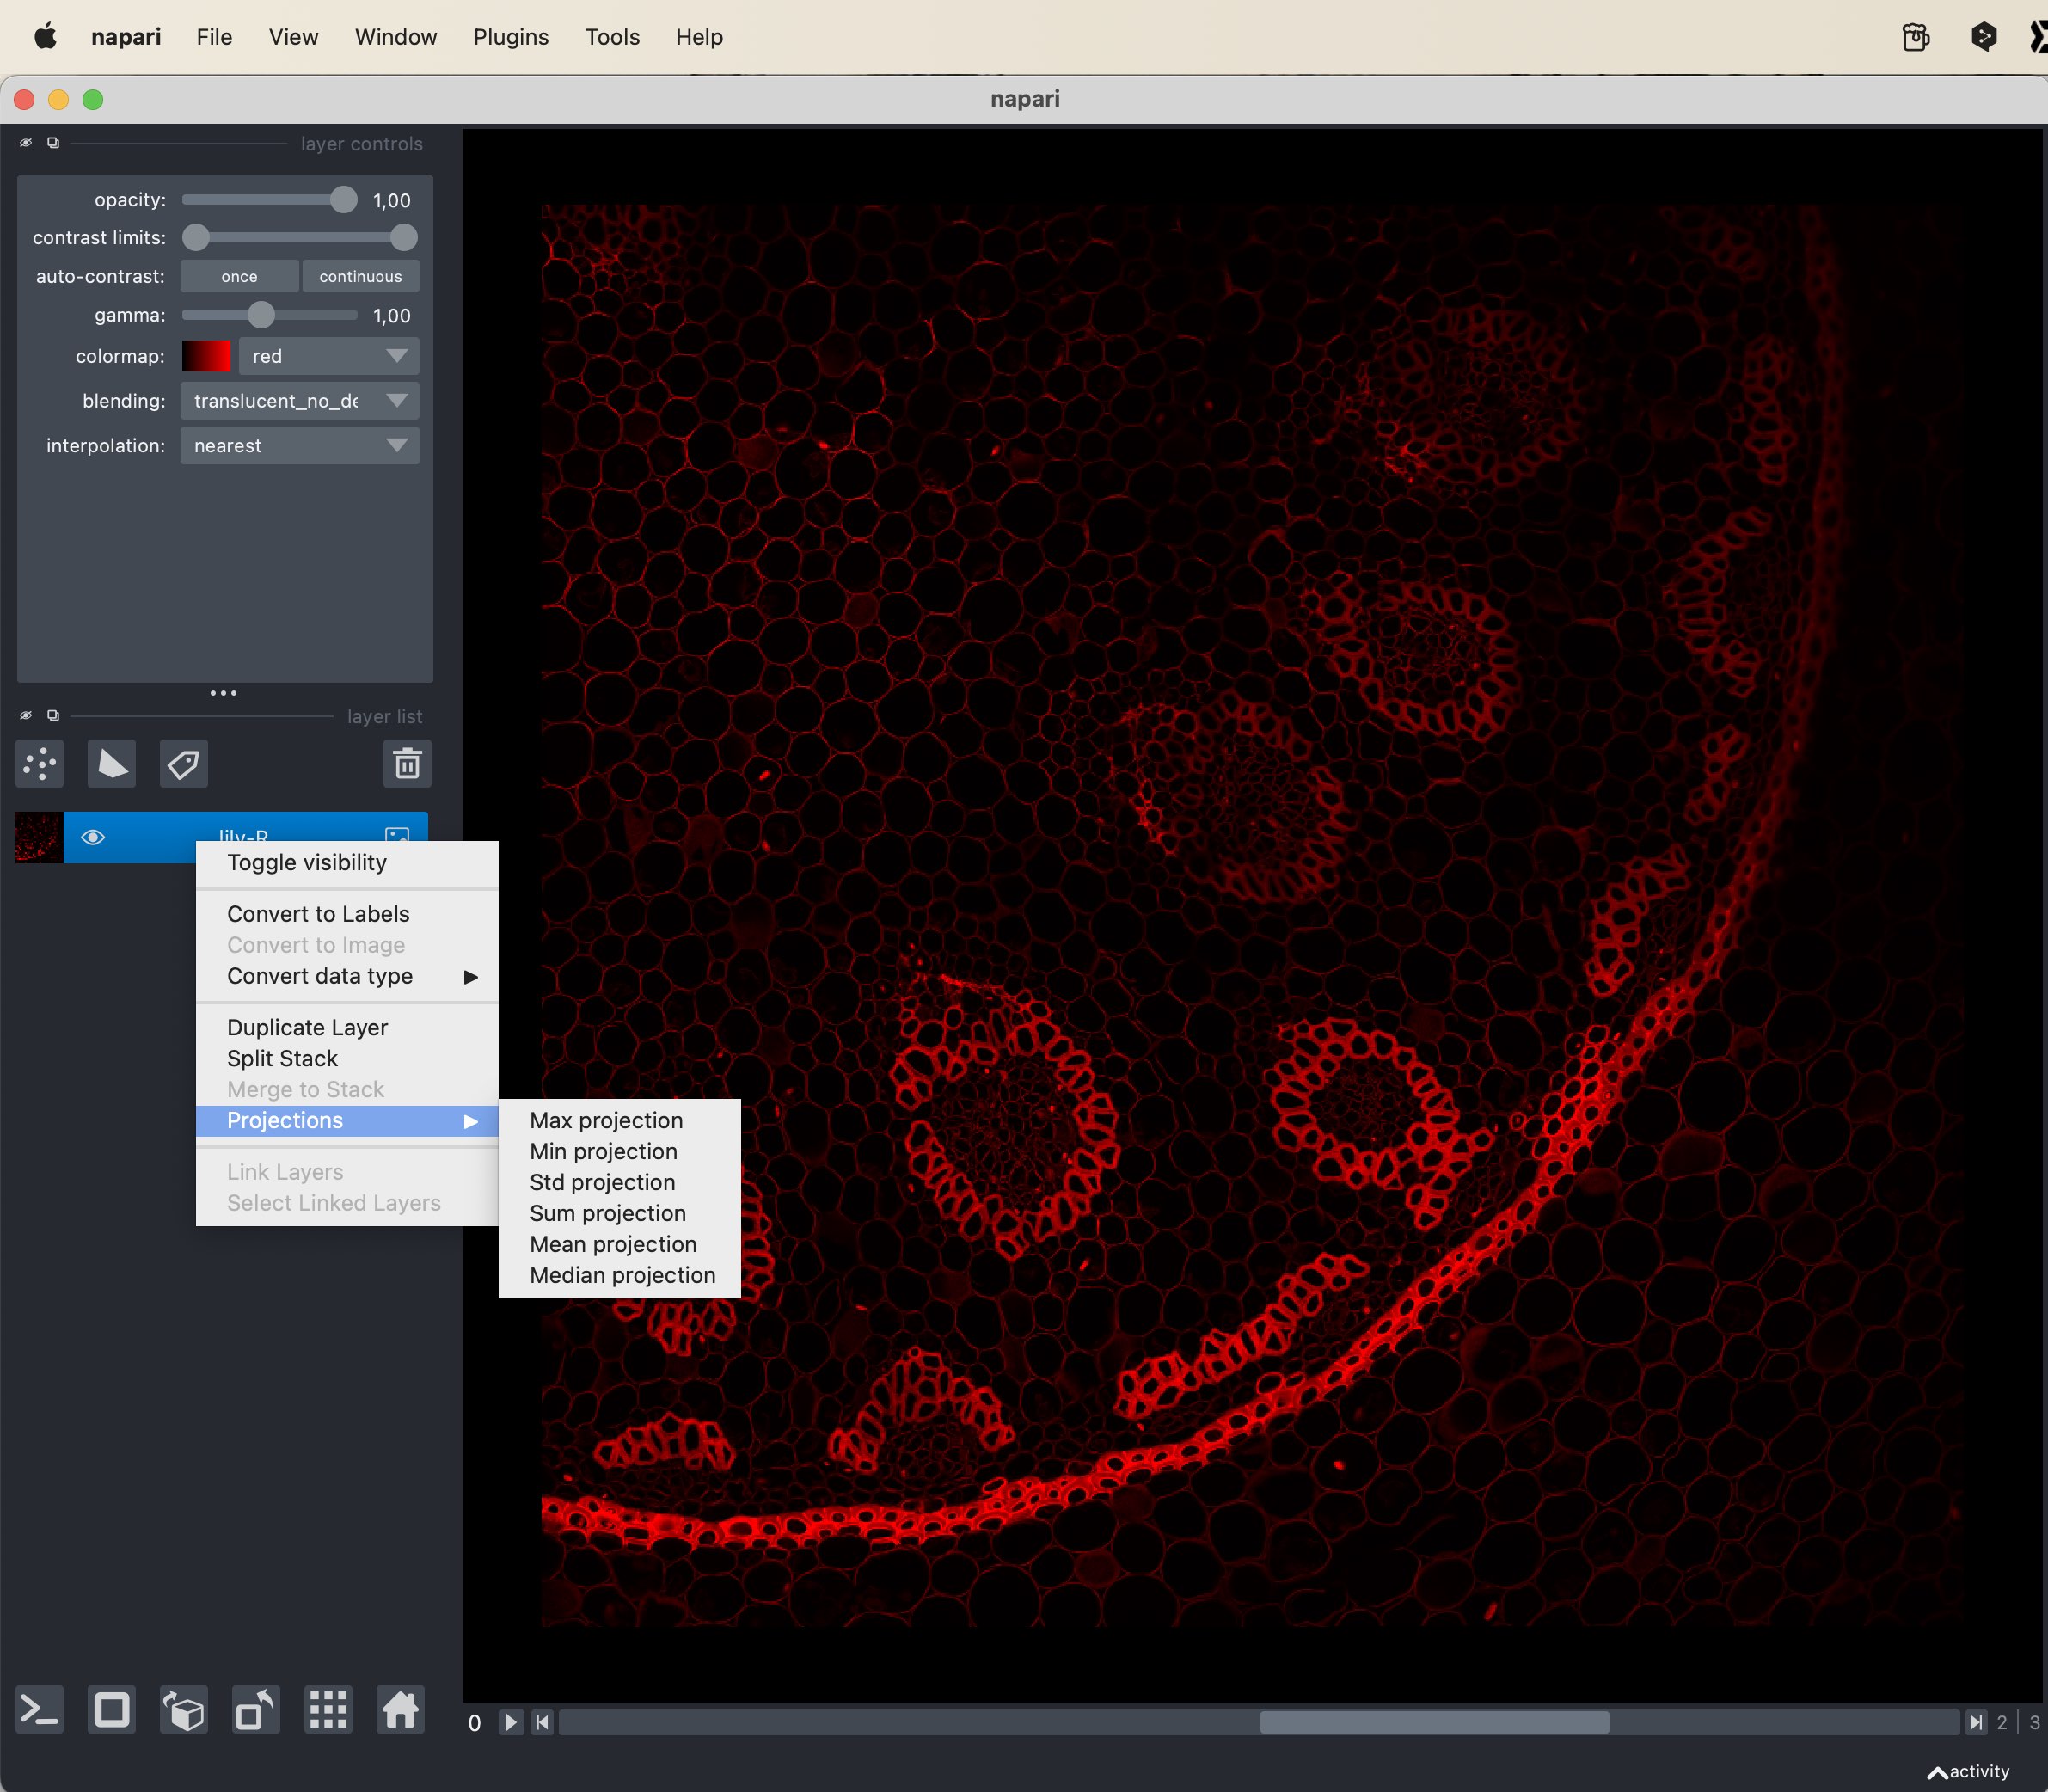 Project layers in the layer list.
In the layer control widget, you can change the appearance of the images in the main window and for each layer individually. For example, you can change the colormap of the selected layer, the opacity, the blending mode, or the interpolation method. You can also change the contrast and brightness of the layer in order to enhance its visibility.
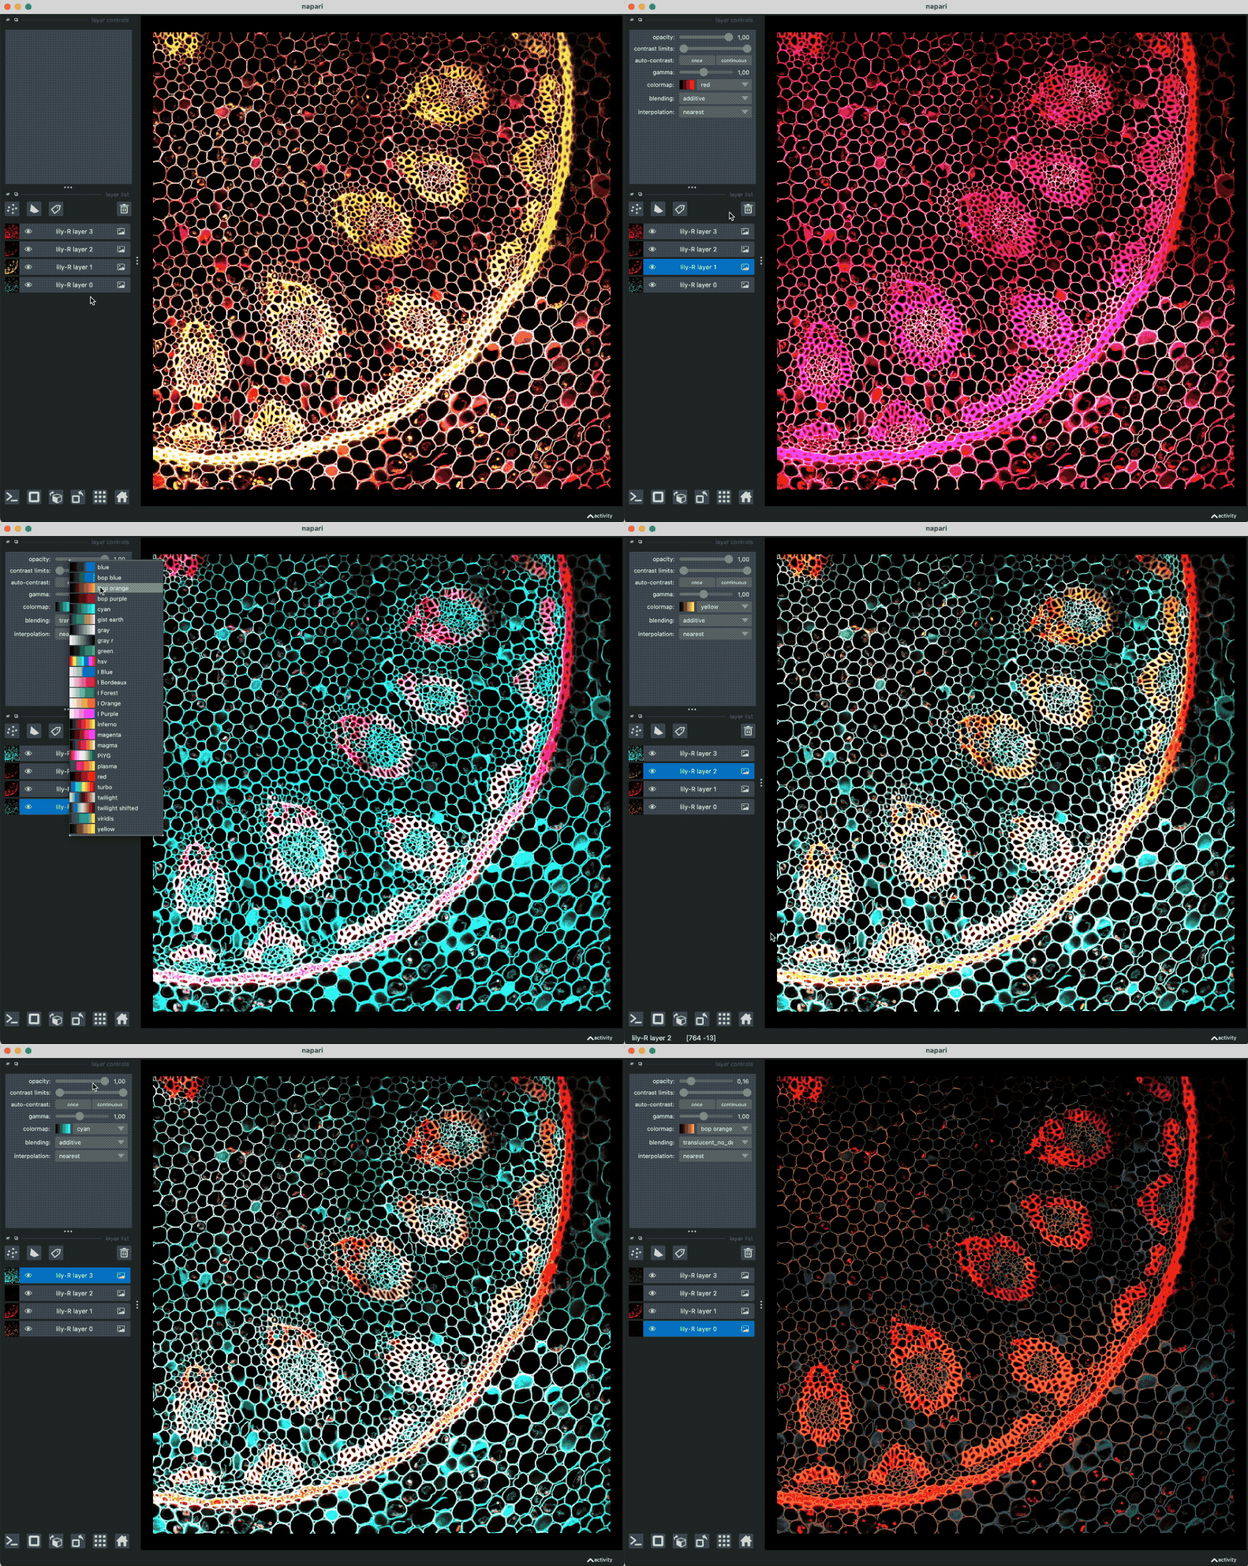 Change the appearance of the selected layer in the layer control widget.
Navigate through the images
Napari allows you to navigate through the images in the main window in different ways. You can use the scroll wheel of your mouse to zoom in and out. A left-click and drag allows you to move the image around. Whenever you get “lost”, you can always click on the “Home” button in the control panel in lower left corner of the main window to reset the view.
If your image has more than one channel or is a time lapse stack, according sliders appear at the bottom of the main window, which you can use to change the channel or the time point.
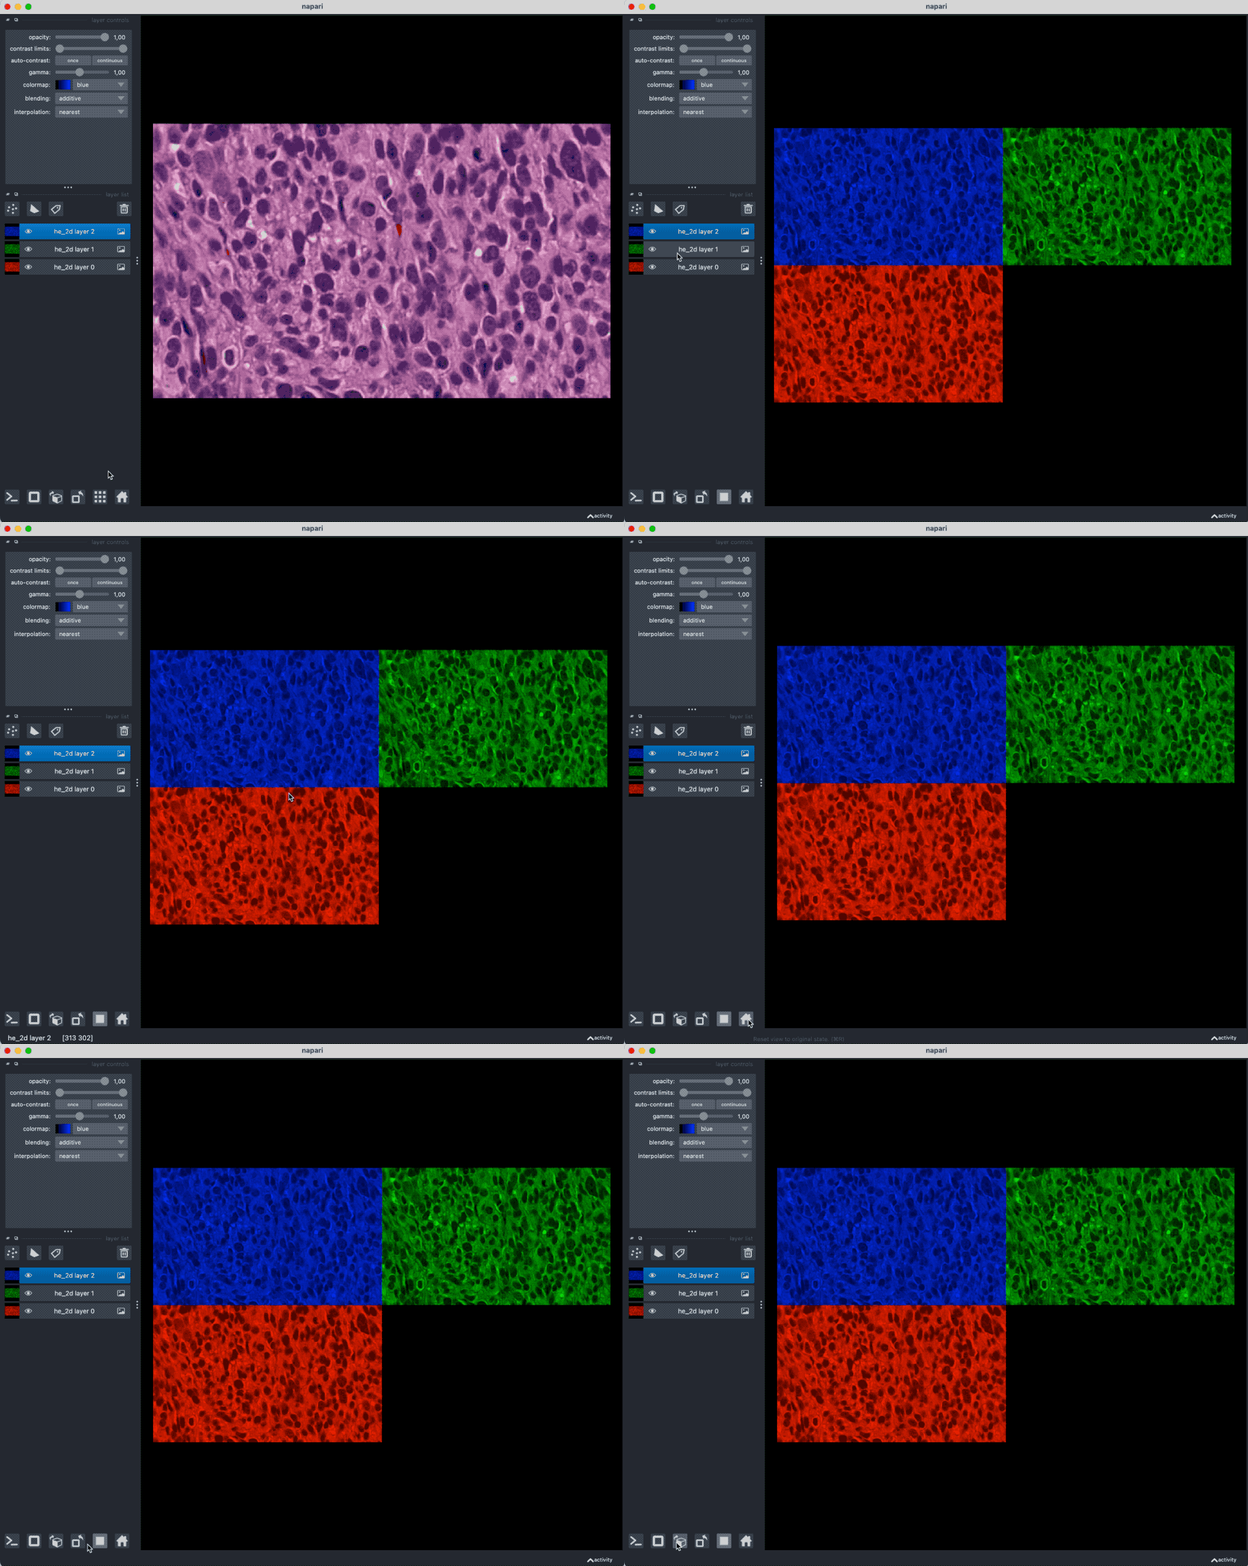
Napari is able, to display images in 2D and 3D. You can switch between the two modes by clicking on the Square button of the lower left control panel (second button, see screenshot below). In 3D mode, you can rotate the image by clicking and dragging the left mouse button. Mouse wheel scrolling allows you to zoom in and out. Holding the Shift key while clicking and dragging the left mouse button allows you to move the image around.
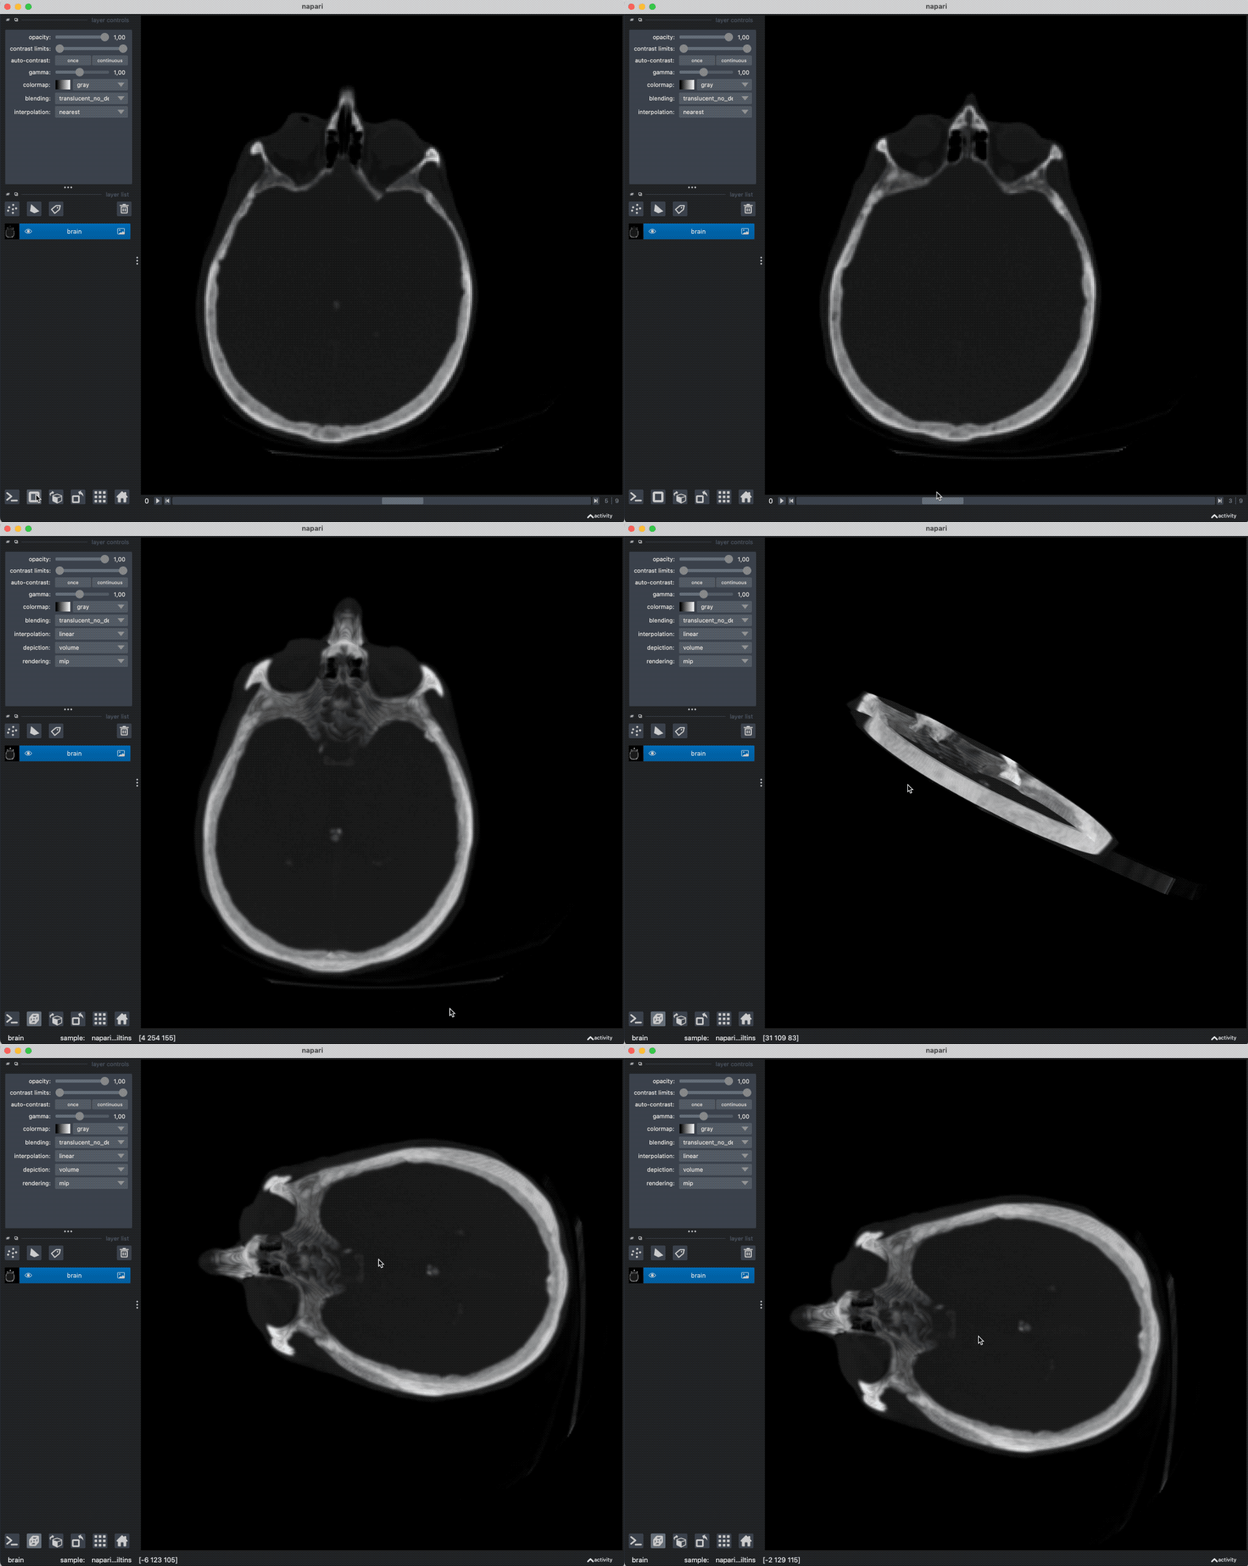 Navigating through the images in Napari.
In both 2D and 3D mode, you can also change order of the visible axis by clicking on the third button of the control panel in the lower left corner (see screenshot below). The transpose button allows you to transpose the image axis (fourth button). And the grid button toggles the grid view (fifth button).
 Napari control panel in the lower left corner of the main window. From left to right: toggle IPython console, toggle 2D/3D mode, change order of the visible axis, transpose the image axis, toggle grid view, and home button.
The points, shapes and label layer
In addition to organizing image layers, the layer list widget in Napari provides functionality to create three additional types of layers: points, shapes, and labels layers. These layers allow you to annotate and mark specific points of interest, draw various shapes, and label regions within your images:
 Control toggles in the layer list for adding points (left), shapes (middle) and label (right) layers as well as deleting layers (trash icon).
For example, with the label layer in Napari, you have the ability to manually assign labels to different regions within your image. This feature is particularly useful for tasks such as measuring the characteristics of labeled image parts. By labeling specific areas of interest, you can easily track and analyze various features within your image for further analysis. After adding a label layer, you can, e.g., use the Paintbrush tool in the layer control widget to draw the regions of interest. You can change the color of the brush/label, its size, and the opacity. You can also change the blending mode of the brush.
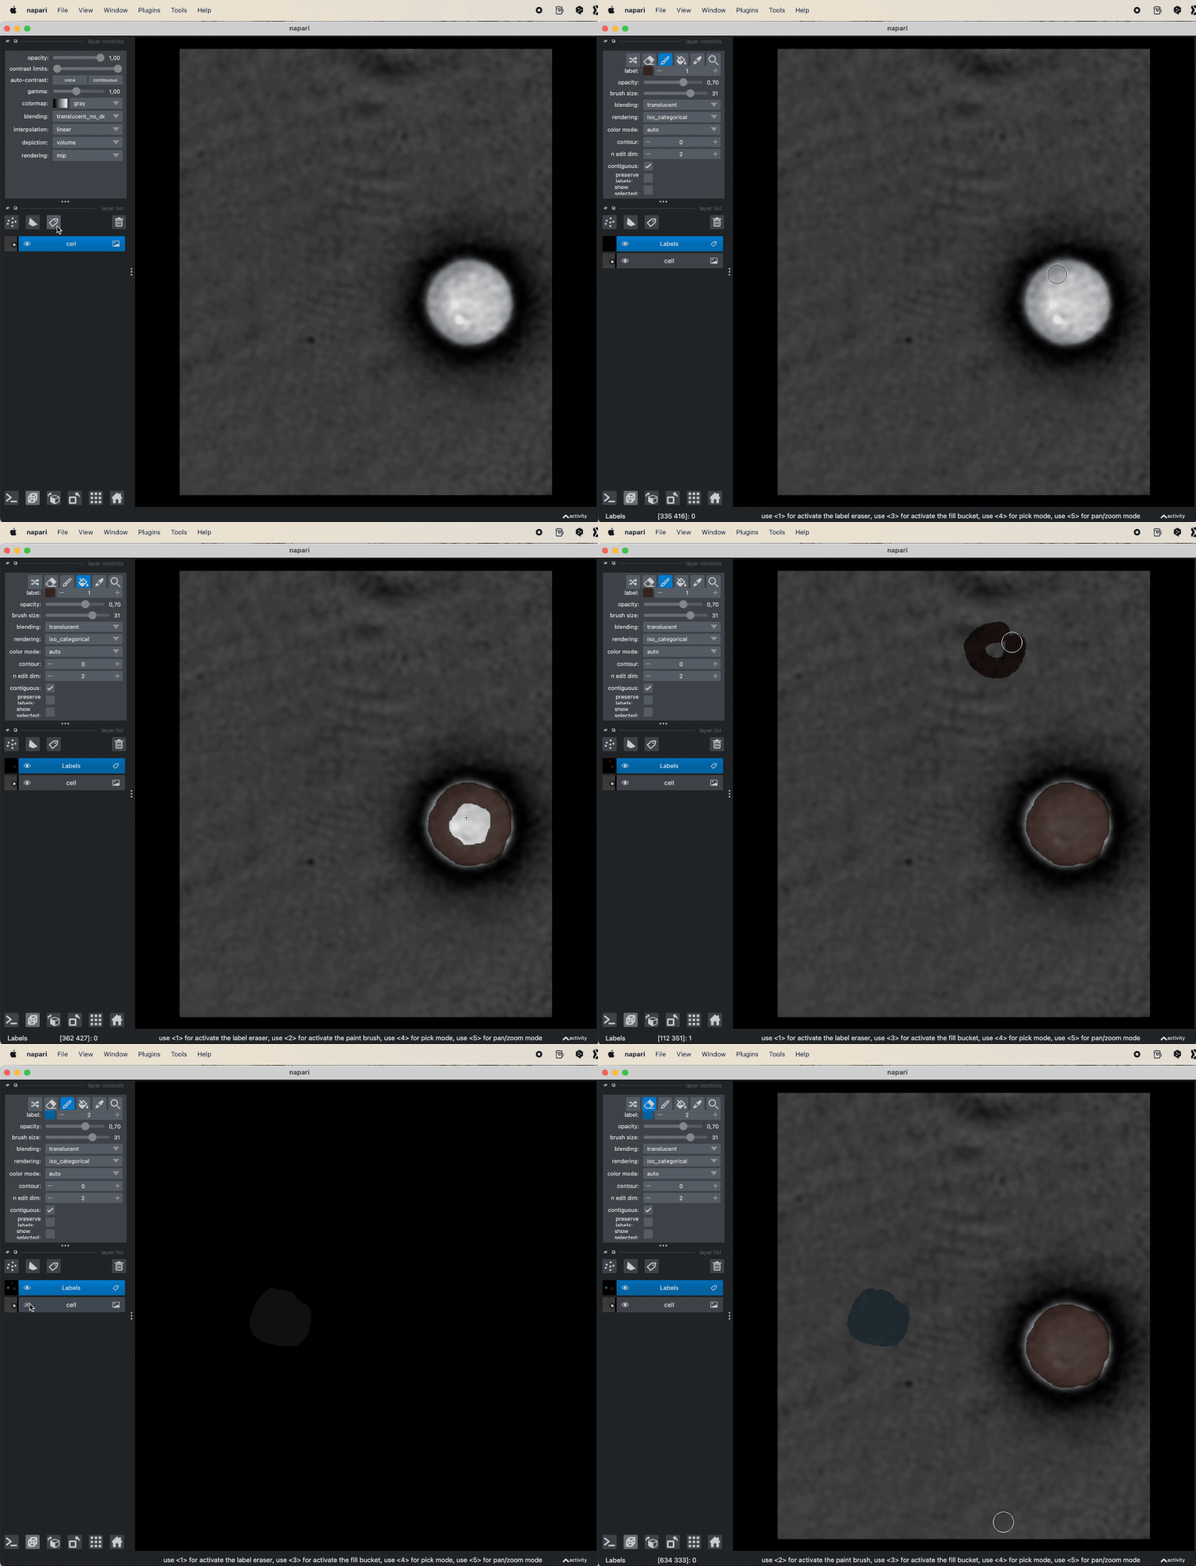 Example of creating and editing a labels in Napari.
Saving your work
You have to keep two thinks in mind while using Napari. First, any image processing you do in Napari is non-destructive, i.e., Napari always creates a new layer for every processing step. Second, Napari does not save your work automatically. You have to save your work manually. To do so, choose either Save All Layers or Save Selected Layer(s) from the File menu. You can save your manually annotated label layers or the output generated by a plugin as well.
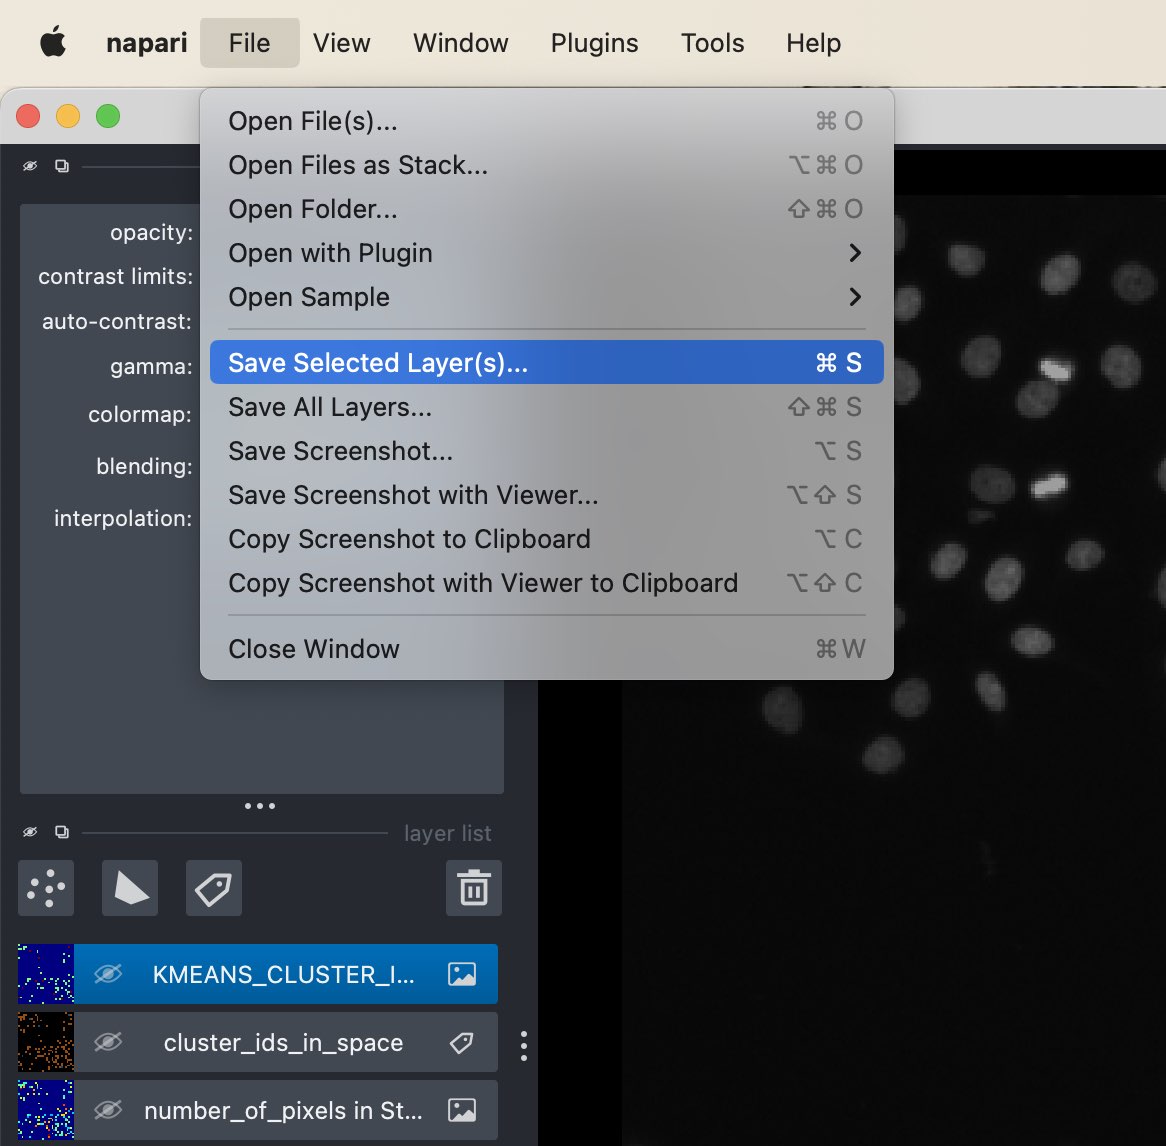 The saving options in the “File” menu.
Plugins
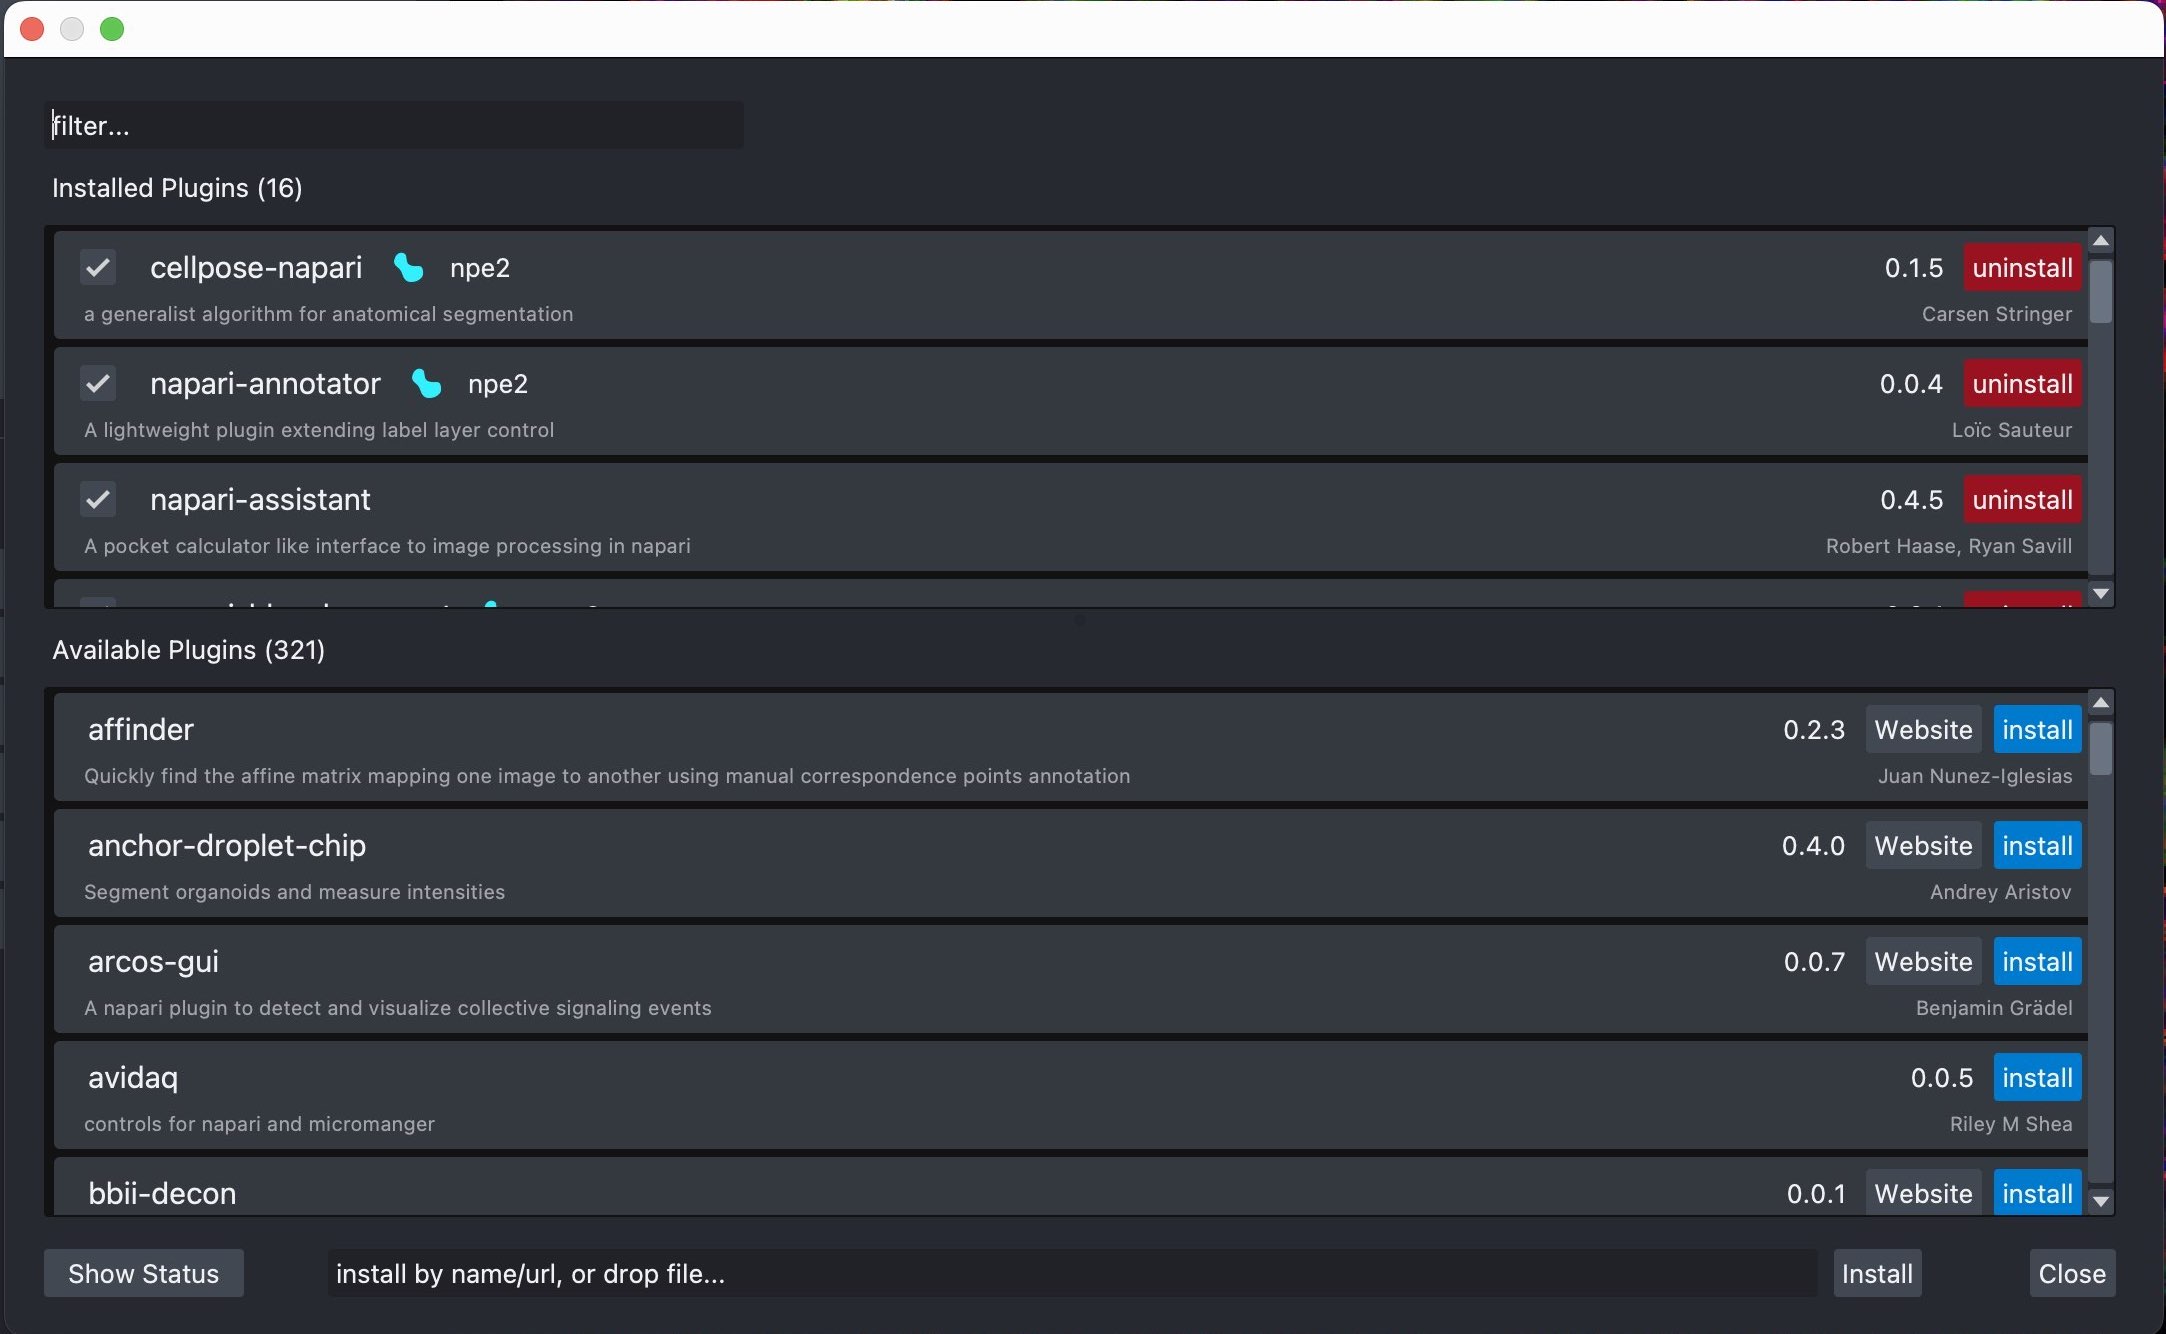
A default Napari installation comes along with all functionalities described above In its bare installation, Napari can therefore be considered as a powerful image-viewer. To leverage its full potential, we need to extend it with plugins. These plugins are written by the Napari community and are freely available. In the Napari hubꜛ, you can browse all available plugins and find the according description and documentation. When you created the conda environment for this course, you already installed several plugins. To install additional plugins, you have two options. First, you can use the plugin manager in the Plugins menu:
Second, you can also install plugins via the terminal, e.g.,
conda install -y cellfinder-napari
or
pip install cellfinder-napari
To install plugins via the terminal in Napari, it is essential to close Napari beforehand. After closing Napari, you can install the plugin in the active conda environment. Once the installation process is complete, you can relaunch Napari, and the installed plugin should be readily accessible for use.
Further readings
- Napari documentationꜛ: The official documentation of Napari, including the user guide and tutorialsꜛ.
- The Napari hubꜛ: The Napari hub is a community-driven collection of plugins for Napari. It is a great place to explore plugins for your specific needs.
