Bleach correction in Napari
If you haven’t installed Napari yet, please do so before proceeding with this tutorial. To practice this tutorial, install the following package(s) in your activated Napari conda environment:
mamba install -y napari-assistant napari-bleach-correct
What is photo-bleaching?
Photo-bleaching is the loss of fluorescence signal due to the interaction of the fluorophore with the excitation light. This effect is more pronounced in live-cell imaging, where the fluorophore is exposed to the excitation light for a long time. There are several image processing techniques available to reduce the photo-bleaching effect. In this tutorial, we will use the Napari “Bleaching Correctionꜛ”.
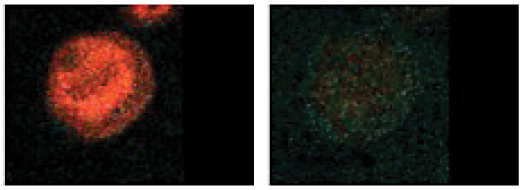 Example of photo-bleaching for usp1-DT40 cells. Modified from Batters et al. (2010)ꜛ. Source: Wikimediaꜛ (CC BY-SA 2.5 license).
Default measures to correct for photo-bleaching are:
- Histogram matching: The histogram of the frames is matched to the histogram of one reference frame.
- Exponential curve fitting: Exponential curve fitting is a technique used to model the decay or recovery of pixel intensities over time in a bleached image. It assumes that the bleaching process follows an exponential decay or recovery function. By fitting an exponential curve to the intensity values, the decay or recovery trend can be estimated, and the image can be corrected by dividing by the estimated curve. For more details, see Miura (2020)ꜛ.
- Ratio method: The ratio method is a simple and widely used technique for bleach correction. It involves computing the ratio between a bleached image and a reference image captured before the bleaching event. The ratio image is then multiplied by the mean intensity of the reference image to obtain the corrected image. The method assumes that the mean intensity is constant through the time-lapse and that the background fluorescence is the same for every pixel and frame. For more details, see Miura (2020)ꜛ.
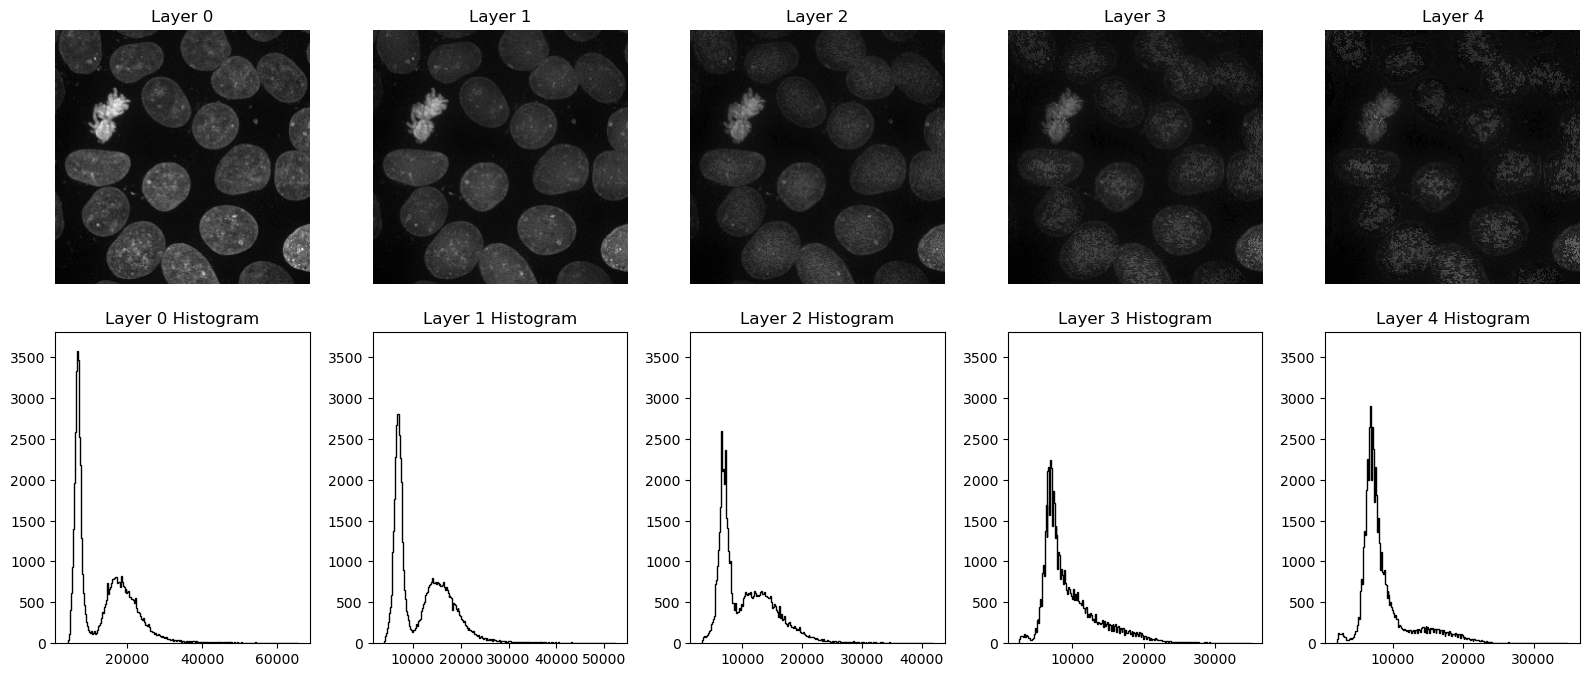
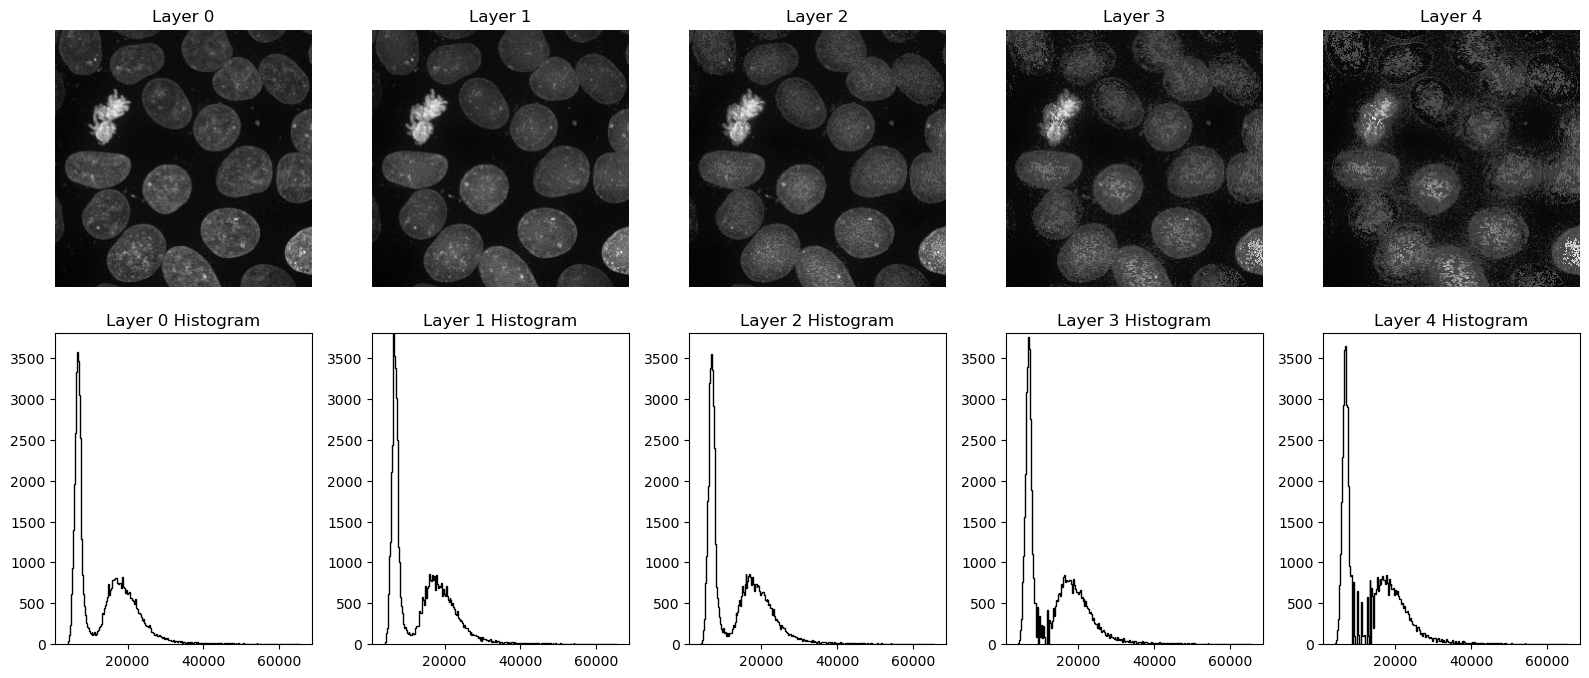 Demonstrating histogram matching to correct for photo-bleaching. Upper panel shows a simulation of photo-bleaching on five consecutive frames together with their corresponding histograms. Note, how the amplitudes for the brightest pixels decrease over time. Lower panel shows the corrected images. Note, how histogram matching restores the original amplitudes, taking the first frame as reference. The Python code to generate the images can be found in the GitHub repository of this course.
The Napari Bleaching Correction plugin
The Napari Bleaching Correction plugin is an implementation of three different methods for bleach correction, namely histogram matching, exponential curve fitting, and ratio method, and can be used to correct time-lapse images that lose intensity due to photo-bleaching. The usage of the plugin is straightforward. First, open the Bleaching Correction plugin from the Plugins menu. Then, select the algorithm and the parameters. Finally, click on the Correct button to apply the correction. The corrected image will be added to the as a new layer to layer list:
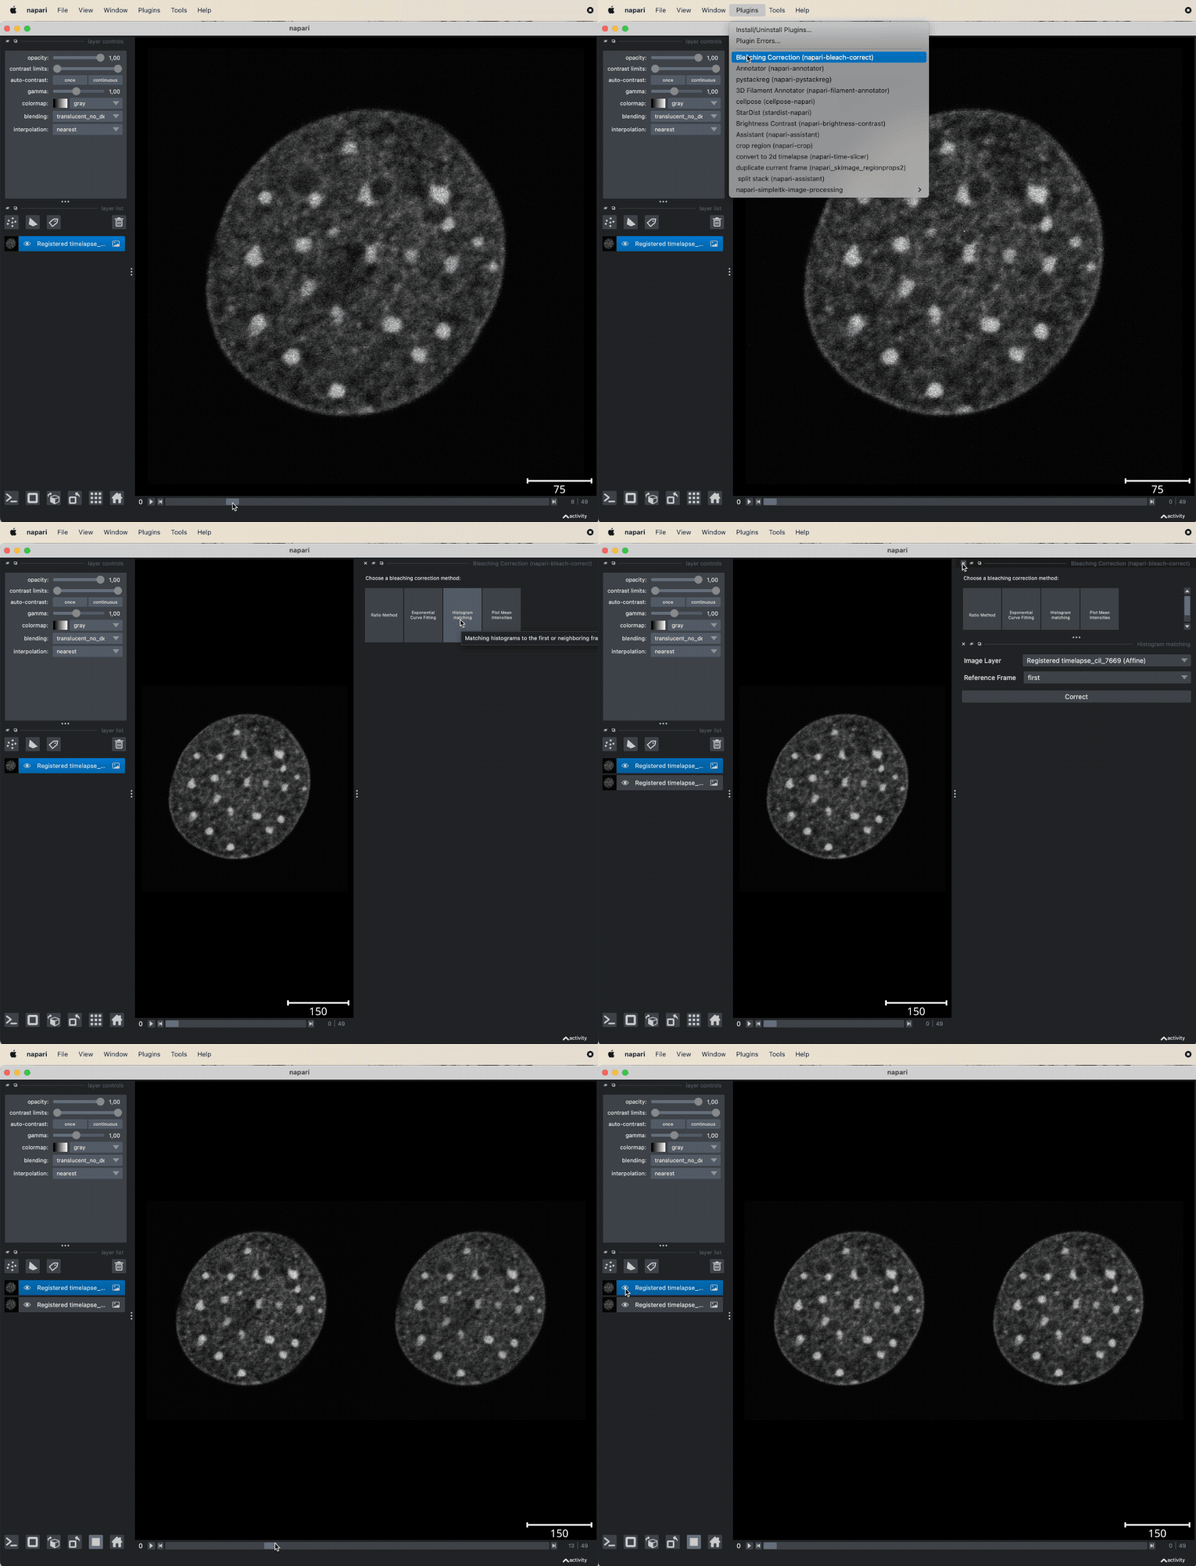 Applying the Bleaching Correction plugin. Tested for the Cell Image Library image ID CIL:7669, showing a mouse fibroblast expressing GFP-H10. Further information about the image can be found hereꜛ. The histogram matching method was applied.
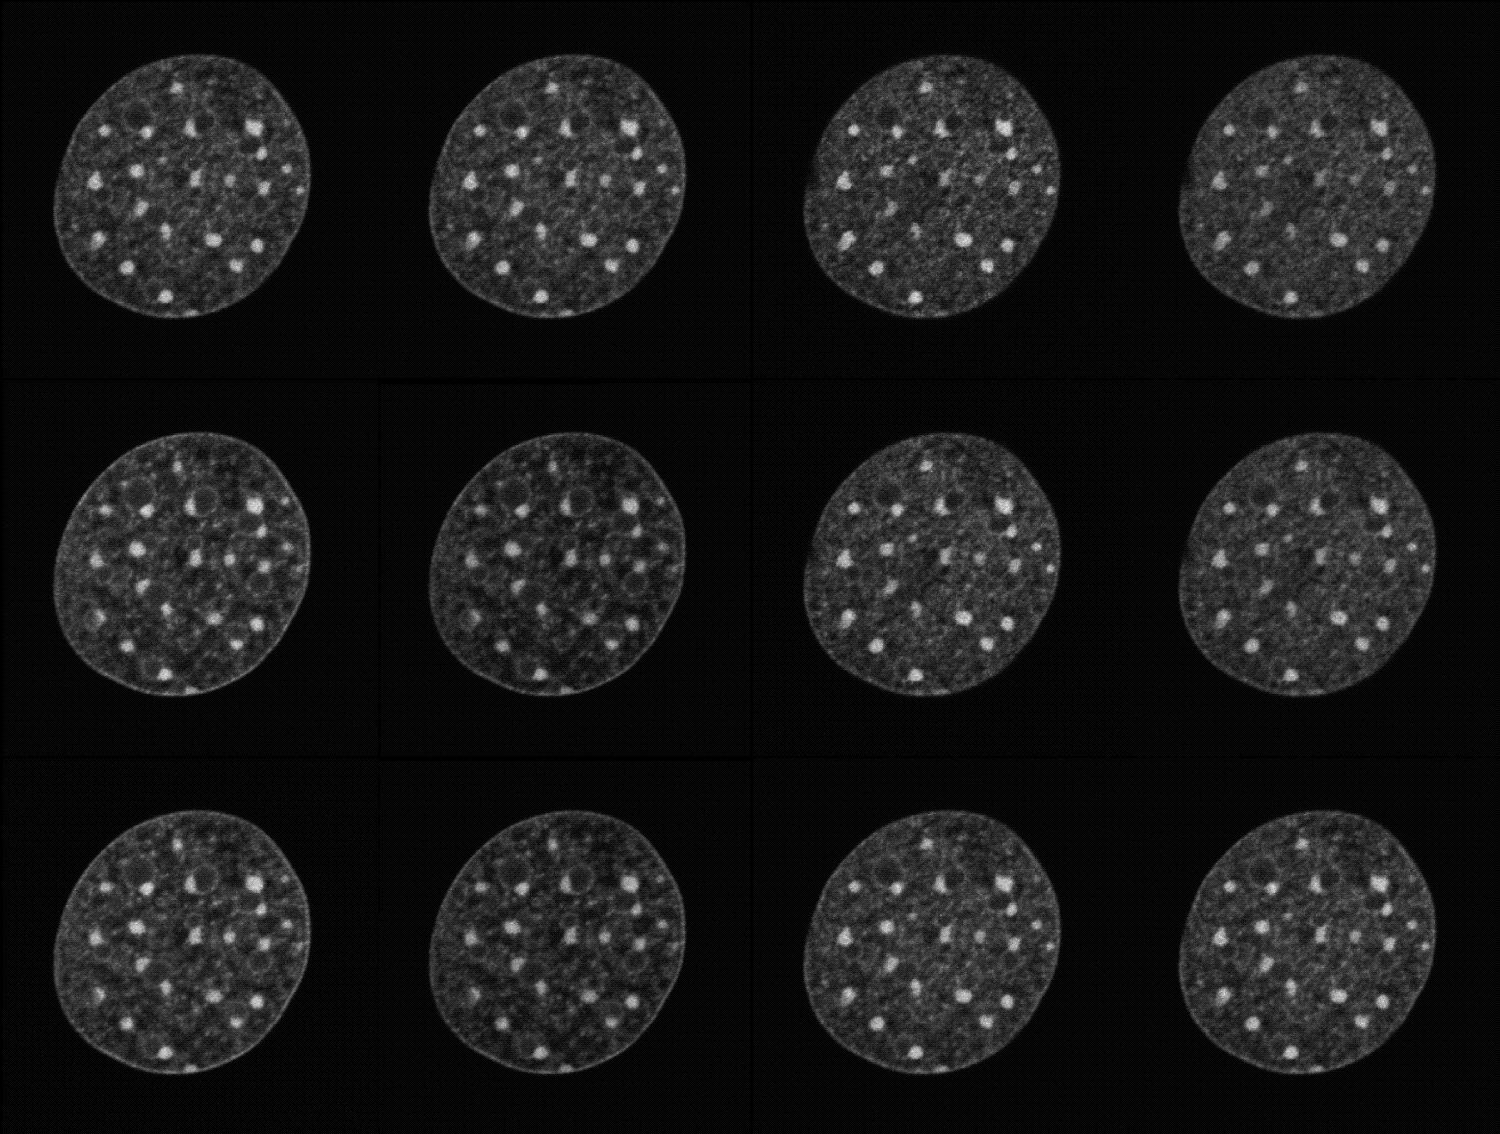 Cut-out of the animation above, showing the bleaching corrected image on the left and the original image on the right.
Exercise
Visit the Napari hub pageꜛ of the plugin and make yourself familiar with the different bleach-correction algorithms. Use the “timelapse_cil_7669” TIFF file provided in the data folder of this course (or download it directly from the Cell Image Libraryꜛ) and apply different bleach correction methods to the image. Which method works best for this image?
Further reading
- Napari Bleaching Correction pluginꜛ
- Wikipedia article on photo-bleaching
- Miura K. Bleach correction ImageJ plugin for compensating the photobleaching of time-lapse sequences. F1000Res. 2020 Dec 21;9:1494. doi: 10.12688/f1000research.27171.1ꜛ
- Batters C, Zhu H, Sale JE (2010). Visualisation of PCNA monoubiquitination in vivo by single pass spectral imaging FRET microscopy. PLoS ONE 5 (2): e9008ꜛ. DOI:10.1371/journal.pone.0009008. PMID 20126408ꜛ. PMC: 2814862.
- Ghosh, Rajarshi, Woodcock, Chris (2010) CIL:7669, Mus musculus. CIL. Dataset. doi.org/doi:10.7295/W9CIL7669ꜛ
Acknowledgements
The image used in this tutorial is taken from the Cell Image Libraryꜛ and has the ID CIL:7669. Please cite as Ghosh, Rajarshi, Woodcock, Chris (2010) CIL:7669, Mus musculus. CIL. Dataset. https://doi.org/doi:10.7295/W9CIL7669ꜛ.
