How to install and run Python code from GitHub
To install a Python package from a GitHub repository, that is not available via conda or pip, we have several options at hand:
- Downloading the repository as a ZIP file and extracting it.
- Clone the repository using the GitHub Desktop app, and keep the cloned version synchronized with updates in the repository.
- Like option 2, but using the git command line tool.

In this post we briefly go through these three options, which we apply to this test repositoryꜛ.
Download a repository as a ZIP file and run the included Python scripts
We can manually download a repository as a ZIP file and run the included Python scripts by following these steps:
- On the repository’s main website, click on the green
Codebutton and chooseDownload ZIP: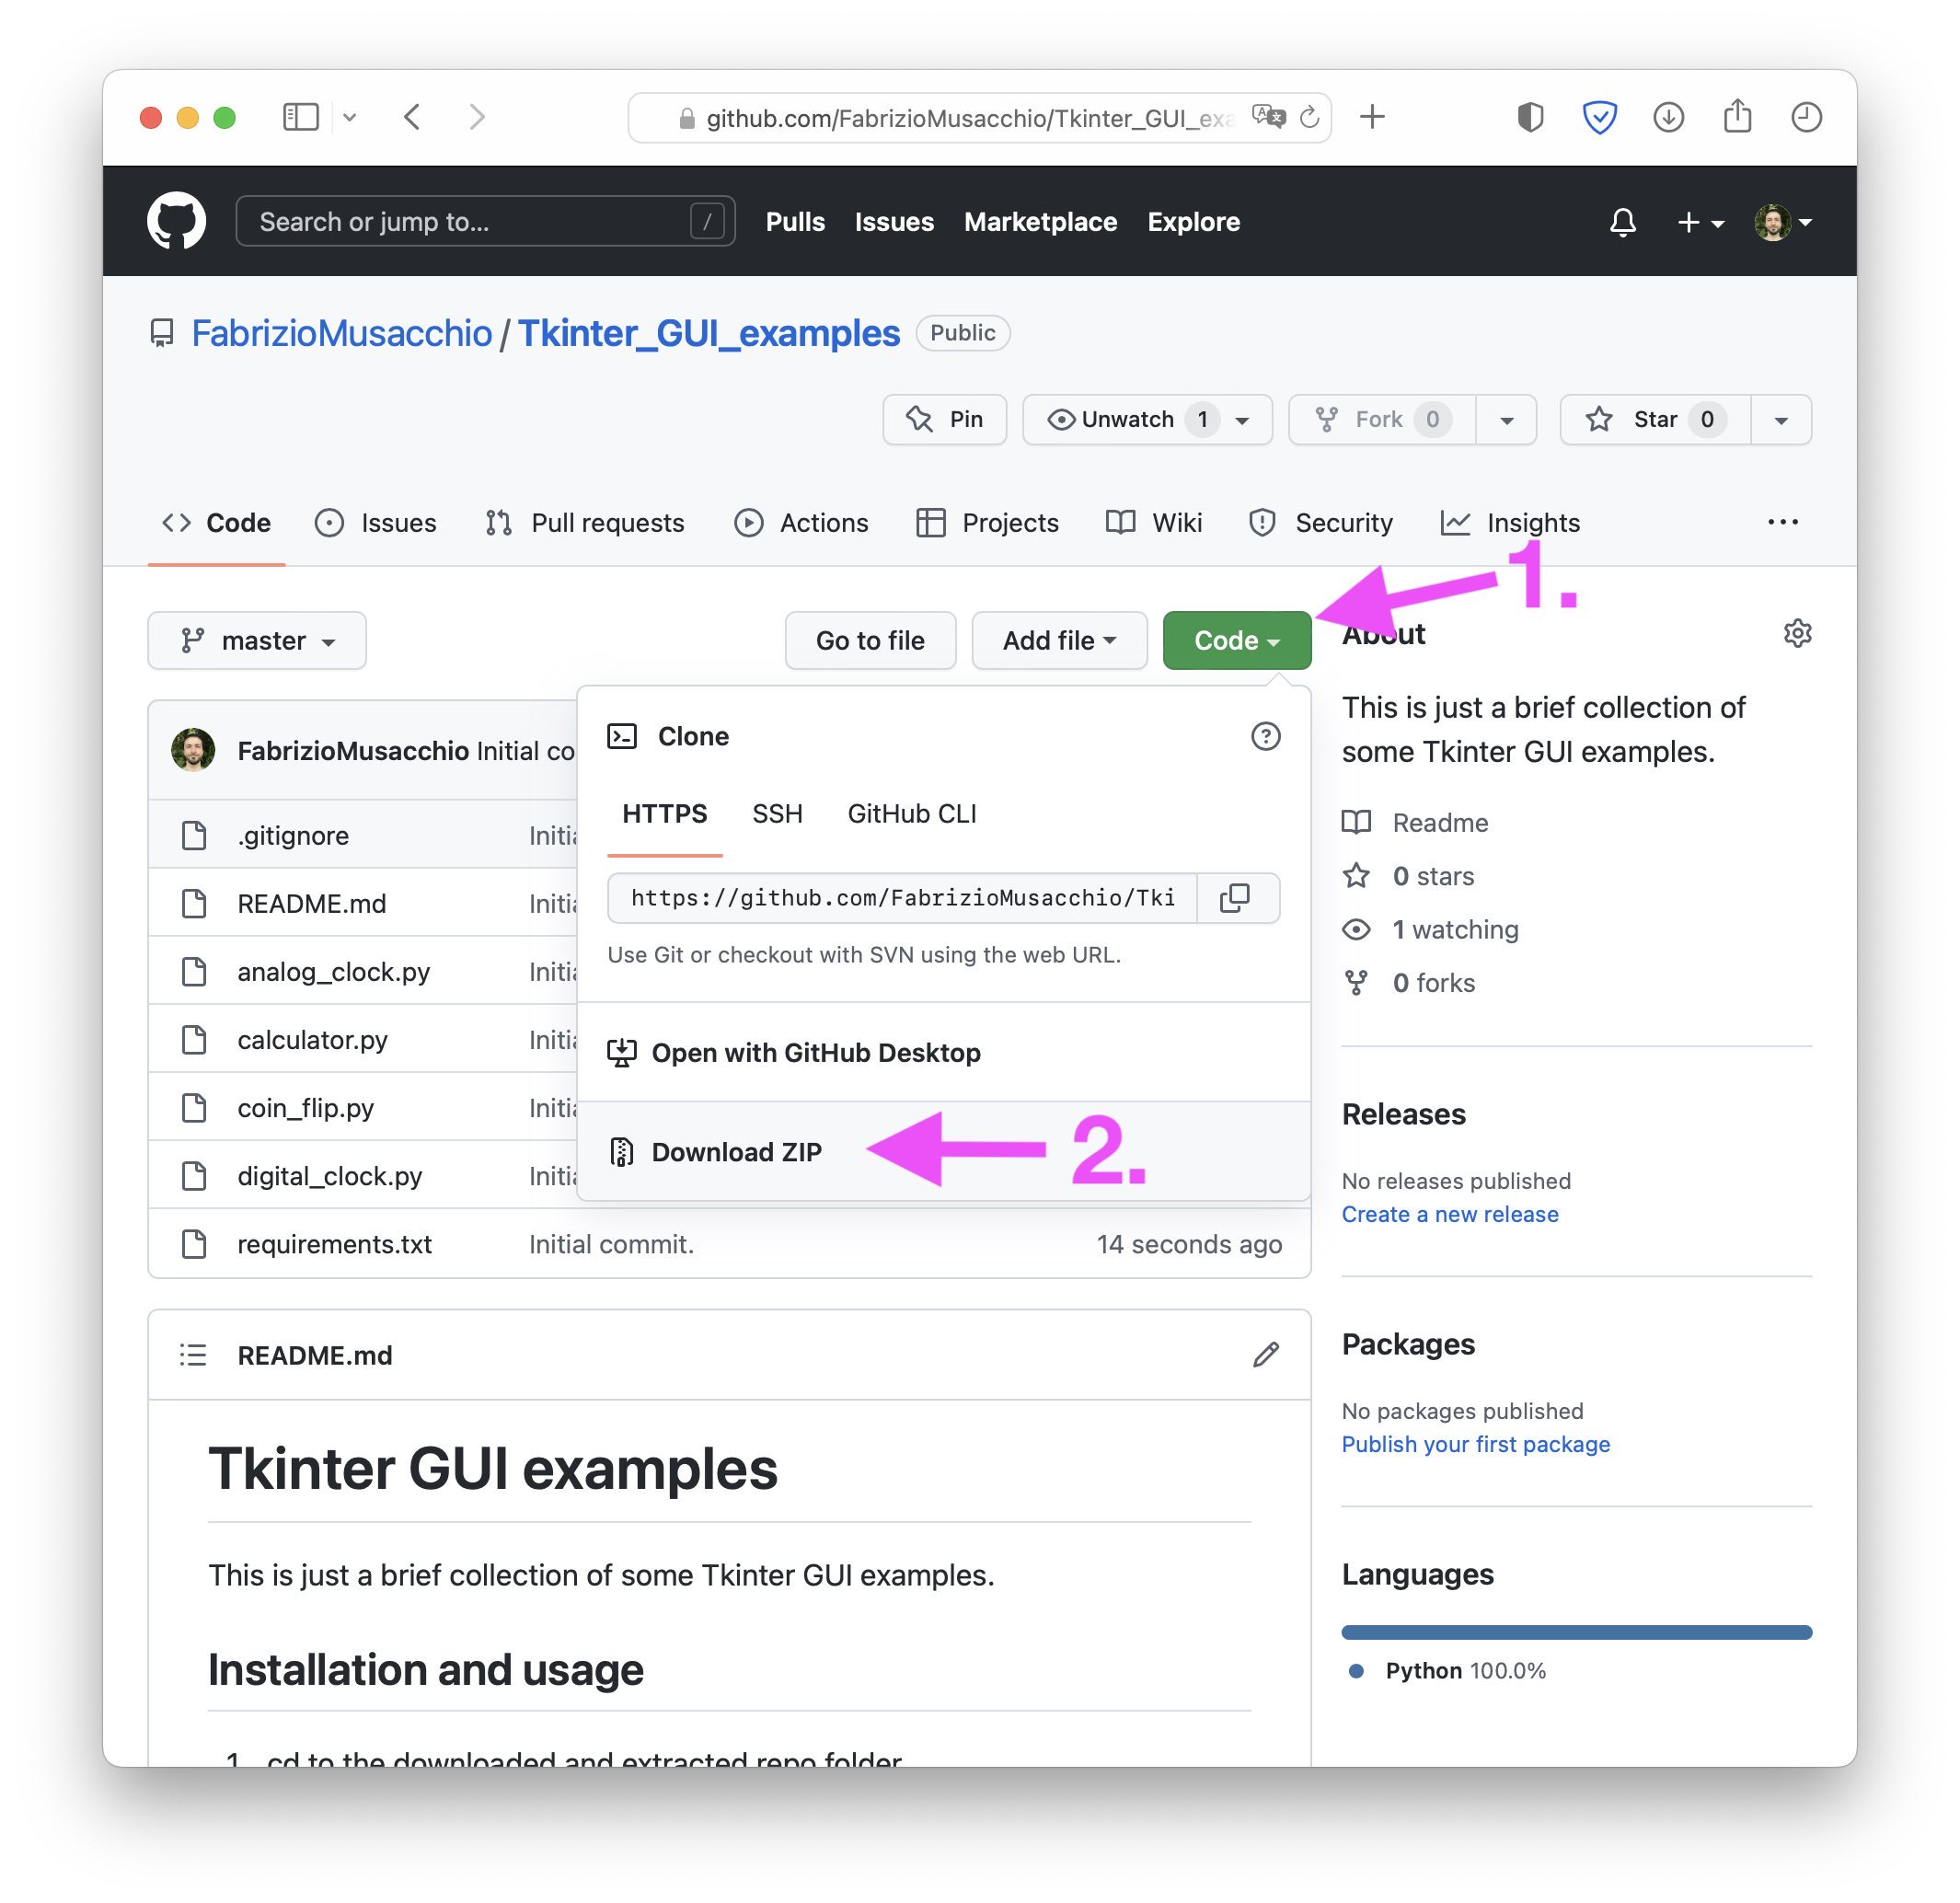
- Extract the Zip file and move the unpacked folder to the desired location on your hard drive.
- Follow the installation instructions provided on the repository’s website or documentation website.
For the example repository, we have to create a virtual environment and install the requirements from the “requirements.txt” file:
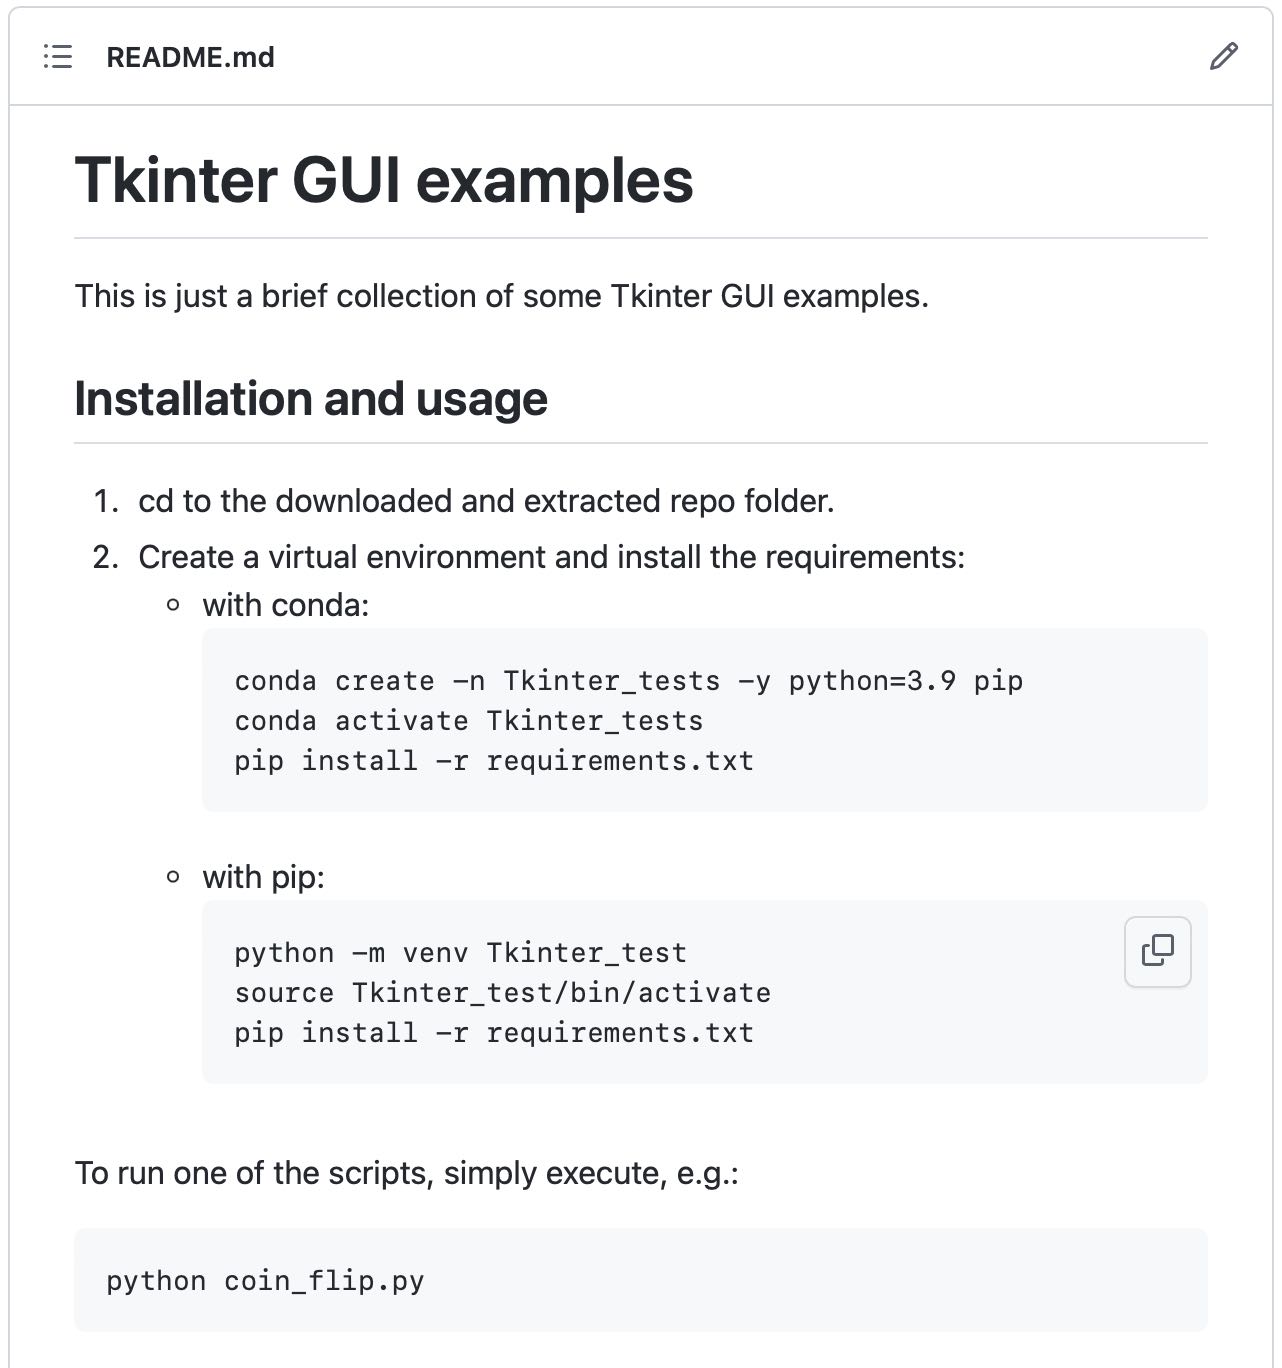
conda create -n Tkinter_tests -y python=3.9 pip conda activate Tkinter_tests pip install -r requirements.txt - To run a script from the package, simply type:
python calculator.py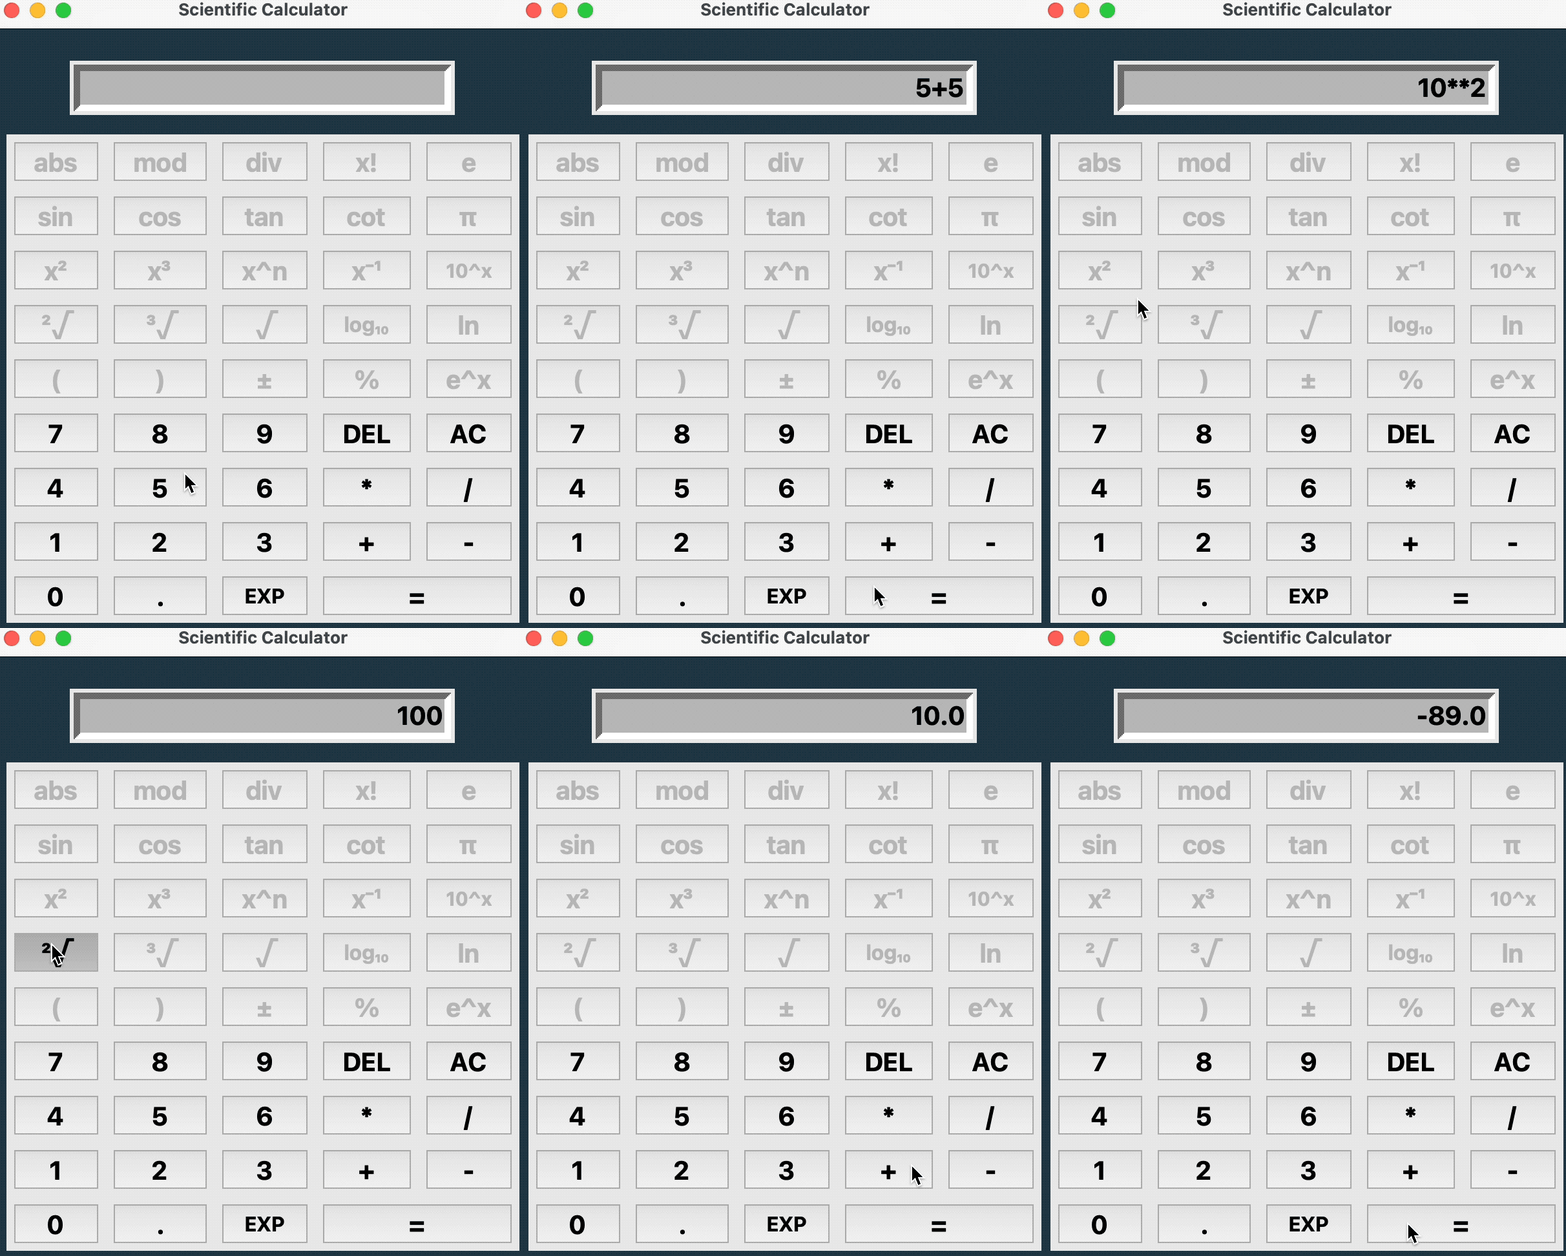
Using the GitHub Desktop app
As an alternative, we can also clone the repository to our hard drive. The advantage of cloning is, that we can update our local copy with any updates in the repository. To clone a repository, we can use the GitHub Desktopꜛ app, which comes along with a GUI and makes the repository management quite handy and easy to use:
- In the GitHub Desktop app, click on the
Addbutton and chooseClone Repository...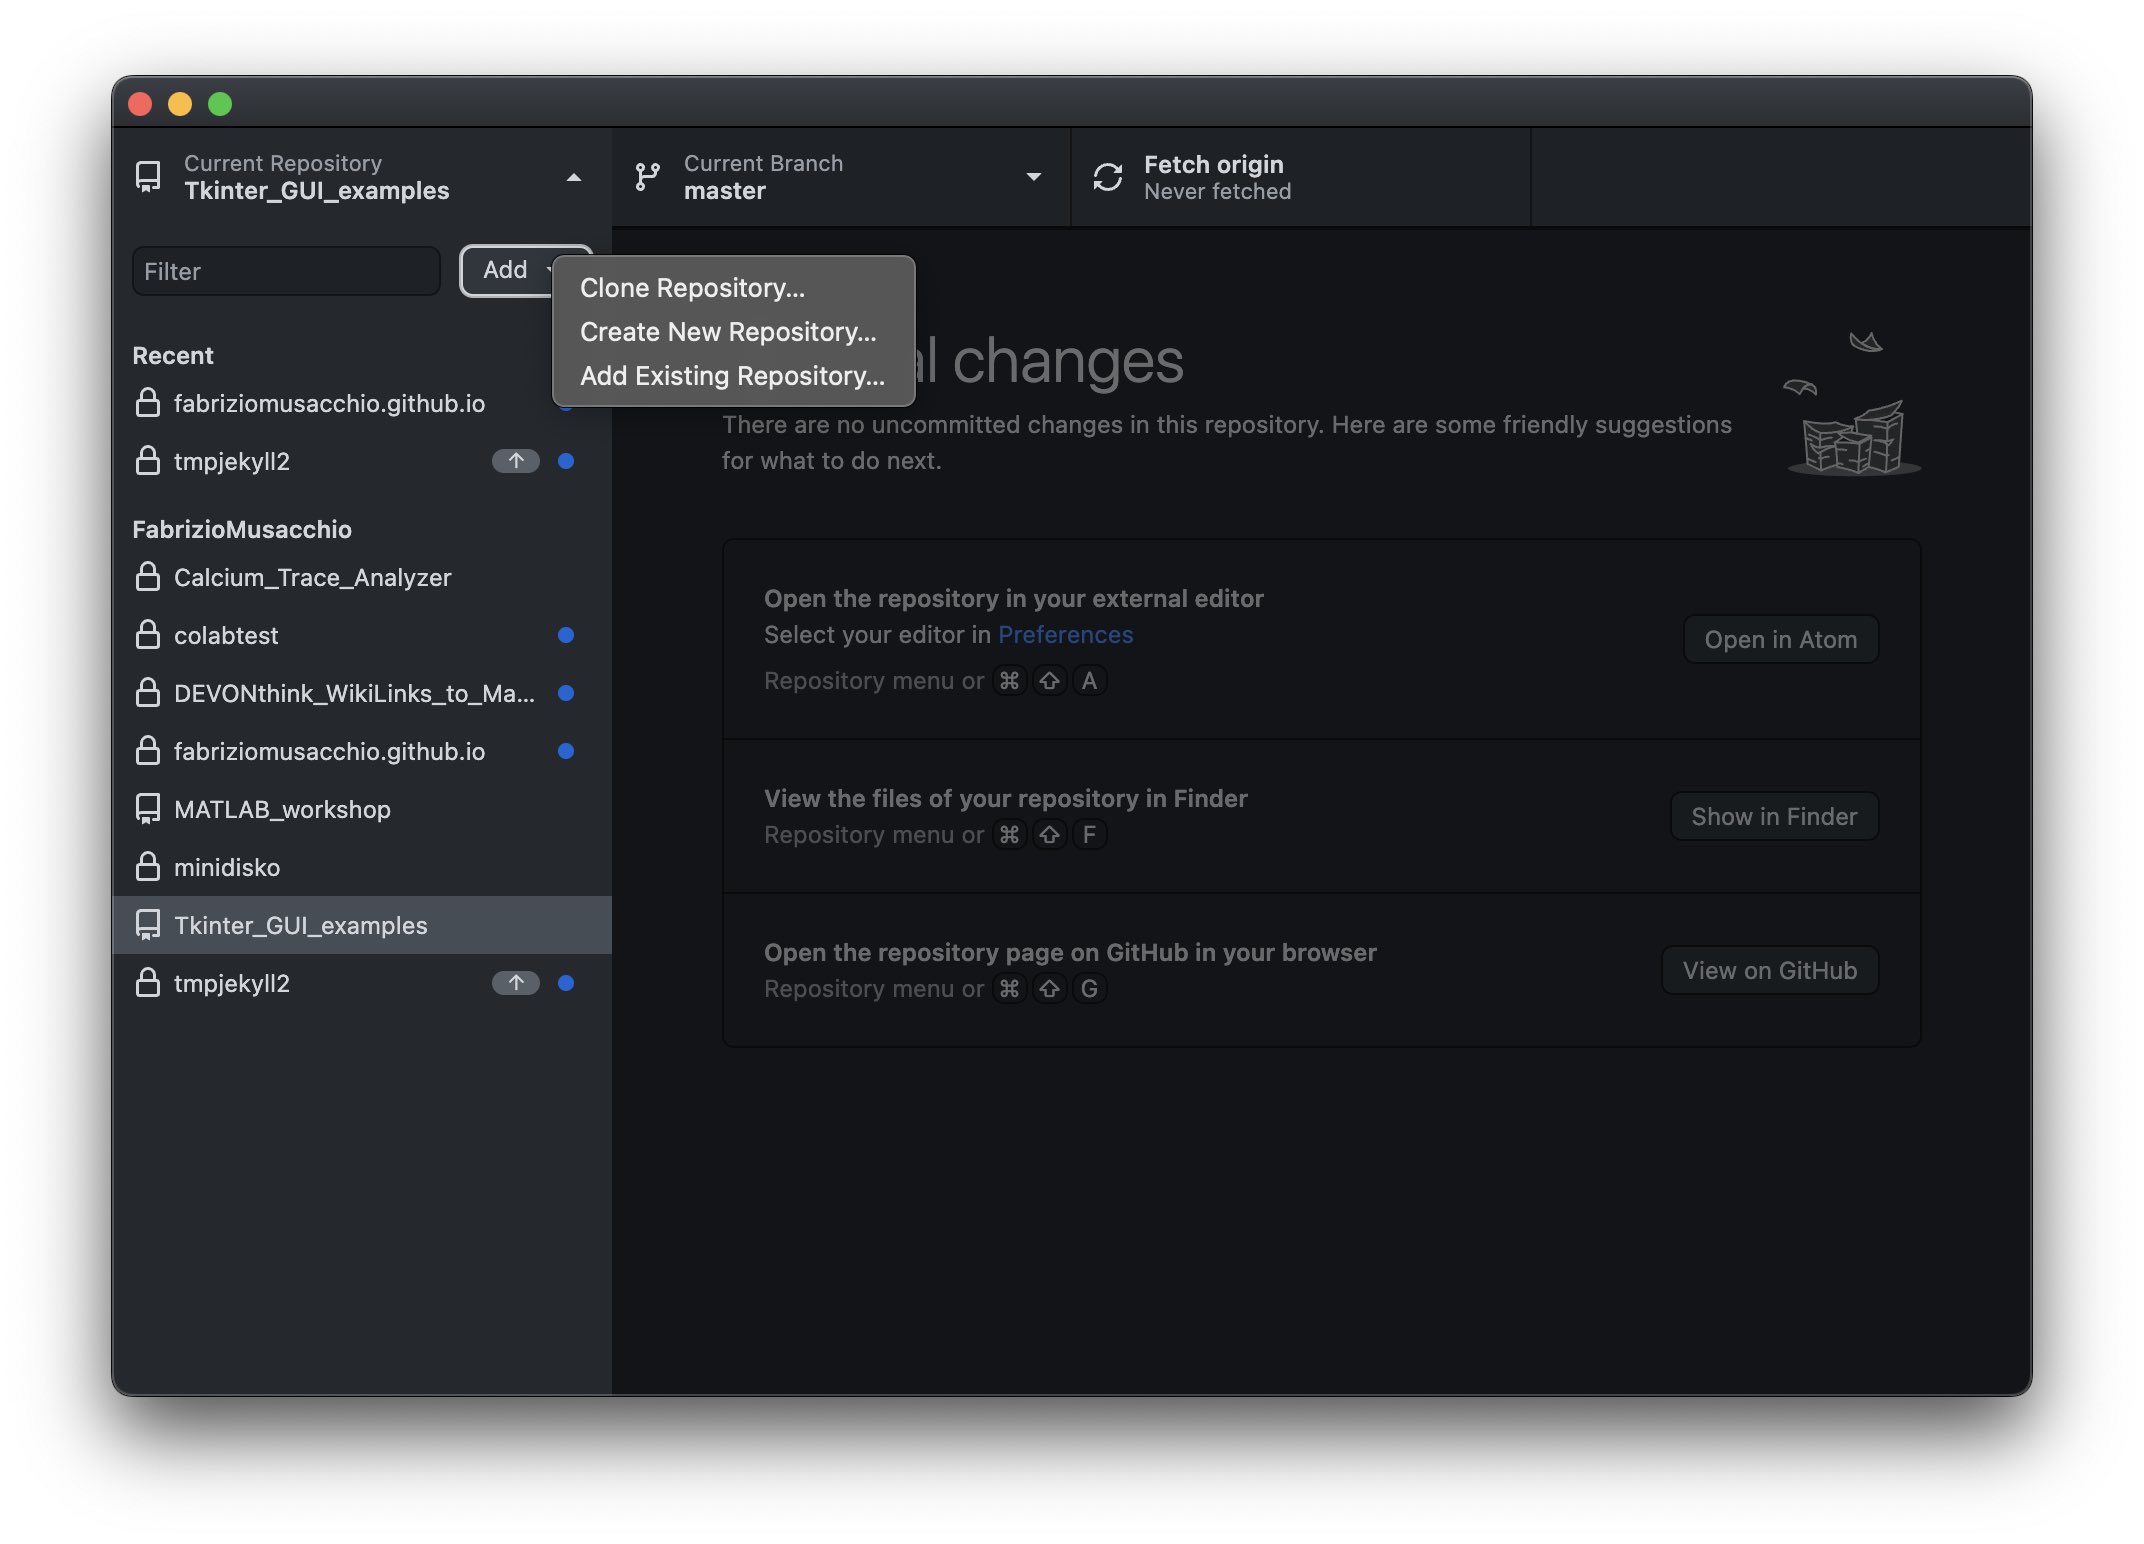
- In the dialog prompt:
- Enter the corresponding repository URL or USERNAME/REPOSITORY. For our example repository from above, simply enter:
FabrizioMusacchio/Tkinter_GUI_examples - Then choose the local path of the folder, in which you’d like to clone the repository. This can be, e.g., the folder of the project, for which you’d like to use the scripts in the repository. The repository will be cloned to a new folder inside that local path:
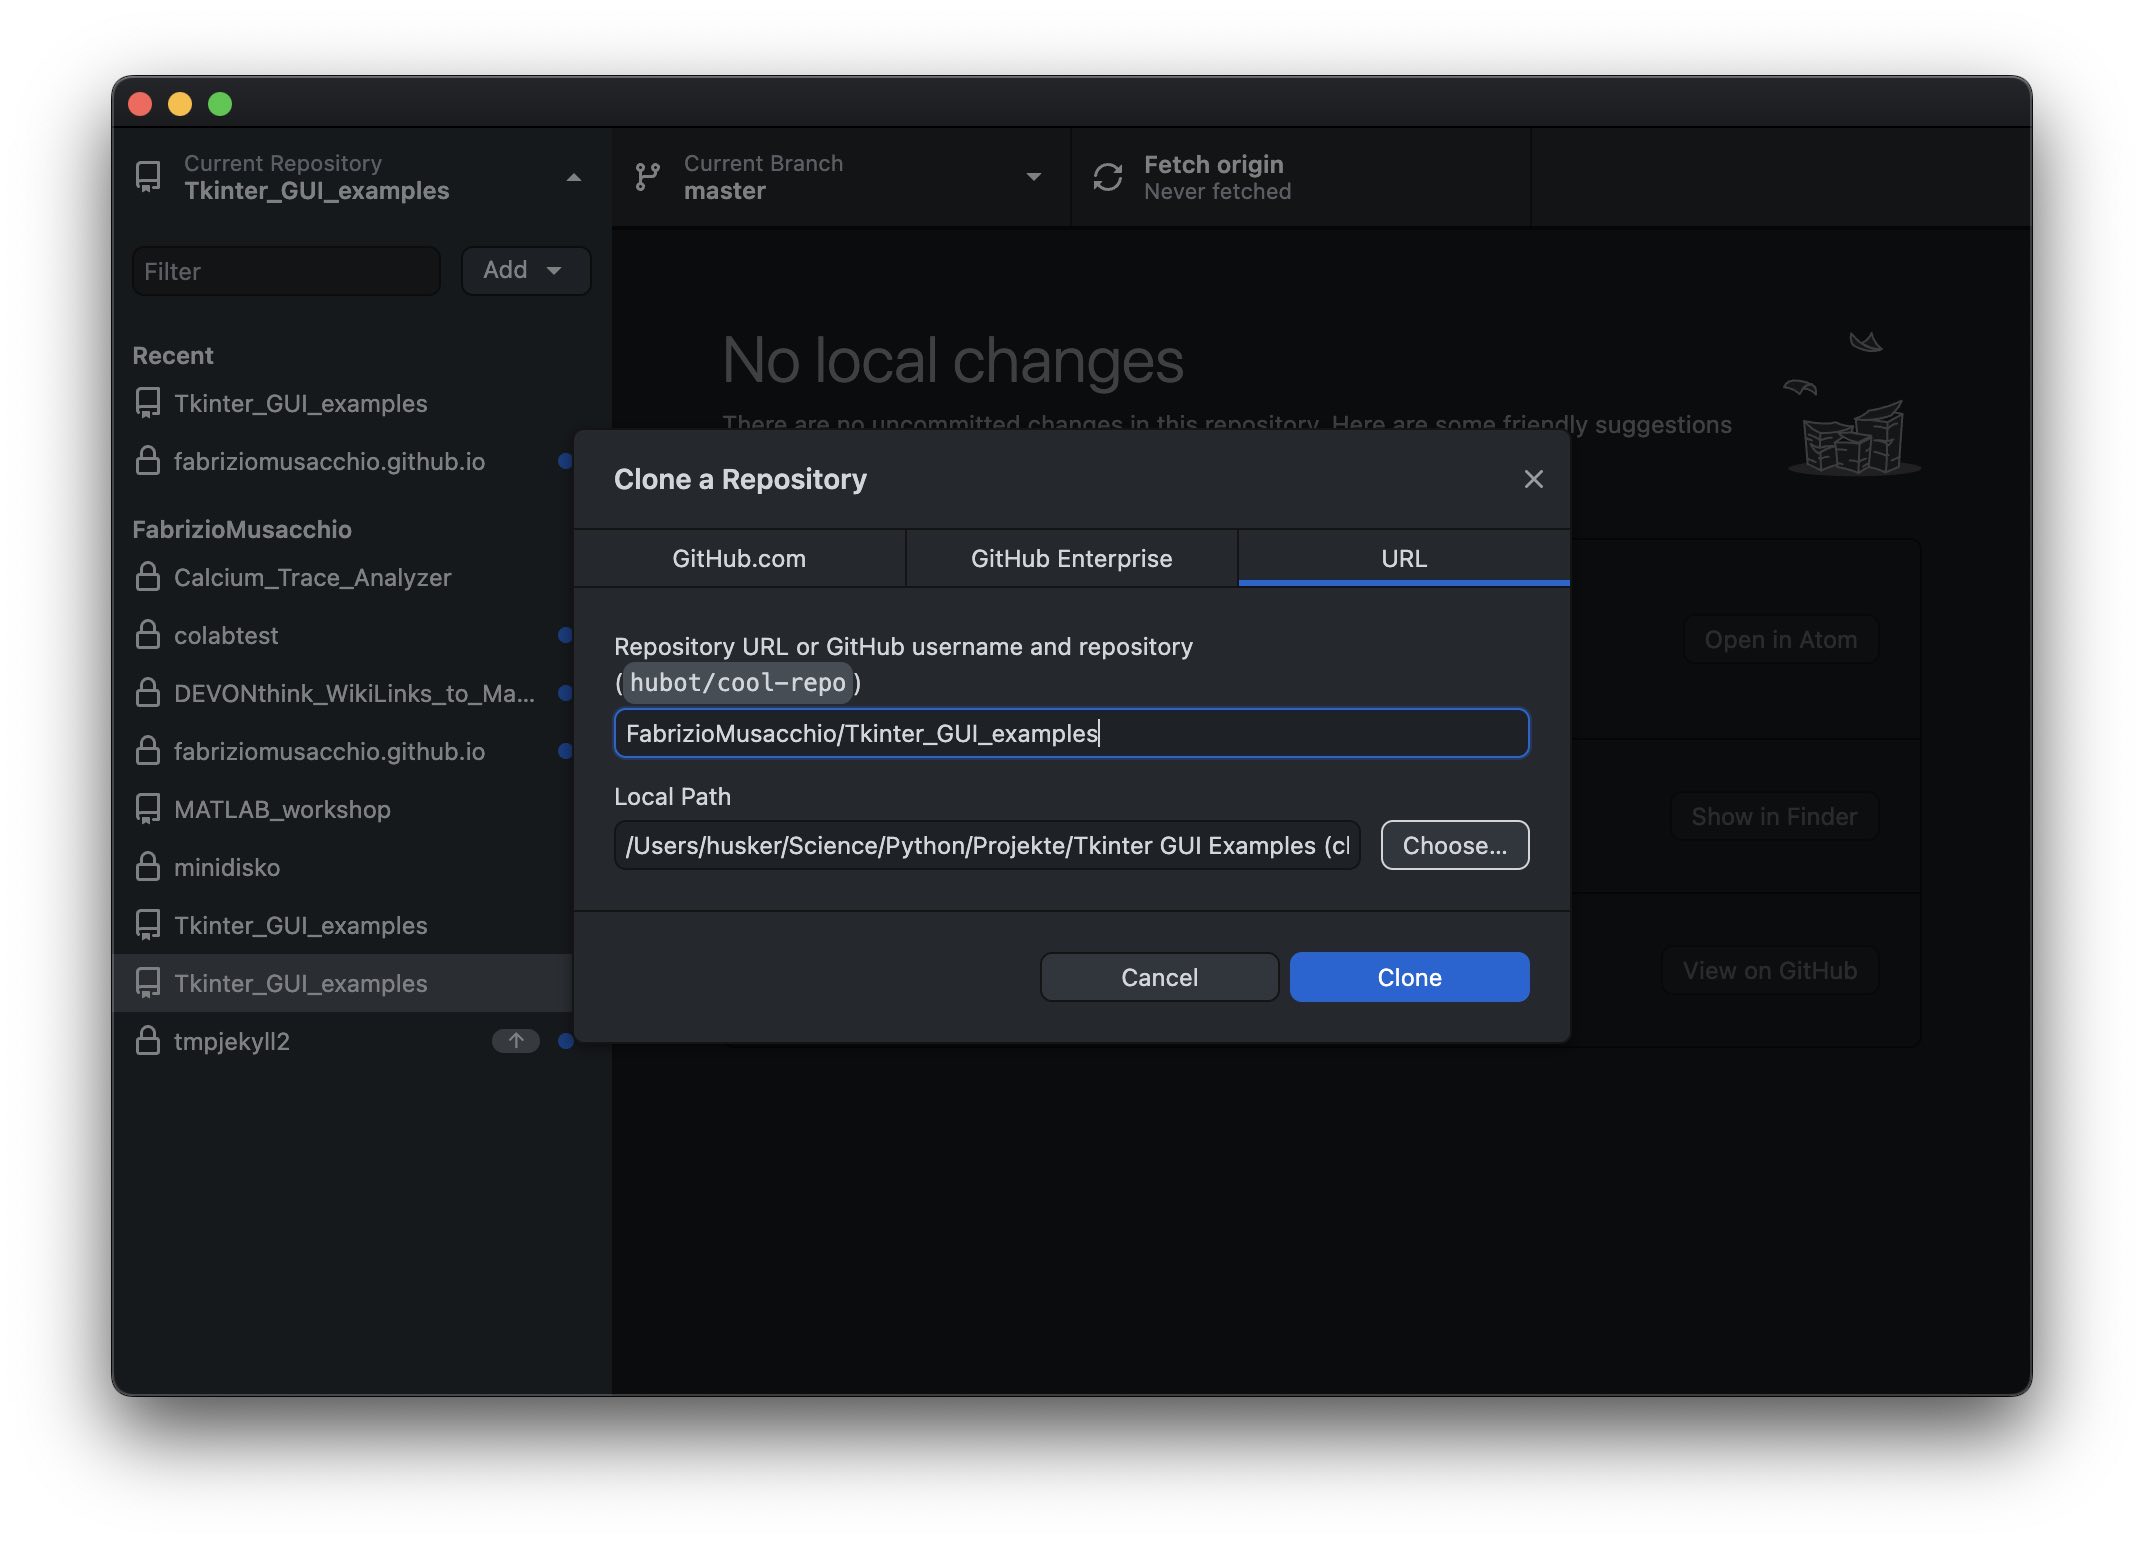
- Enter the corresponding repository URL or USERNAME/REPOSITORY. For our example repository from above, simply enter:
- Follow steps 3 and 4 from option 1.
Whenever the repository is updated by the repository contributors, the GitHub Desktop app detects these updates and offers the option to Pull origin, which will synchronize your local copy with the repository:
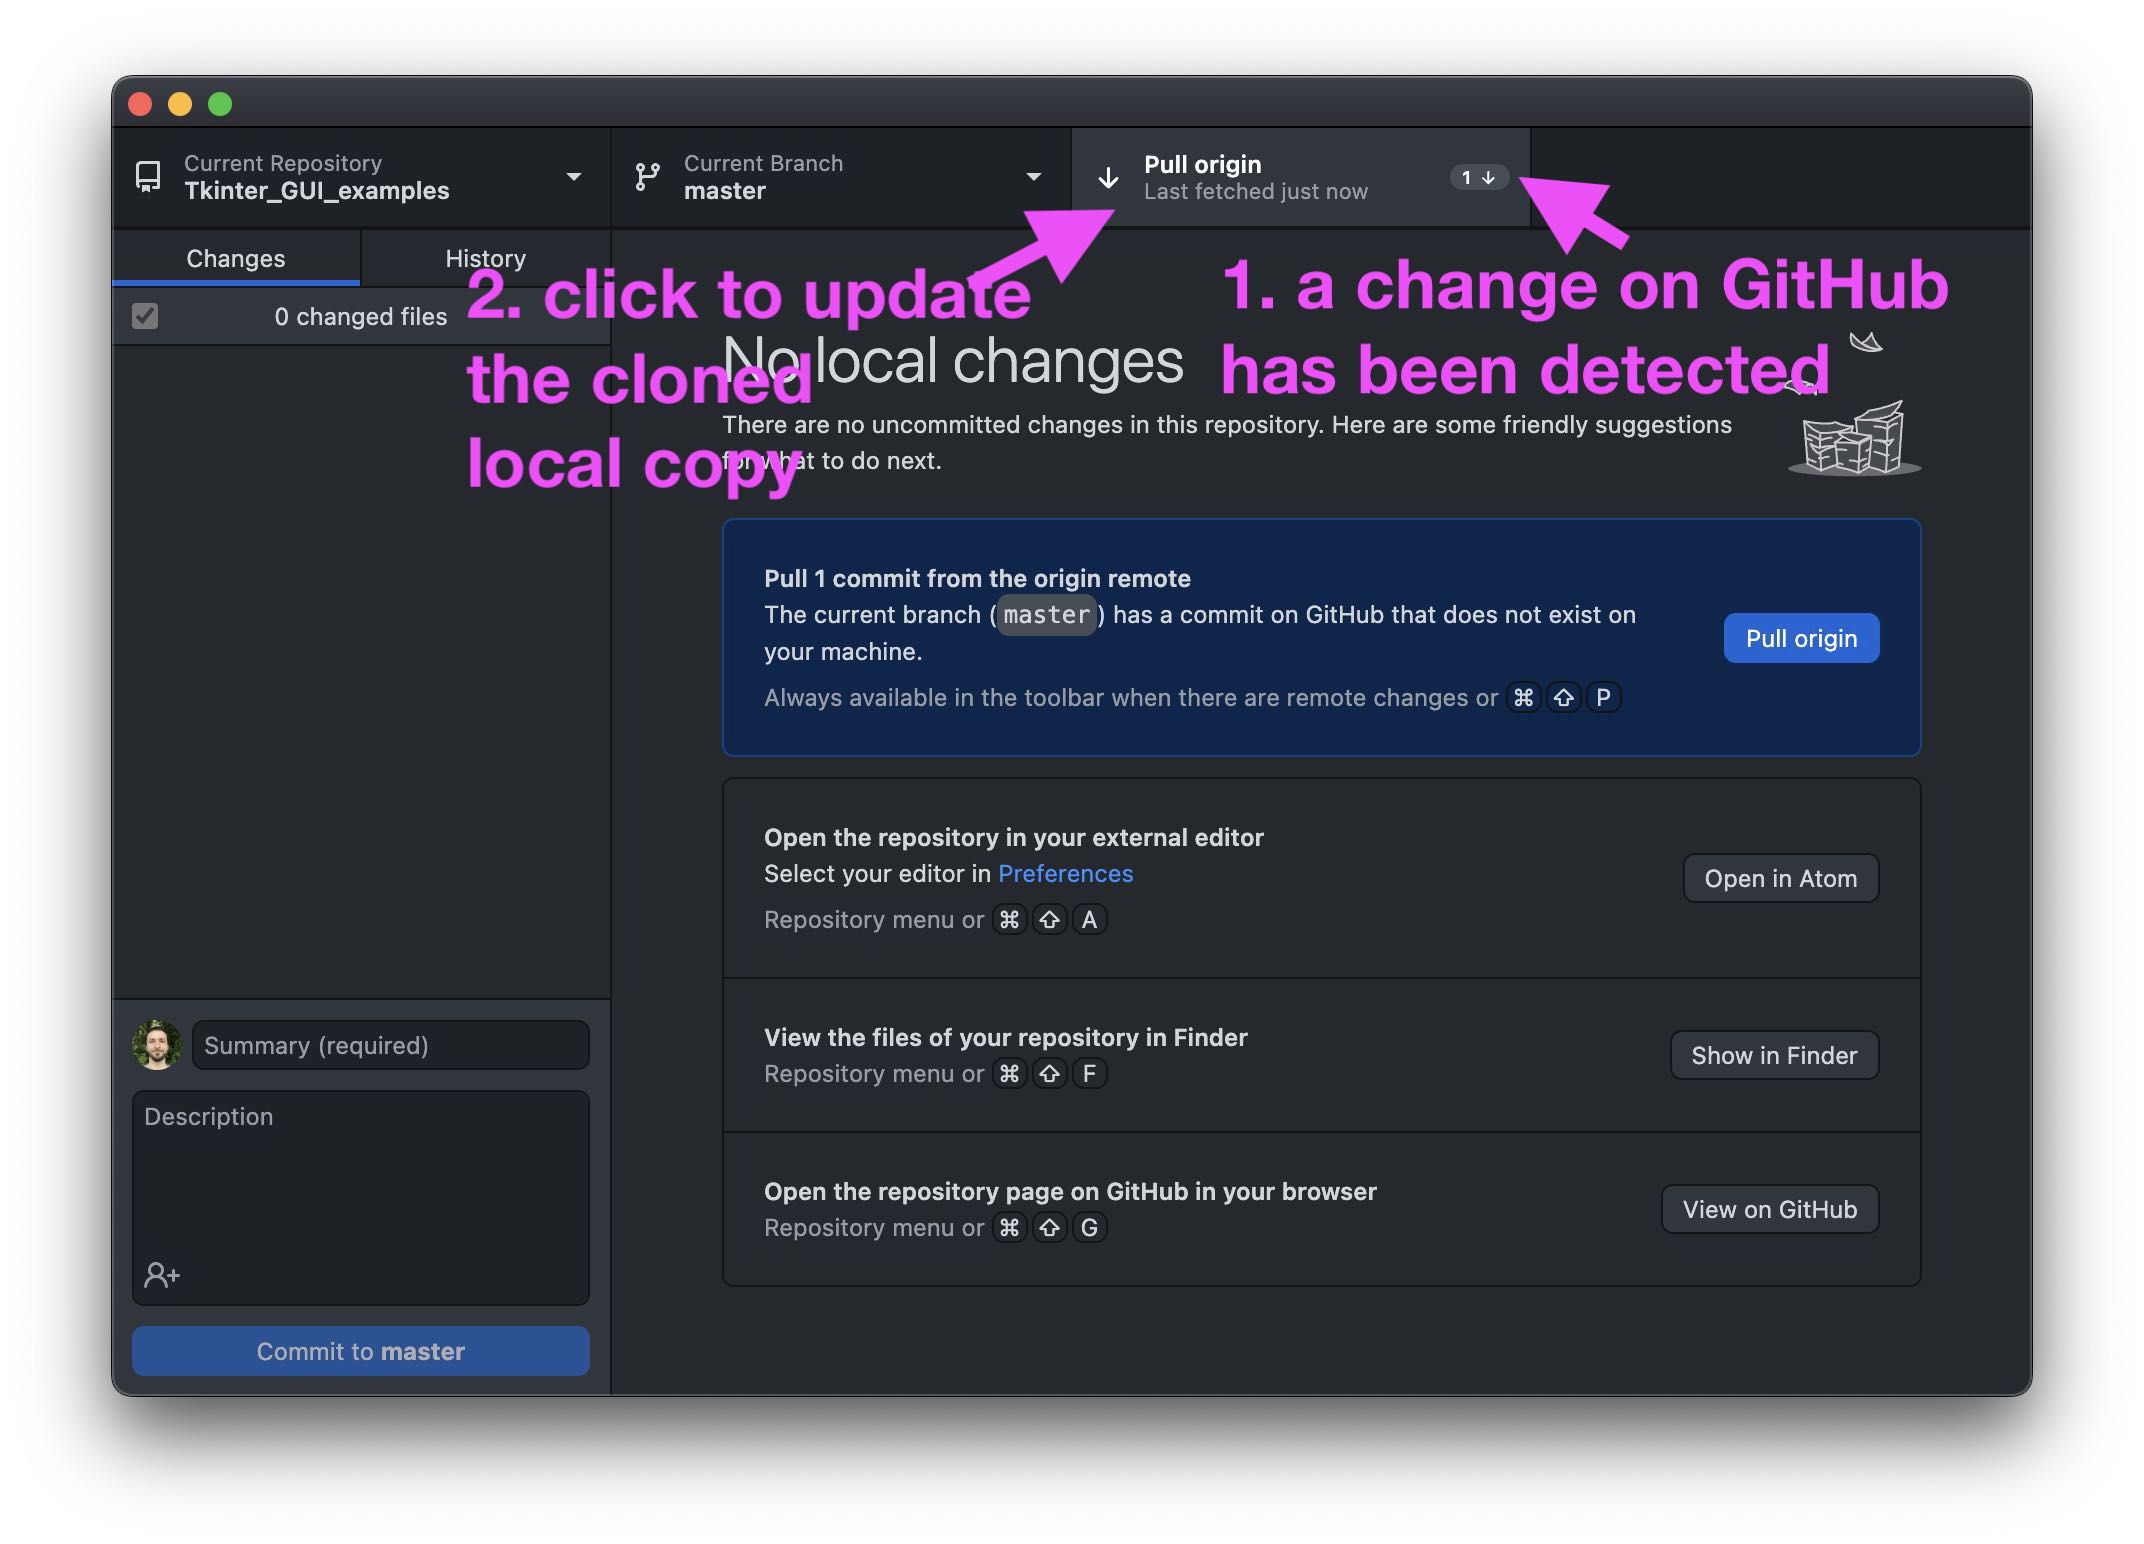
But caution: A synchronization via the pull operation is always bidirectional (in the next session we learn further details on this). If you add your own files to the cloned local repository folder, the GitHub Desktop app pushes them to the repository on GitHub, and they become available to the public – if the repository holders accept them. In case you have modified the downloaded repository content, the app also pushes these modifications back to the remote repository, and the repository holders can decide whether to accept your changes or not. Both scenarios are maybe not what you want. To avoid them, never commit your local changes to the repository:
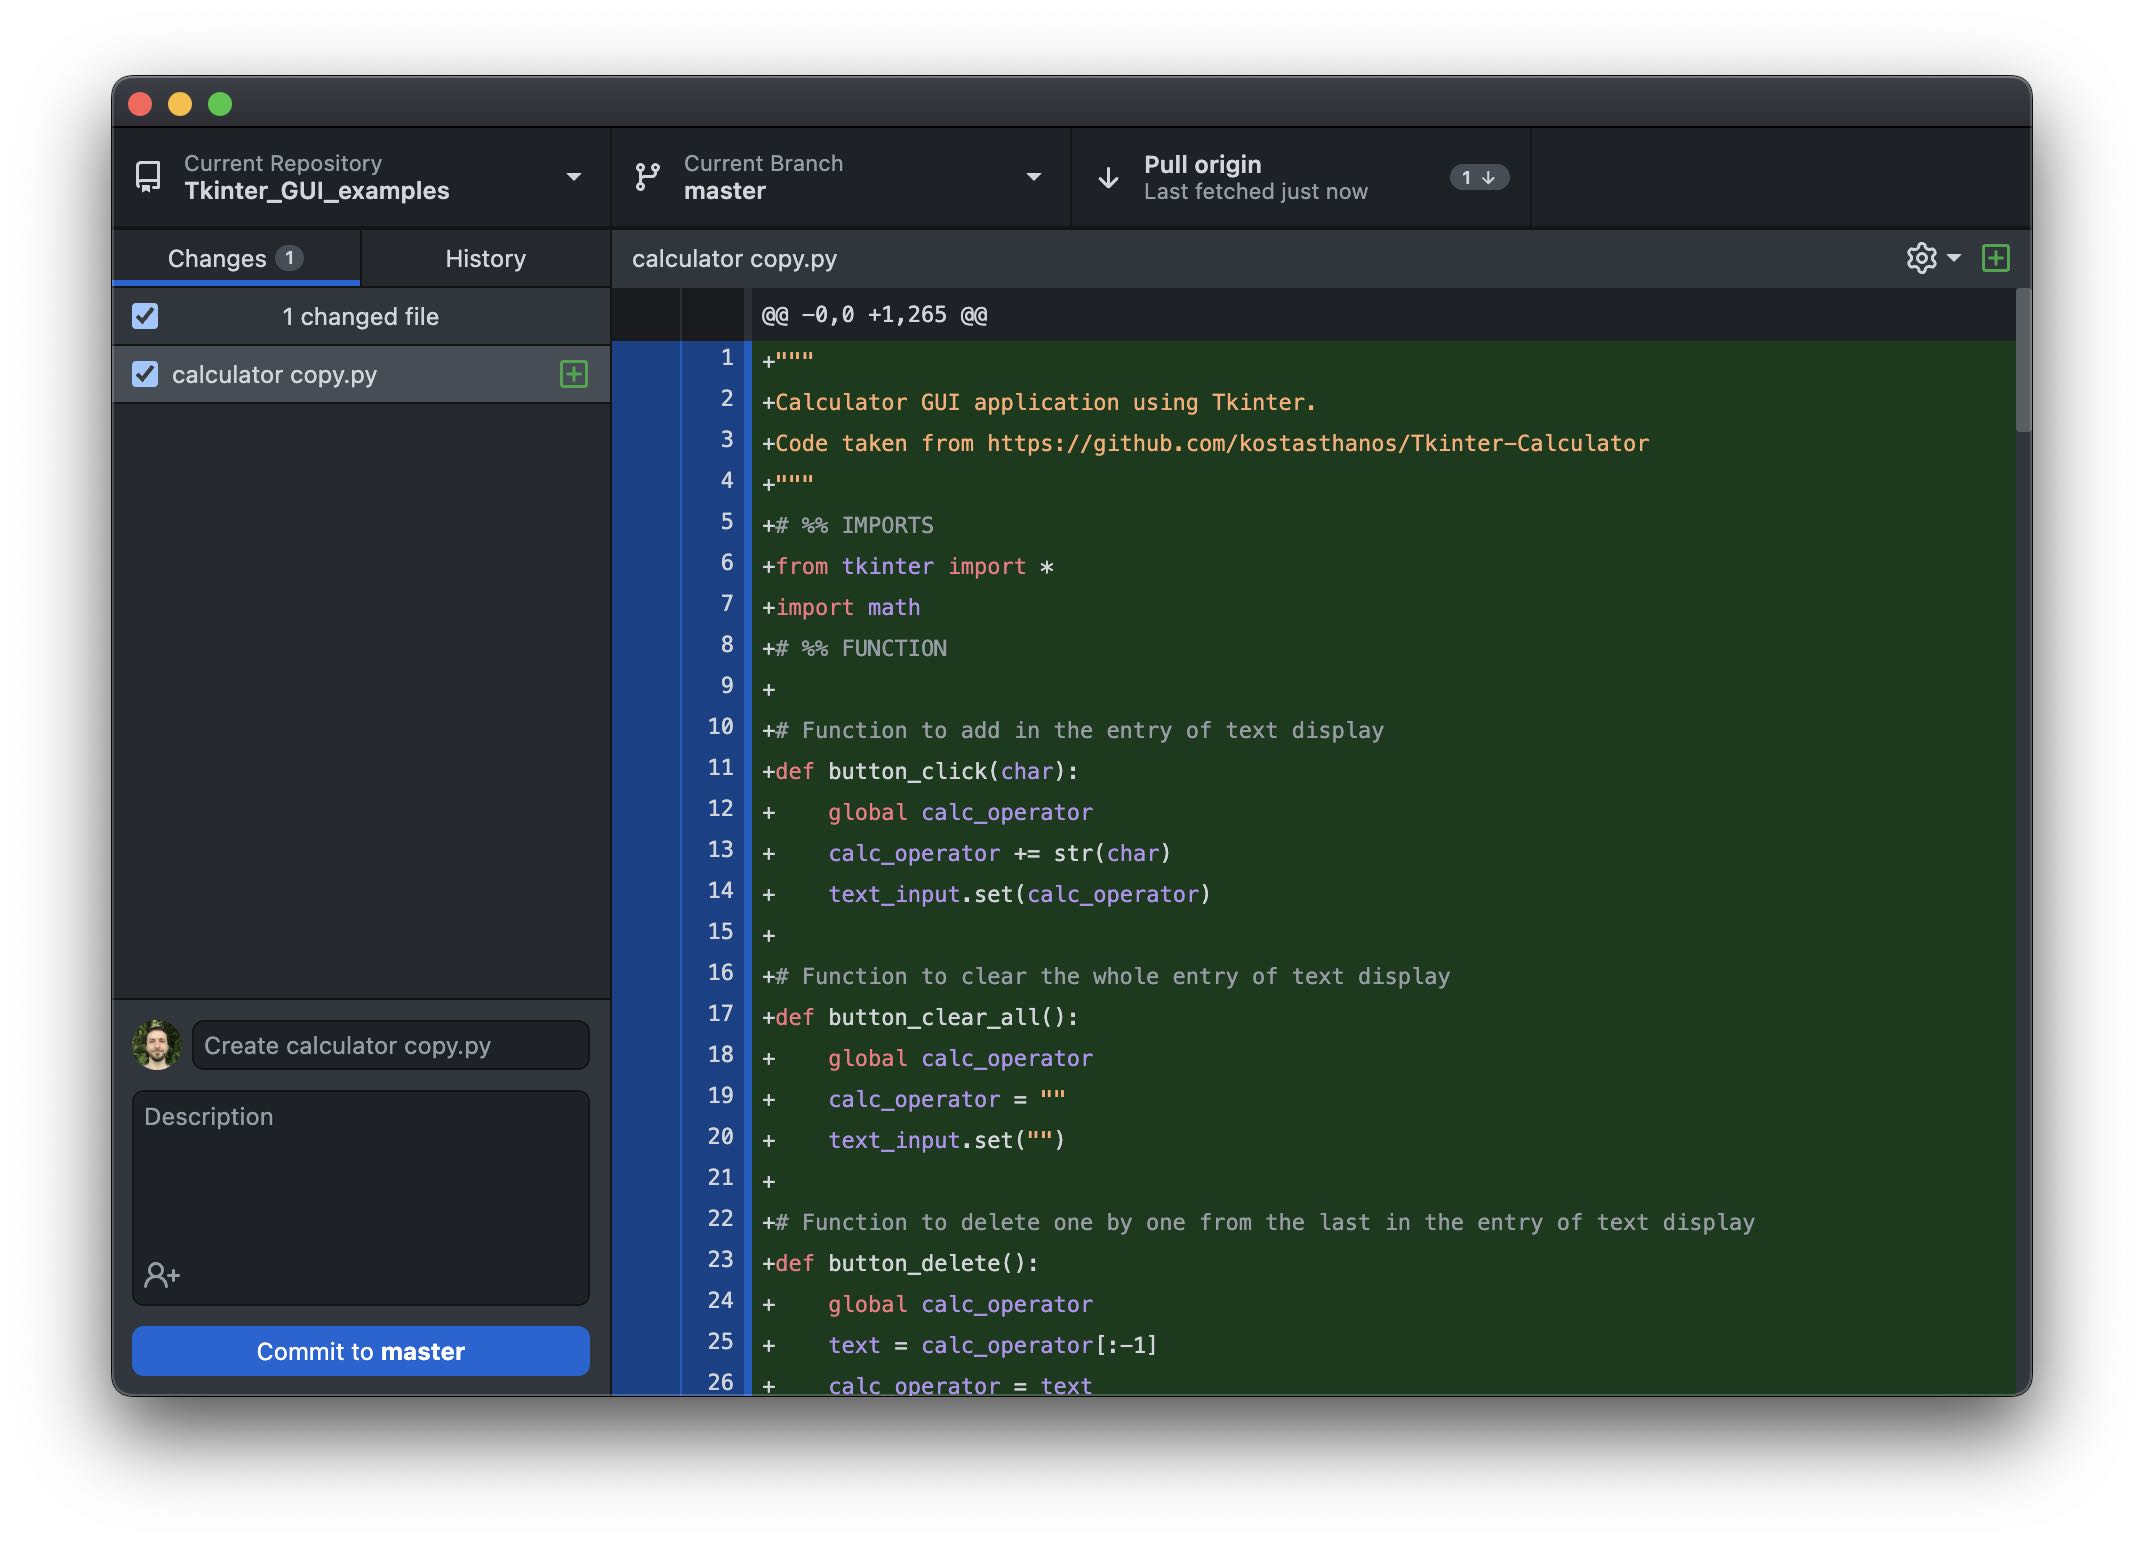
Alternatively, never modify or add anything to the cloned folder, and just work in the parent project folder – except, of course, you’d like to actively contribute to the repository.
Using the git command line tool
If we have installed gitꜛ on our OS, we can carry out the same steps with the command lineꜛ as with the GitHub Desktop app:
- Copy the URL of the repository:
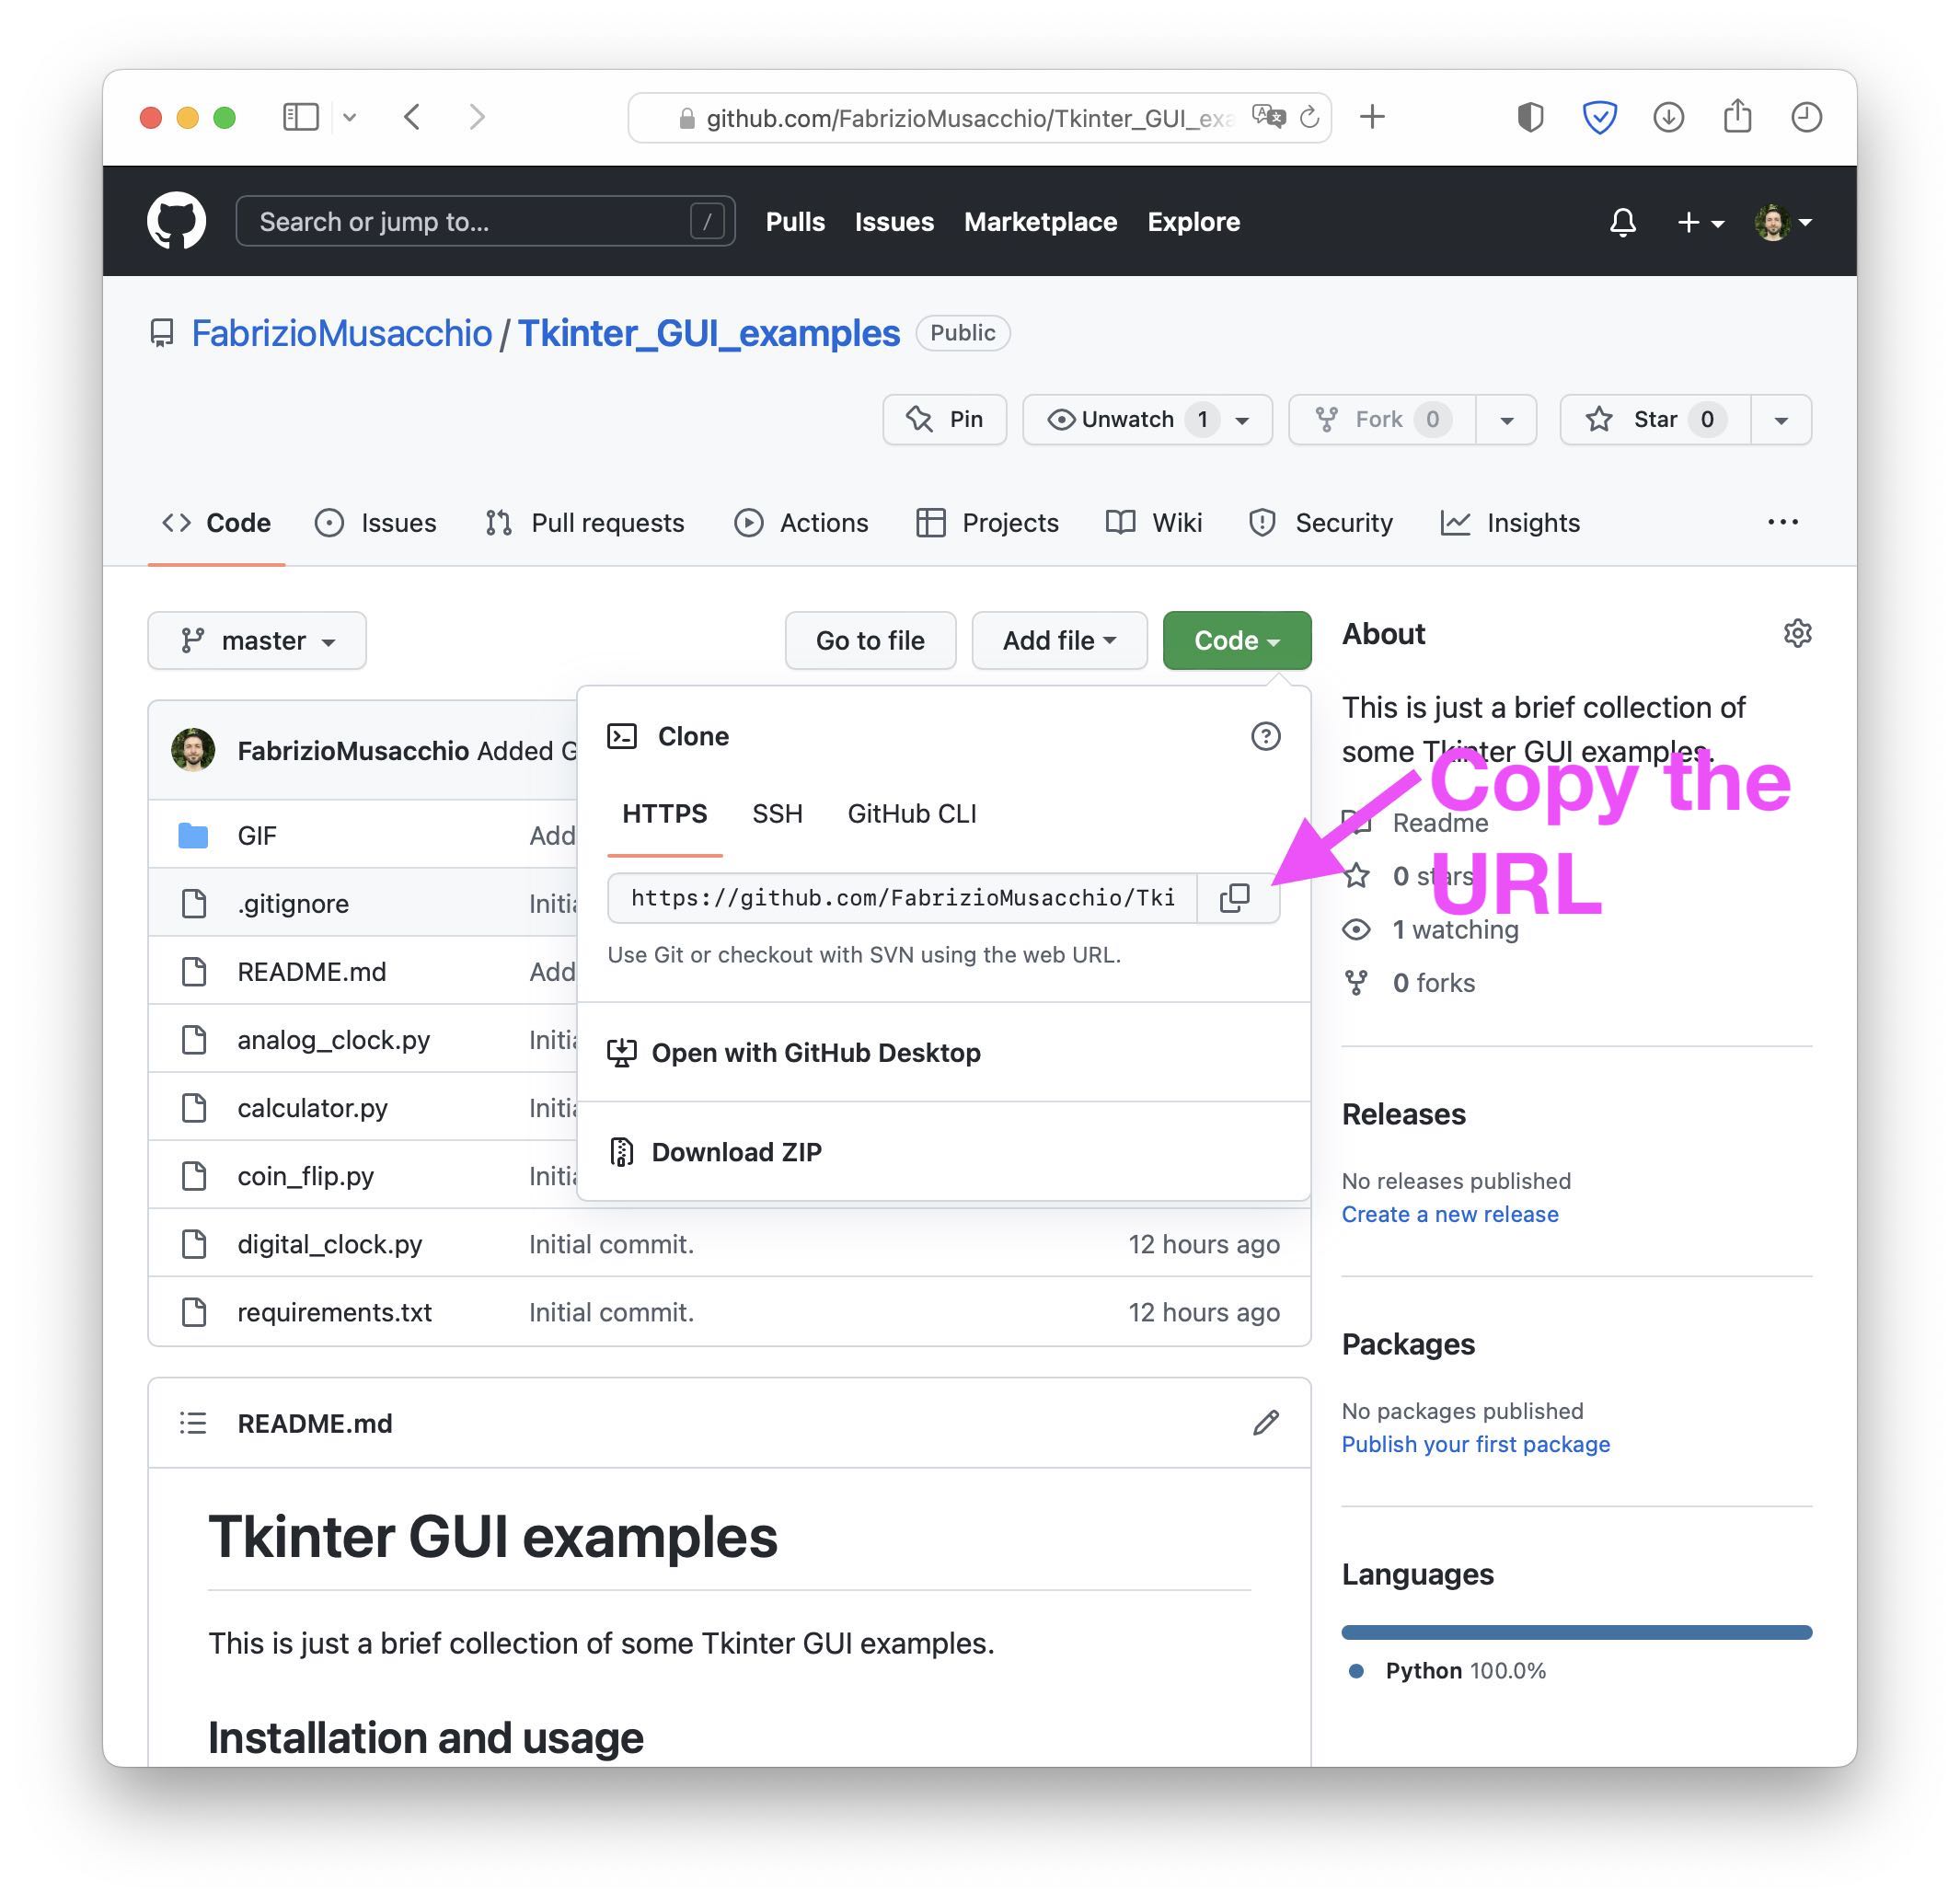 The URL for our example repository is:
https://github.com/FabrizioMusacchio/Tkinter_GUI_examples.git - Open a terminal and change the current working directory (
cd) to the location where you want the cloned directory. - Type:
git clone https://github.com/FabrizioMusacchio/Tkinter_GUI_examples.git - Follow steps 3 and 4 from option 1.
To update your locally cloned copy with potential changes in repository on GitHub, follow these steps:
- cd into the cloned repository folder on your hard drive.
- Type:
git fetch
fetchꜛ only pulls updates from GitHub without merging them with our local changes. To merge our local changes with the repository, we would have to use the merge command:
git merge
The pullꜛ command combines both, fetching and merging, in one command:
git pull
The pull command only merges committed local changes with the remote repository. Since gitꜛ is an open-source version control system, it is meant to store and manage different versions of our code stored on our local hard drive or in a remote repository (like GitHub). To create such versions with git, we have to commitꜛ them (i.e., the changes in our files) via
git commit -m "some explanatory commit comment"
With
git status
we can get a quick summary of the current status of our repository (Is everything up to date? Are any modified files waiting to be committed?). And with the logꜛ command,
git log
we can browse and inspect the history of the files in the repository.



comments