Deep-learning-based cell segmentation with StarDist
If you haven’t installed Napari yet, please do so before proceeding with this tutorial. To practice this tutorial, install the following package(s) in your activated Napari conda environment:
conda install -y napari-assistant napari-simpleitk-image-processing stardist-napari
StarDist: A deep learning-based cell segmentation tool
Another versatile and powerful segmentation tool is StarDistꜛ. StarDist is based on a combined method of neural networks and probability density estimation. It utilizes a neural network to identify the positions of cell nuclei and perform an initial segmentation. Subsequently, a probability density estimation is applied to the initial segmentation to generate precise cell contours. StarDist is particularly useful for segmenting heavily overlapping or densely packed cells. In this tutorial, we will use StarDist for segmenting fine cell structures such as nuclei.
Using StarDist in Napari
StarDist comes with the stardist-napariꜛ Napari plugin. Its usage is as straightforward as for any other Napari plugin. Simply open the StarDist plugin widget via the Plugins menu, select the input image layer, select the appropriate model for your underlying image (2D or 3D) and specify the axes of your image. When you are done, just the Run button. The run button is grayed out when one or more properties are not set correctly.
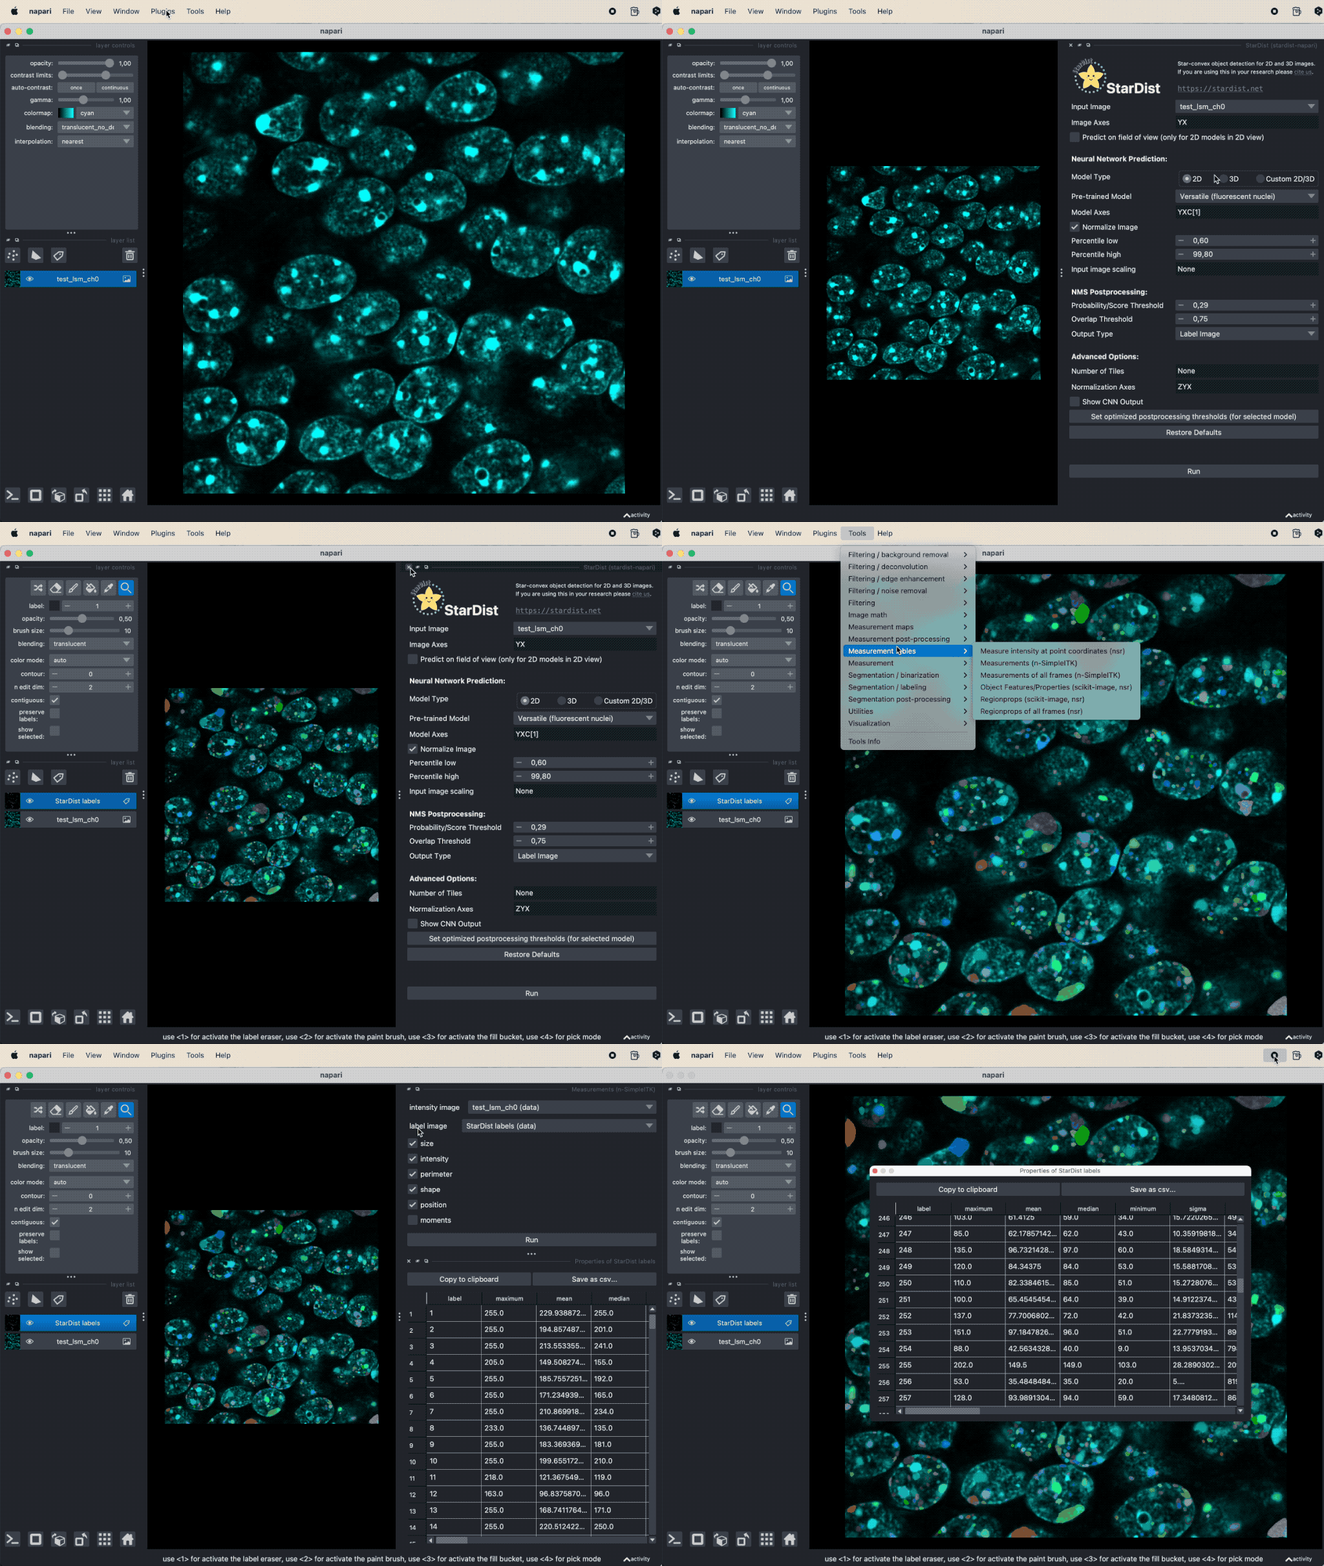 Applying StarDist to the sample image “test_lsm_ch0” provided in the GitHub data folder (see image credits in the acknowledgements section below).
The segmentation result will be displayed as new layers in the layer list and you can evaluate the segmented image parts with the Measurement function from the Tools->Measurement tables menu (see “Feature extraction” in Chapter “Image segmentation and feature extraction”).
Comparing StarDist with Cellpose
While Cellpose is also able to segment cell nuclei, for the underlying image, StarDist achieves a better segmentation result:
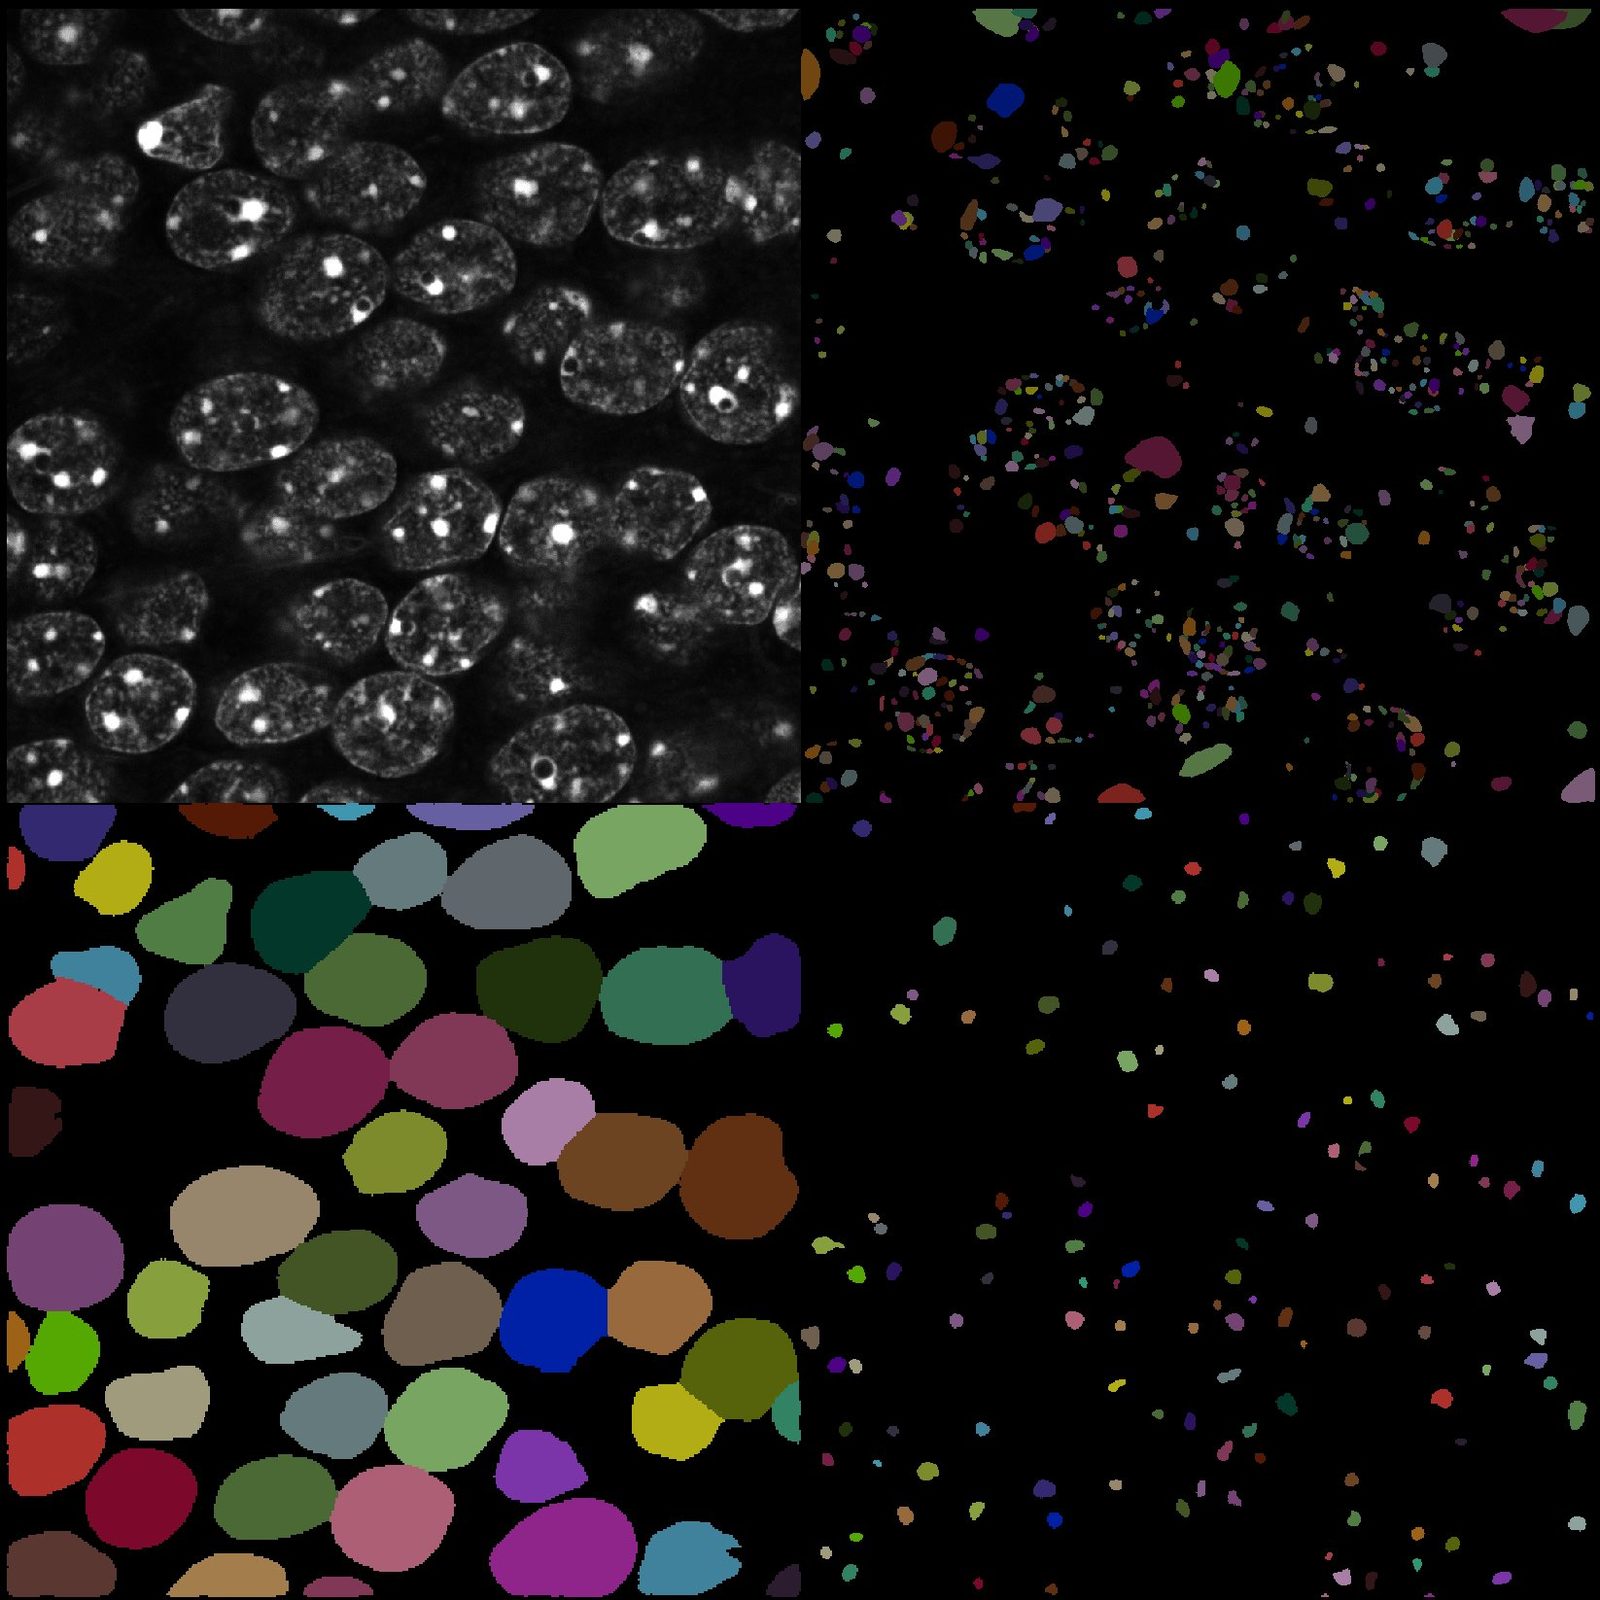 Comparing StarDist to Cellpose. Top right: Original image. Top left: StarDist segmentation. Bottom left: Cellpose segmentation (cytoplasm). Bottom right: Cellpose segmentation (nuclei).
This is due to the fact that StarDist is trained on a larger and more diverse data set. However, StarDist is not able to segment the cytoplasm of the cells. In general, the segmentation performance also dependents on the underlying image complexity, thus, one should not commit to only one method, but try different methods and compare the results.
Using StarDist in reproducible workflows
As discussed in the previous chapter for Cellpose, segmentation methods such as StarDist can also be used programmatically as part of script-based image analysis workflows. This is particularly useful when the same analysis has to be applied consistently to multiple images or when segmentation should be combined directly with preprocessing, feature extraction, or subsequent quantitative analyses.
The StarDist Python package provides an API for applying pretrained models outside the Napari plugin and for integrating segmentation into custom analysis pipelines. In this way, the interactive Napari workflow demonstrated above can serve for exploring images and evaluating segmentation results, while script-based workflows provide greater flexibility and reproducibility for repeated analyses.
Further readings
- GitHub repository of the Napari StarDist pluginꜛ including a detailed documentation
- GitHub repository of StarDistꜛ
- StarDist’s Napari hub pageꜛ
- StarDist tutorial on multi-class classificationꜛ
- Uwe Schmidt, Martin Weigert, Coleman Broaddus, and Gene Myers. Cell Detection with Star-convex Polygons. International Conference on Medical Image Computing and Computer-Assisted Intervention (MICCAI), Granada, Spain, September 2018.
- Martin Weigert, Uwe Schmidt, Robert Haase, Ko Sugawara, and Gene Myers. Star-convex Polyhedra for 3D Object Detection and Segmentation in Microscopy. The IEEE Winter Conference on Applications of Computer Vision (WACV), Snowmass Village, Colorado, March 2020
Acknowledgements
The data file used in this tutorial is an excerpt from the example data set of Napari PartSeg pluginꜛ