Chapter 3: Jupyter Notebooks
The Jupyter Notebook
A Jupyter Notebook is an interactive document that combines executable Python code, code output, plots, and formatted text in a single file. Notebook files use the ending .ipynb.
You can work with Jupyter notebooks in two common ways:
- in the classic browser-based Jupyter interface, or
- directly inside VS Code
Both approaches use the same notebook format. In this course, we will mainly work with notebooks in VS Code, but it is still useful to understand how Jupyter also works in the browser.
Starting Jupyter in the browser
To use Jupyter in the browser, you first need to activate your course environment in a terminal (see previous chapter). Open a terminal and run:
conda activate python_course
Then start a local Jupyter server with:
jupyter notebook
After running this command, Jupyter starts a local server on your computer and usually opens a new browser window automatically. If this does not happen, the terminal will show a local web address that you can copy into your browser.
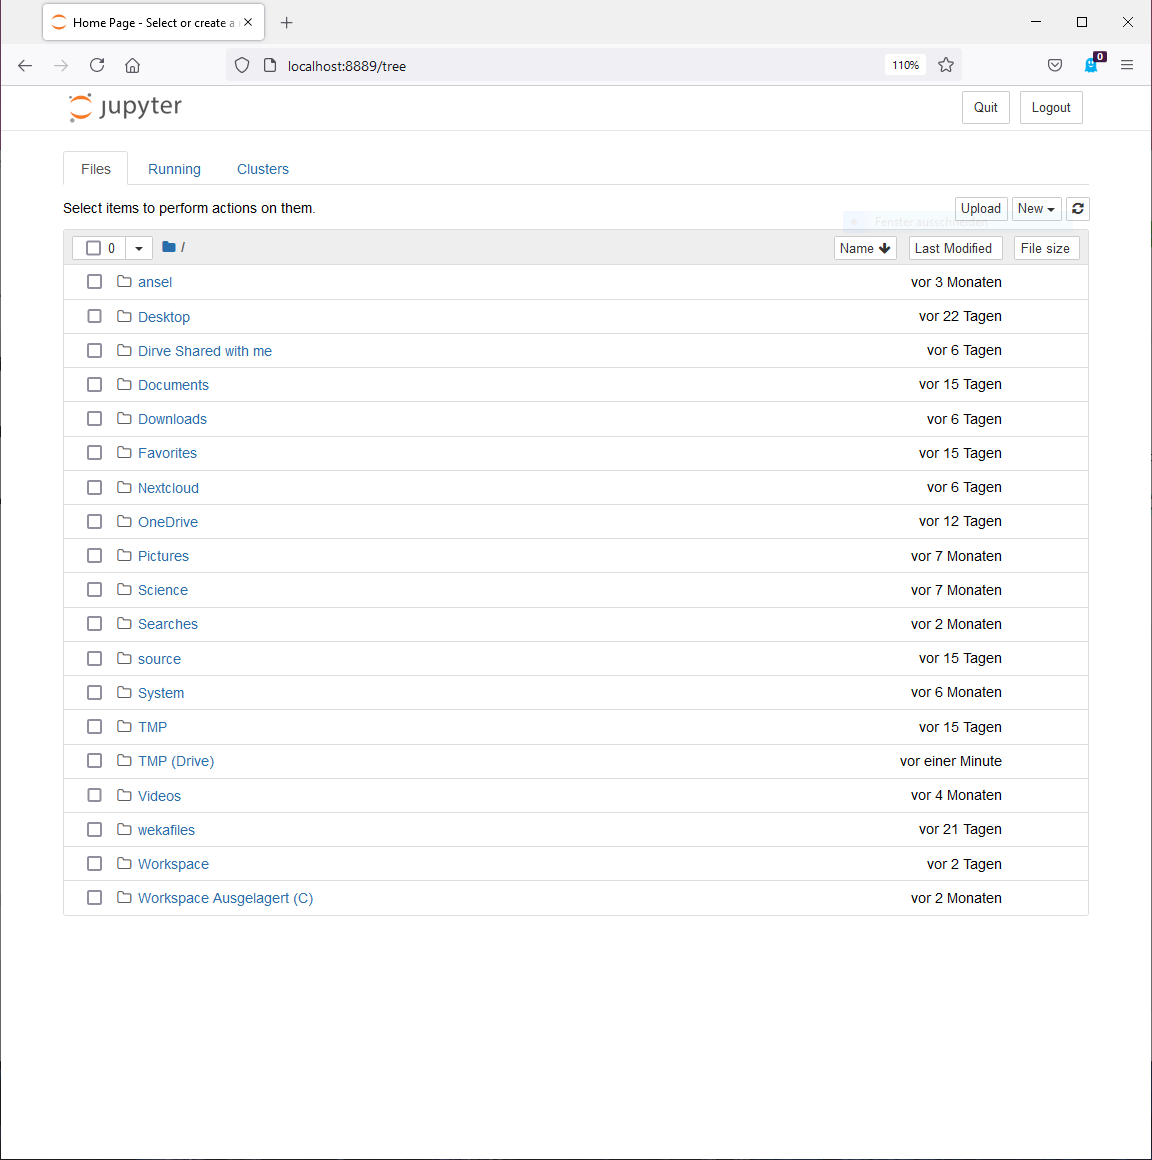
The browser window will then show the Jupyter file tree view:
Creating a new notebook in the browser
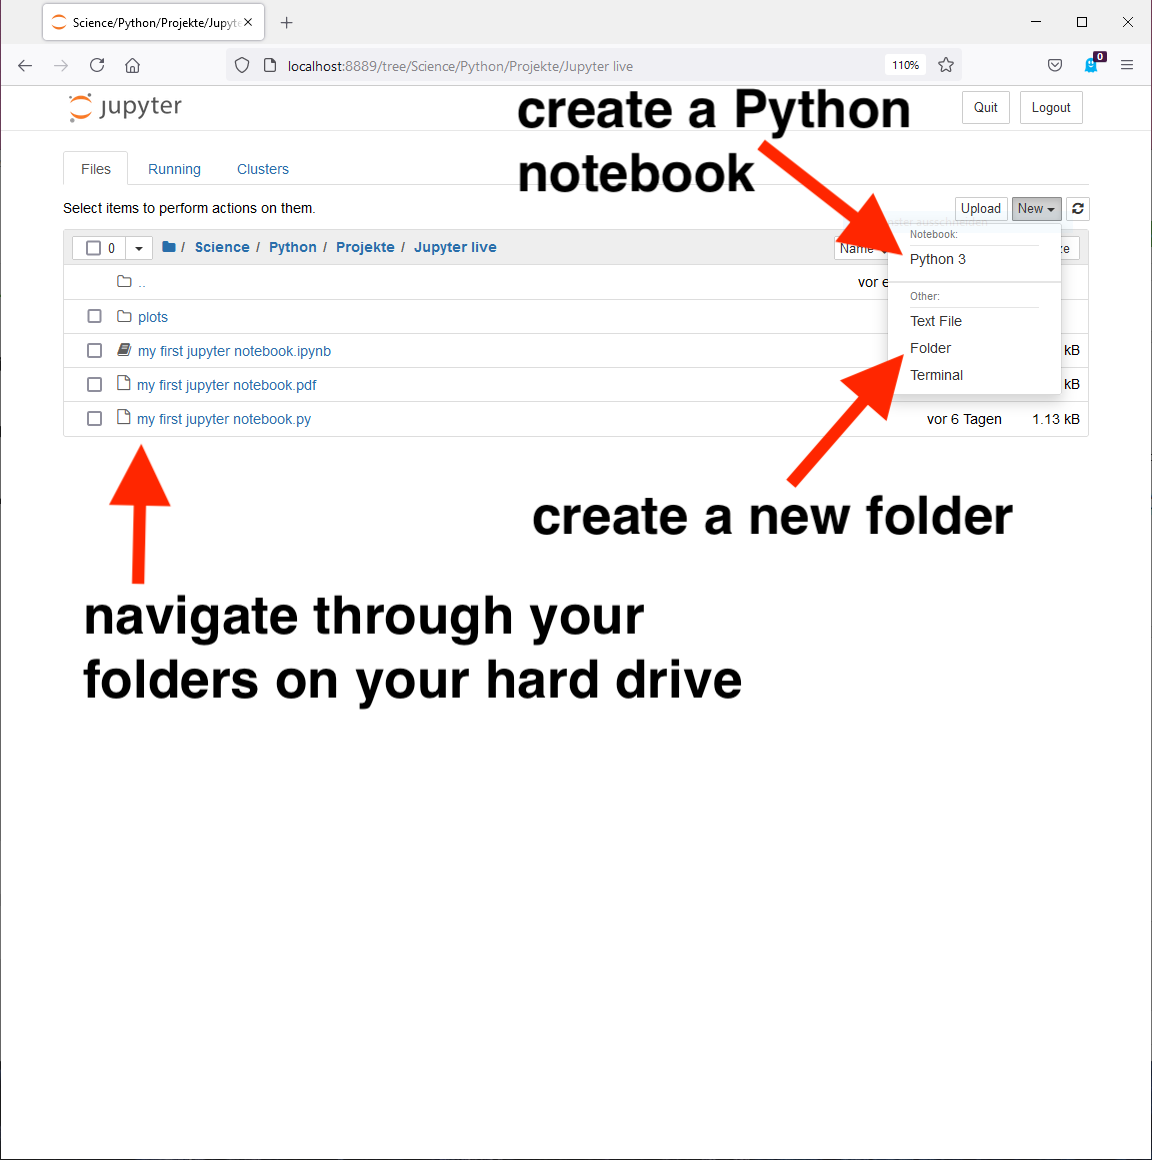
By default, the browser window shows the files and folders in your home folder. Please navigate to your desired destination for the course files and create a new folder if needed. Then create a new Python notebook via the New menu.
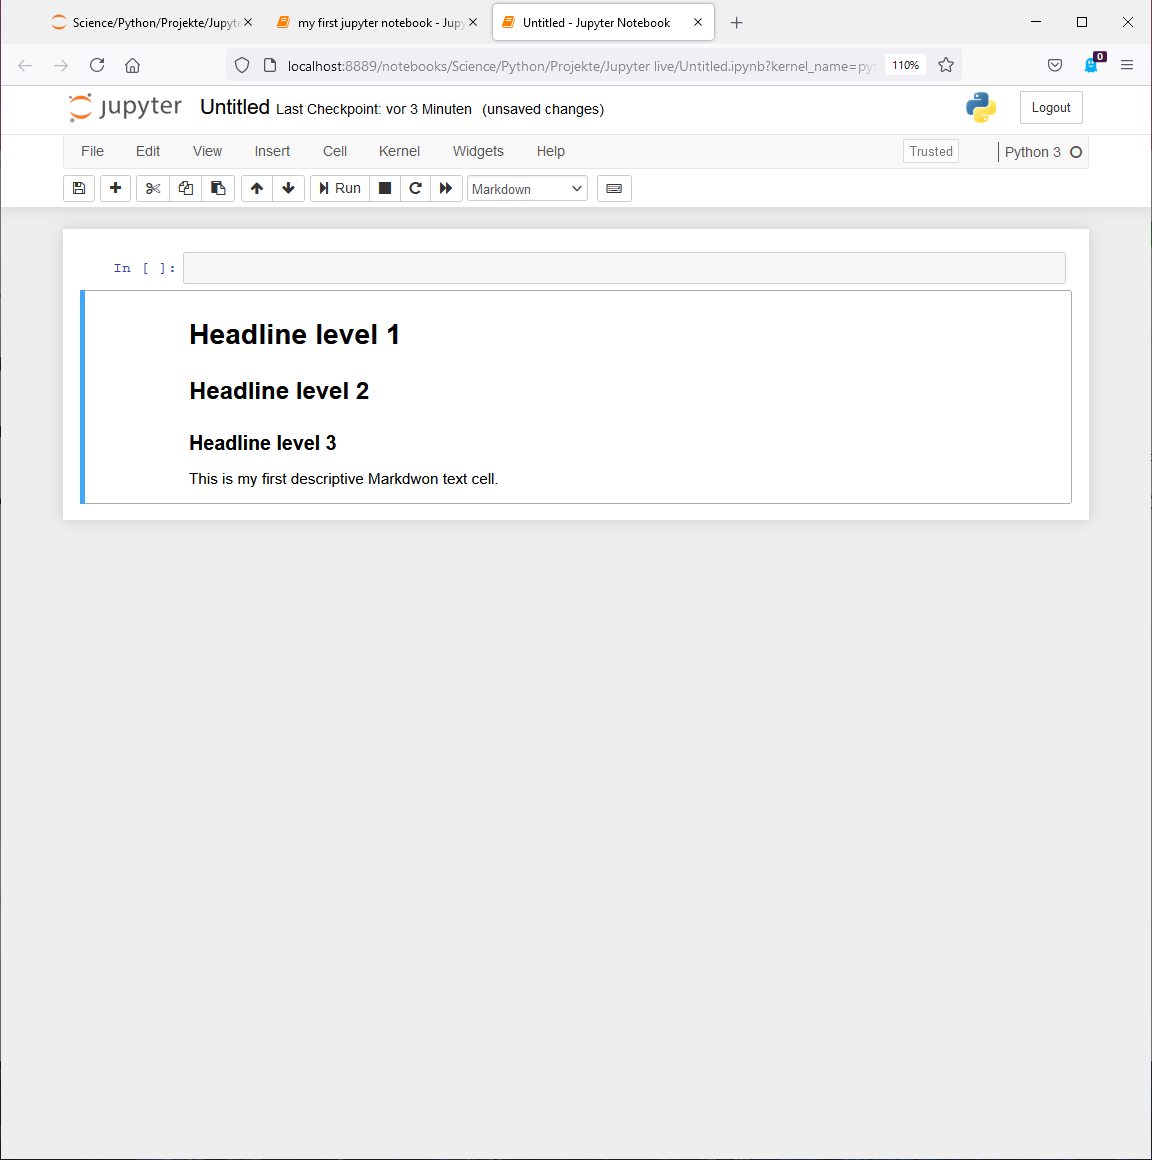
The newly created blank notebook should look similar to this:
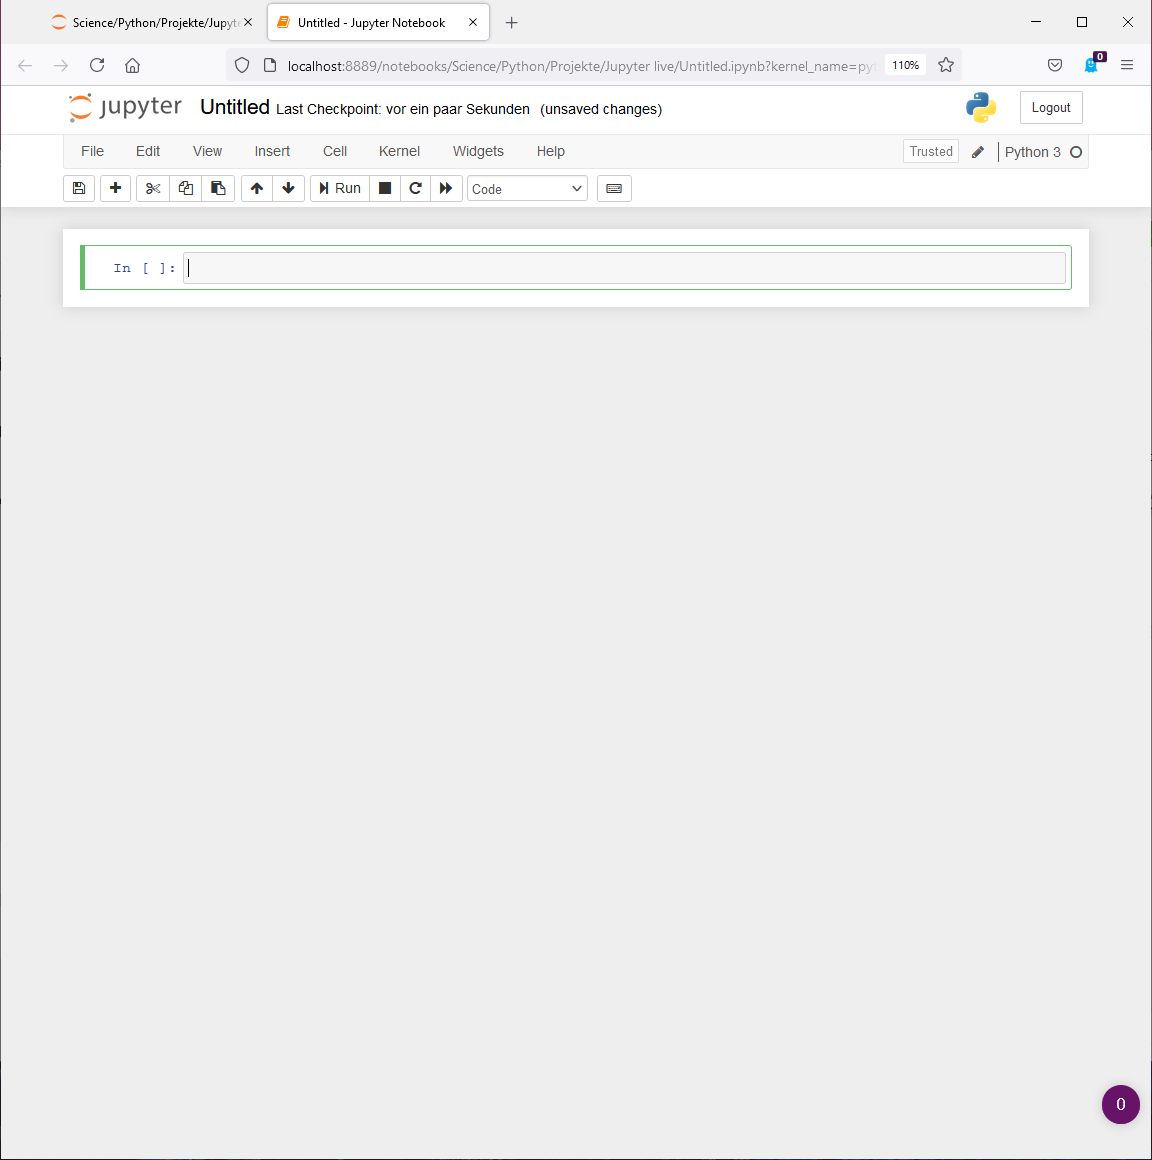
Code cells
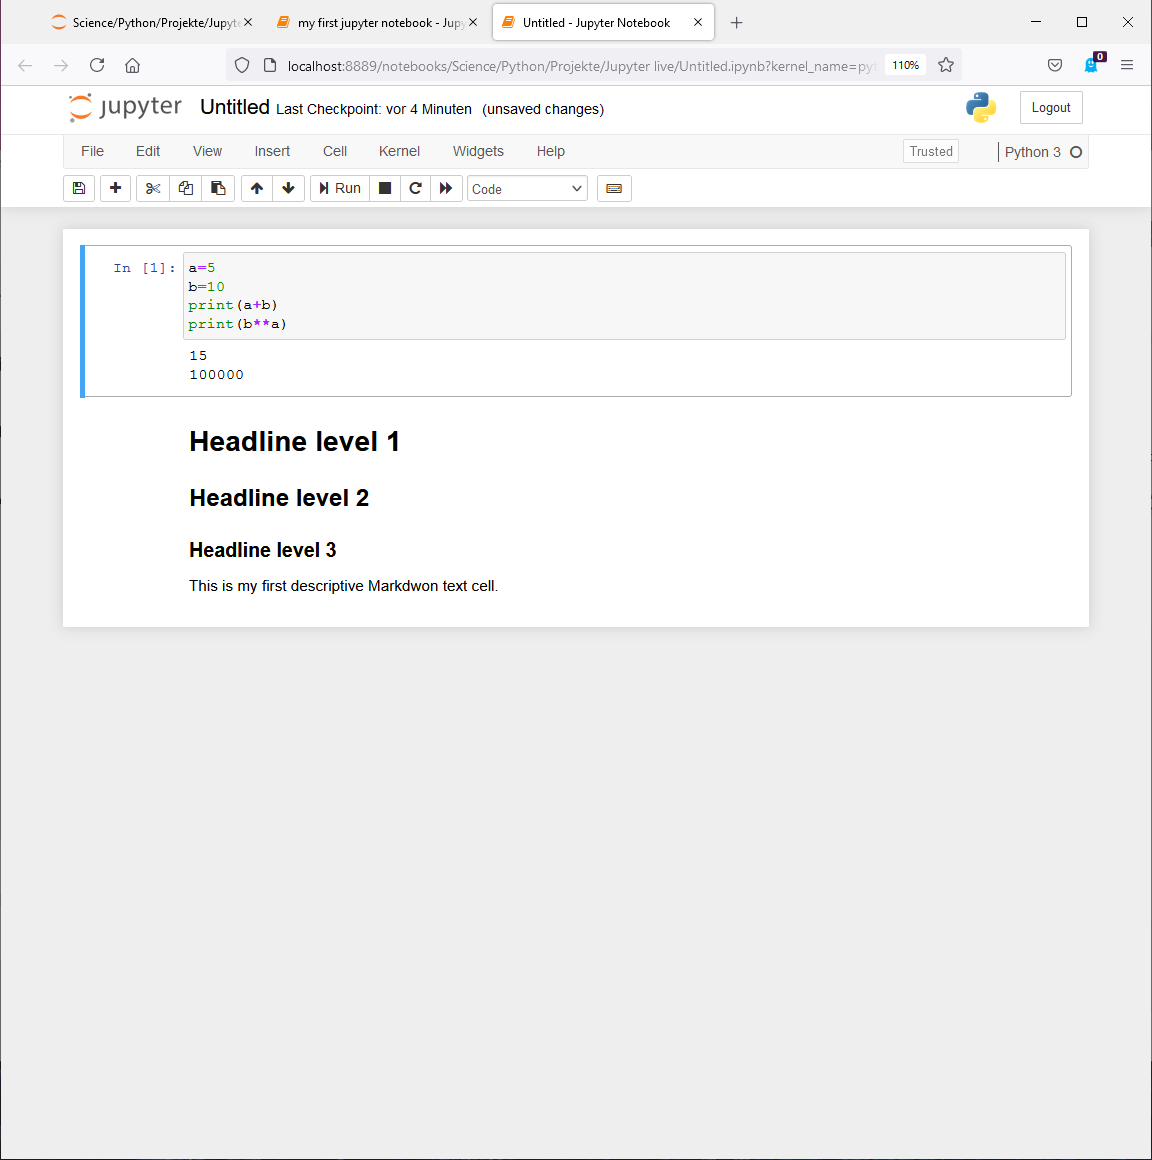
A new notebook already contains a first code cell. Inside this cell, you can write Python code just as you would in a normal Python script.
For example:
a = 5
b = 10
print(a + b)
print("Hello world.")
To execute the currently selected cell, click the Run button in the notebook toolbar. The output of the cell is then shown directly below it.
Jupyter code cells are conceptually similar to the code cells introduced earlier in Python scripts. The difference is that notebooks are built around such cells from the beginning.
To add a new cell in the browser interface, use the Insert menu:
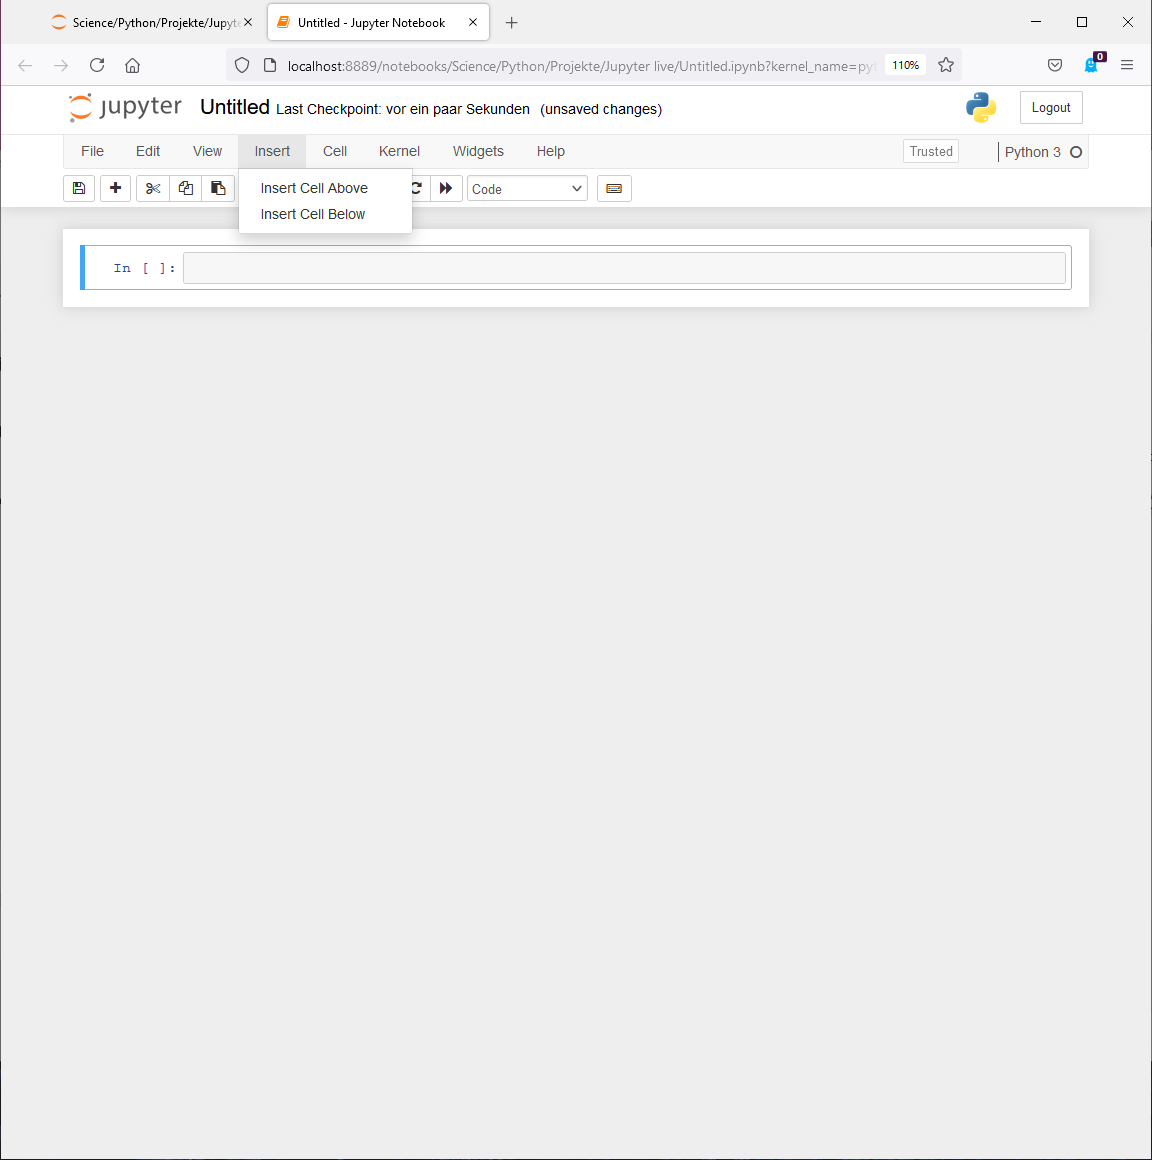
Markdown cells
Besides code cells, notebooks also support Markdown cells. These cells are used for explanatory text, headings, notes, and structured documentation.
To convert a code cell into a Markdown cell, use the drop-down menu in the toolbar:
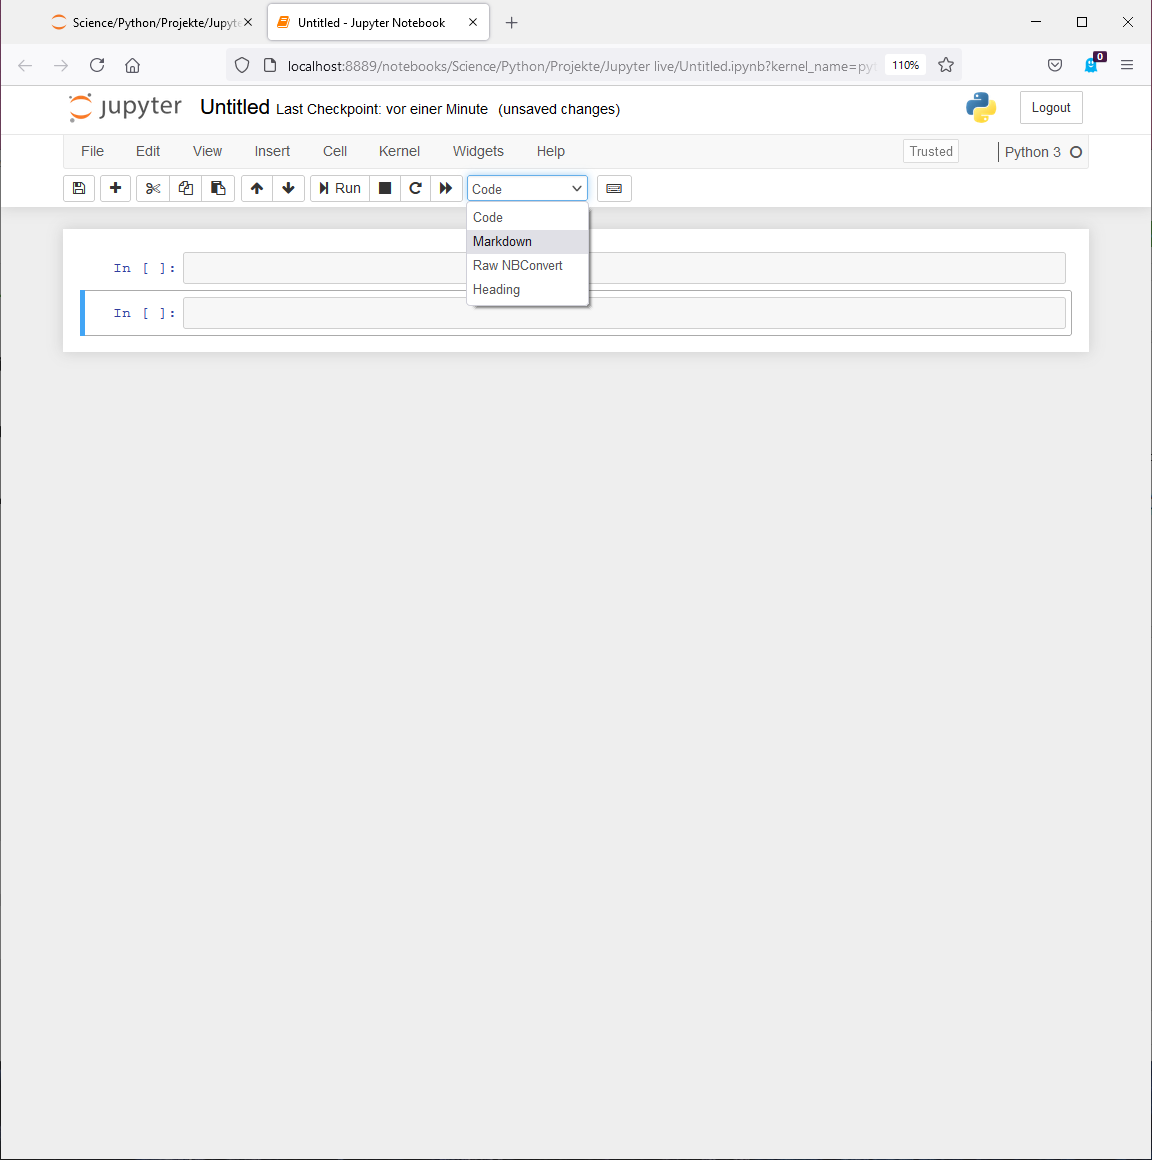
Markdown cells are not executed as Python code. Instead, they are rendered as formatted text. This makes notebooks especially useful for teaching, step by step analyses, and documenting your code.
You can use Markdown syntax to format the text:
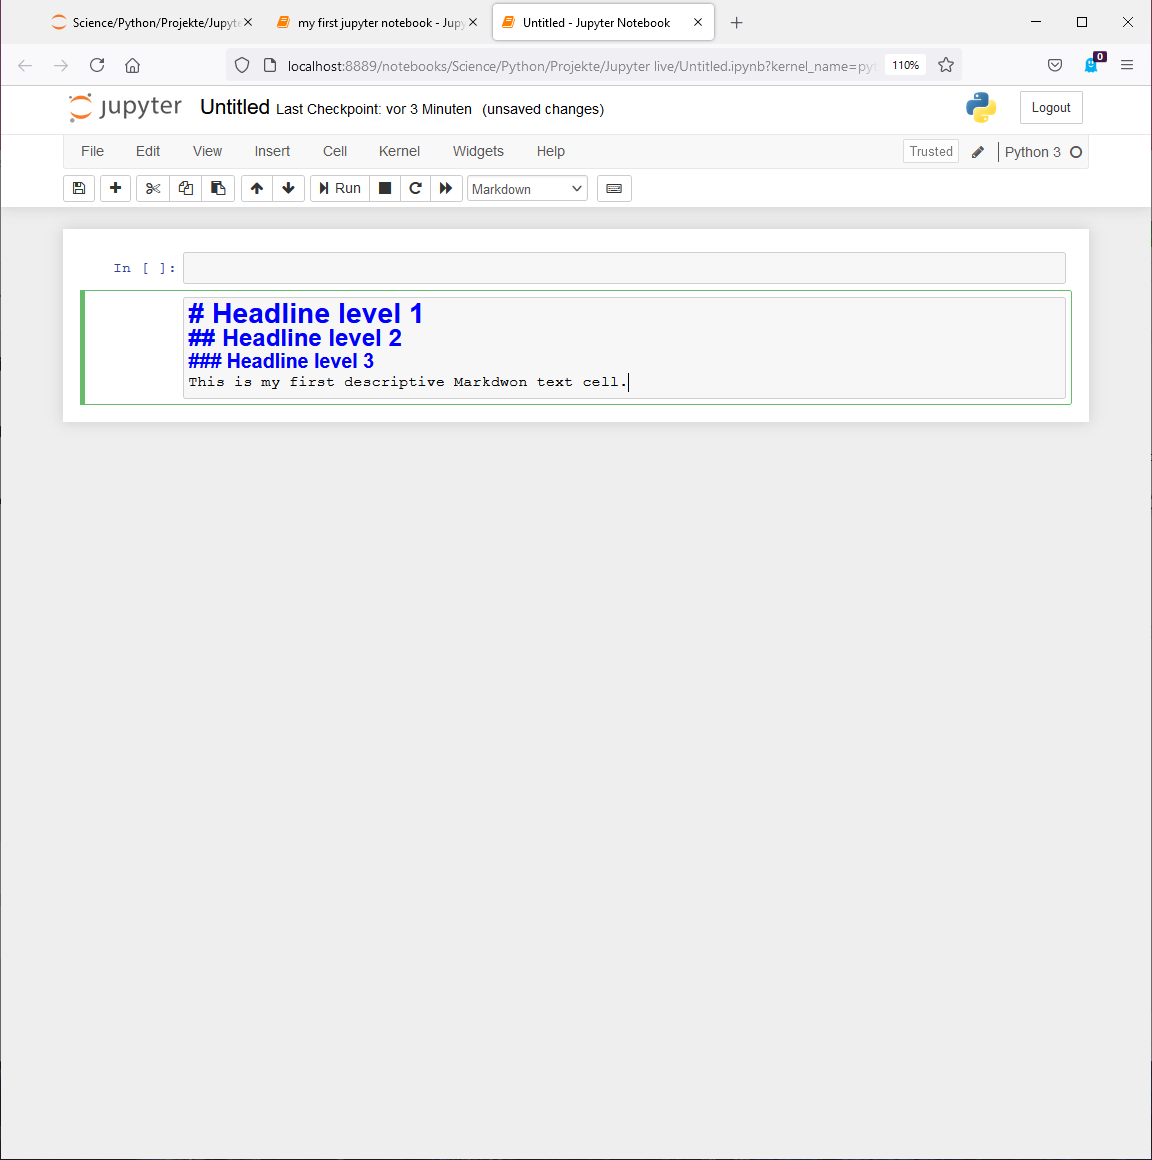
Markdown: You can find an overview of Markdown syntax in the Markdown guide in the general teaching materials.
After writing the Markdown syntax, execute the cell just like a code cell. The text will then be rendered in formatted form.
To edit a Markdown cell again, double click on it.
Working with notebooks in VS Code
Although Jupyter notebooks can be used in the browser, in this course we will mainly work with them in VS Code. This has several practical advantages:
- notebooks and normal Python scripts can be handled in the same editor
- file management is easier if you already use VS Code
- the transition between notebooks and
.pyscripts becomes more natural - terminal, editor, and notebook interface are combined in one place
To open a notebook in VS Code, simply open an existing .ipynb file or create a new notebook via the Command Palette or the Explorer. If the Jupyter extension is installed, VS Code will automatically recognize notebook files and open them in notebook view.
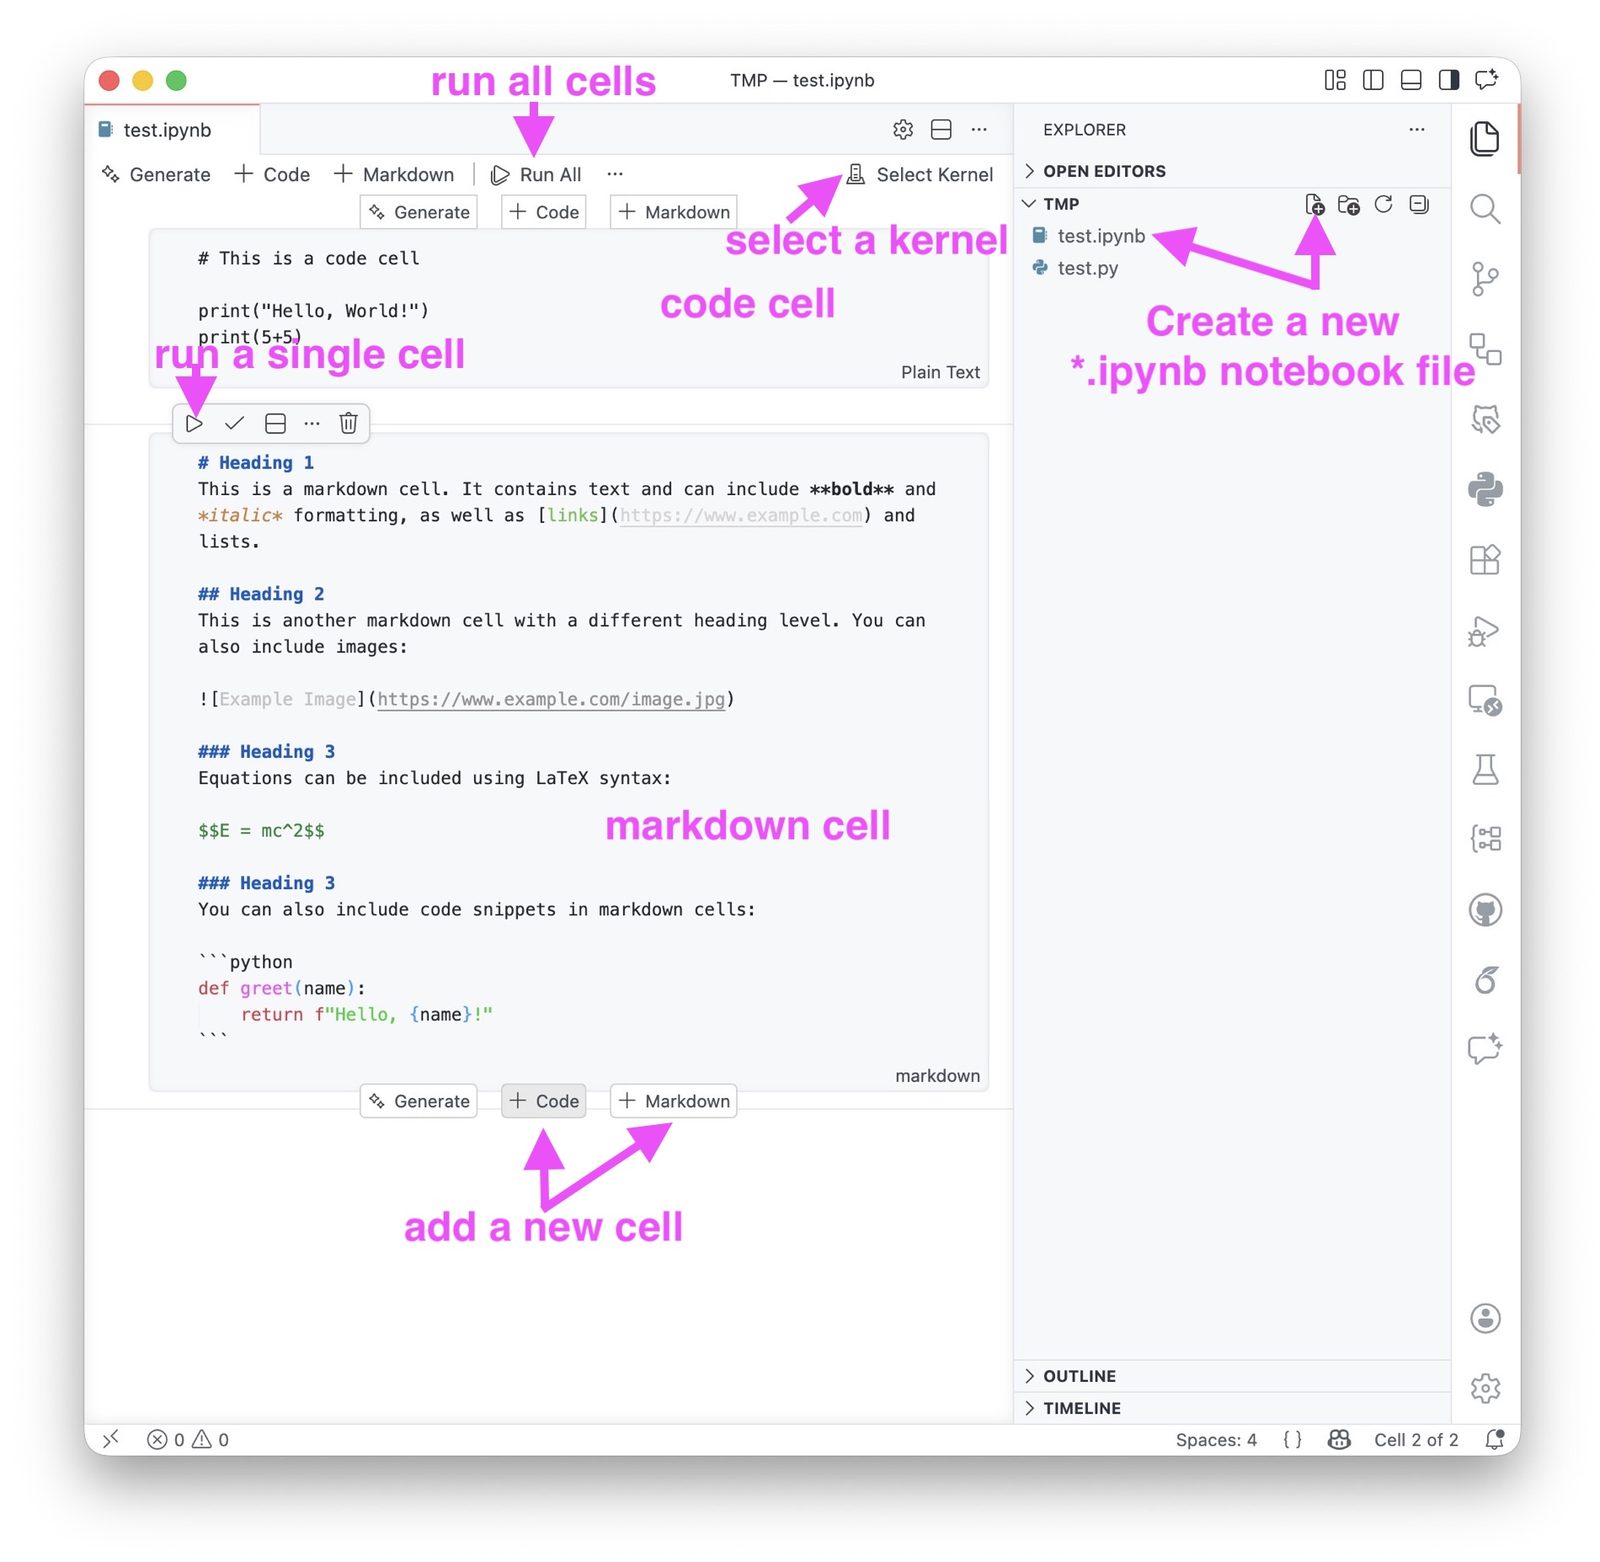
A Jupyter notebook opened in VS Code.
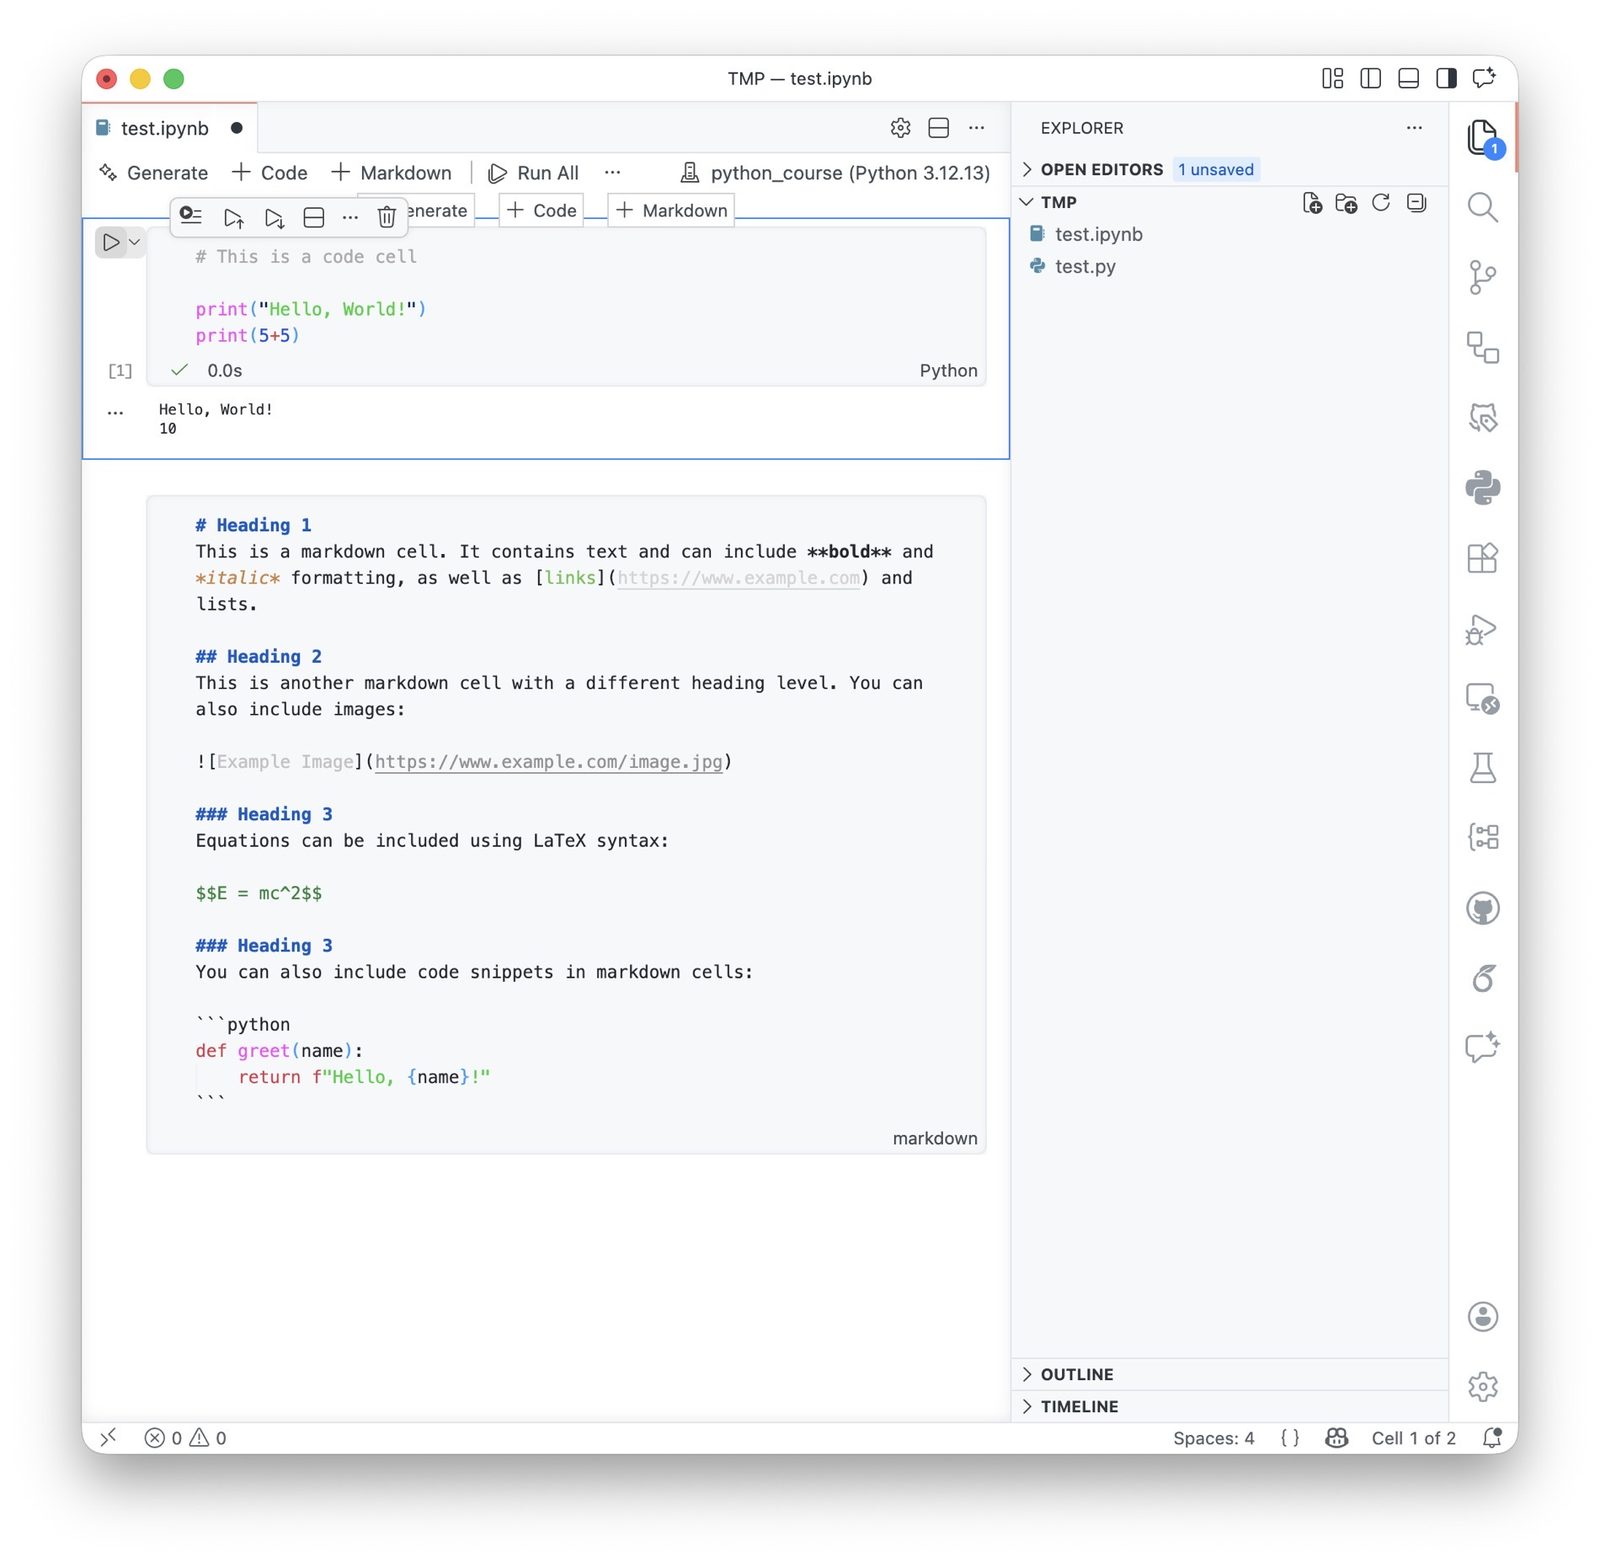
A new notebook in VS Code also consists of cells. These cells can be either code cells or Markdown cells, just as in the browser-based interface.
Running notebook cells in VS Code
Inside VS Code, each notebook cell has its own run button. When you execute a code cell, the output is shown directly below the cell.
Before executing cells, VS Code may ask you to select a kernel. The kernel is the Python environment that will be used to run the notebook. For this course, please select the kernel belonging to your python_course environment:
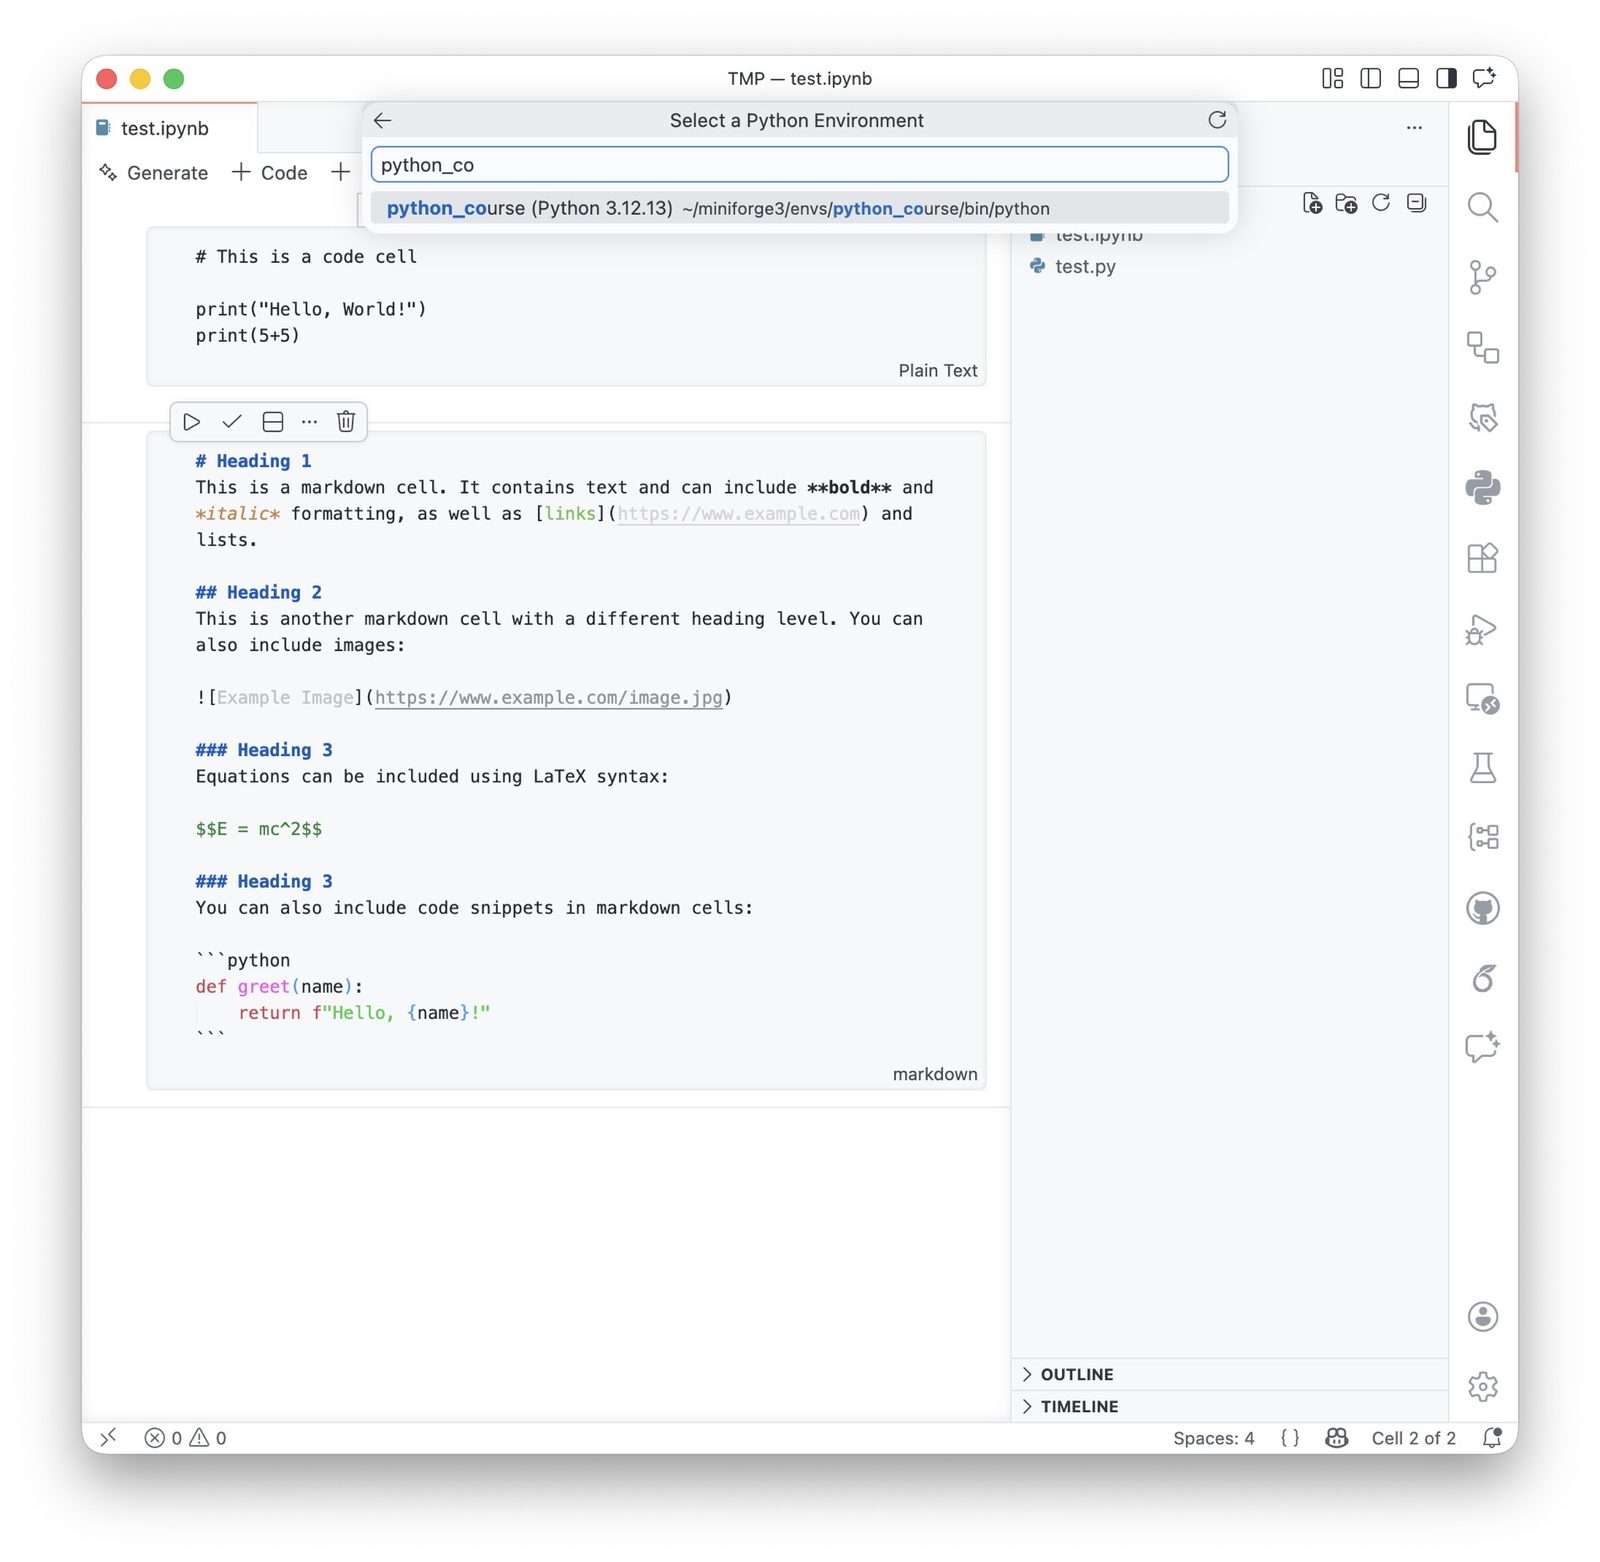
Selecting the Python kernel for the current notebook session.
This is important because otherwise the notebook might use the wrong Python installation or miss required packages.
Example of an executed code cell in a VS Code Jupyter notebook.
Markdown cells in VS Code
Markdown cells work in the same way as in the browser-based notebook interface. You can use them to structure your notebook, add explanations, and write formatted text between code cells.
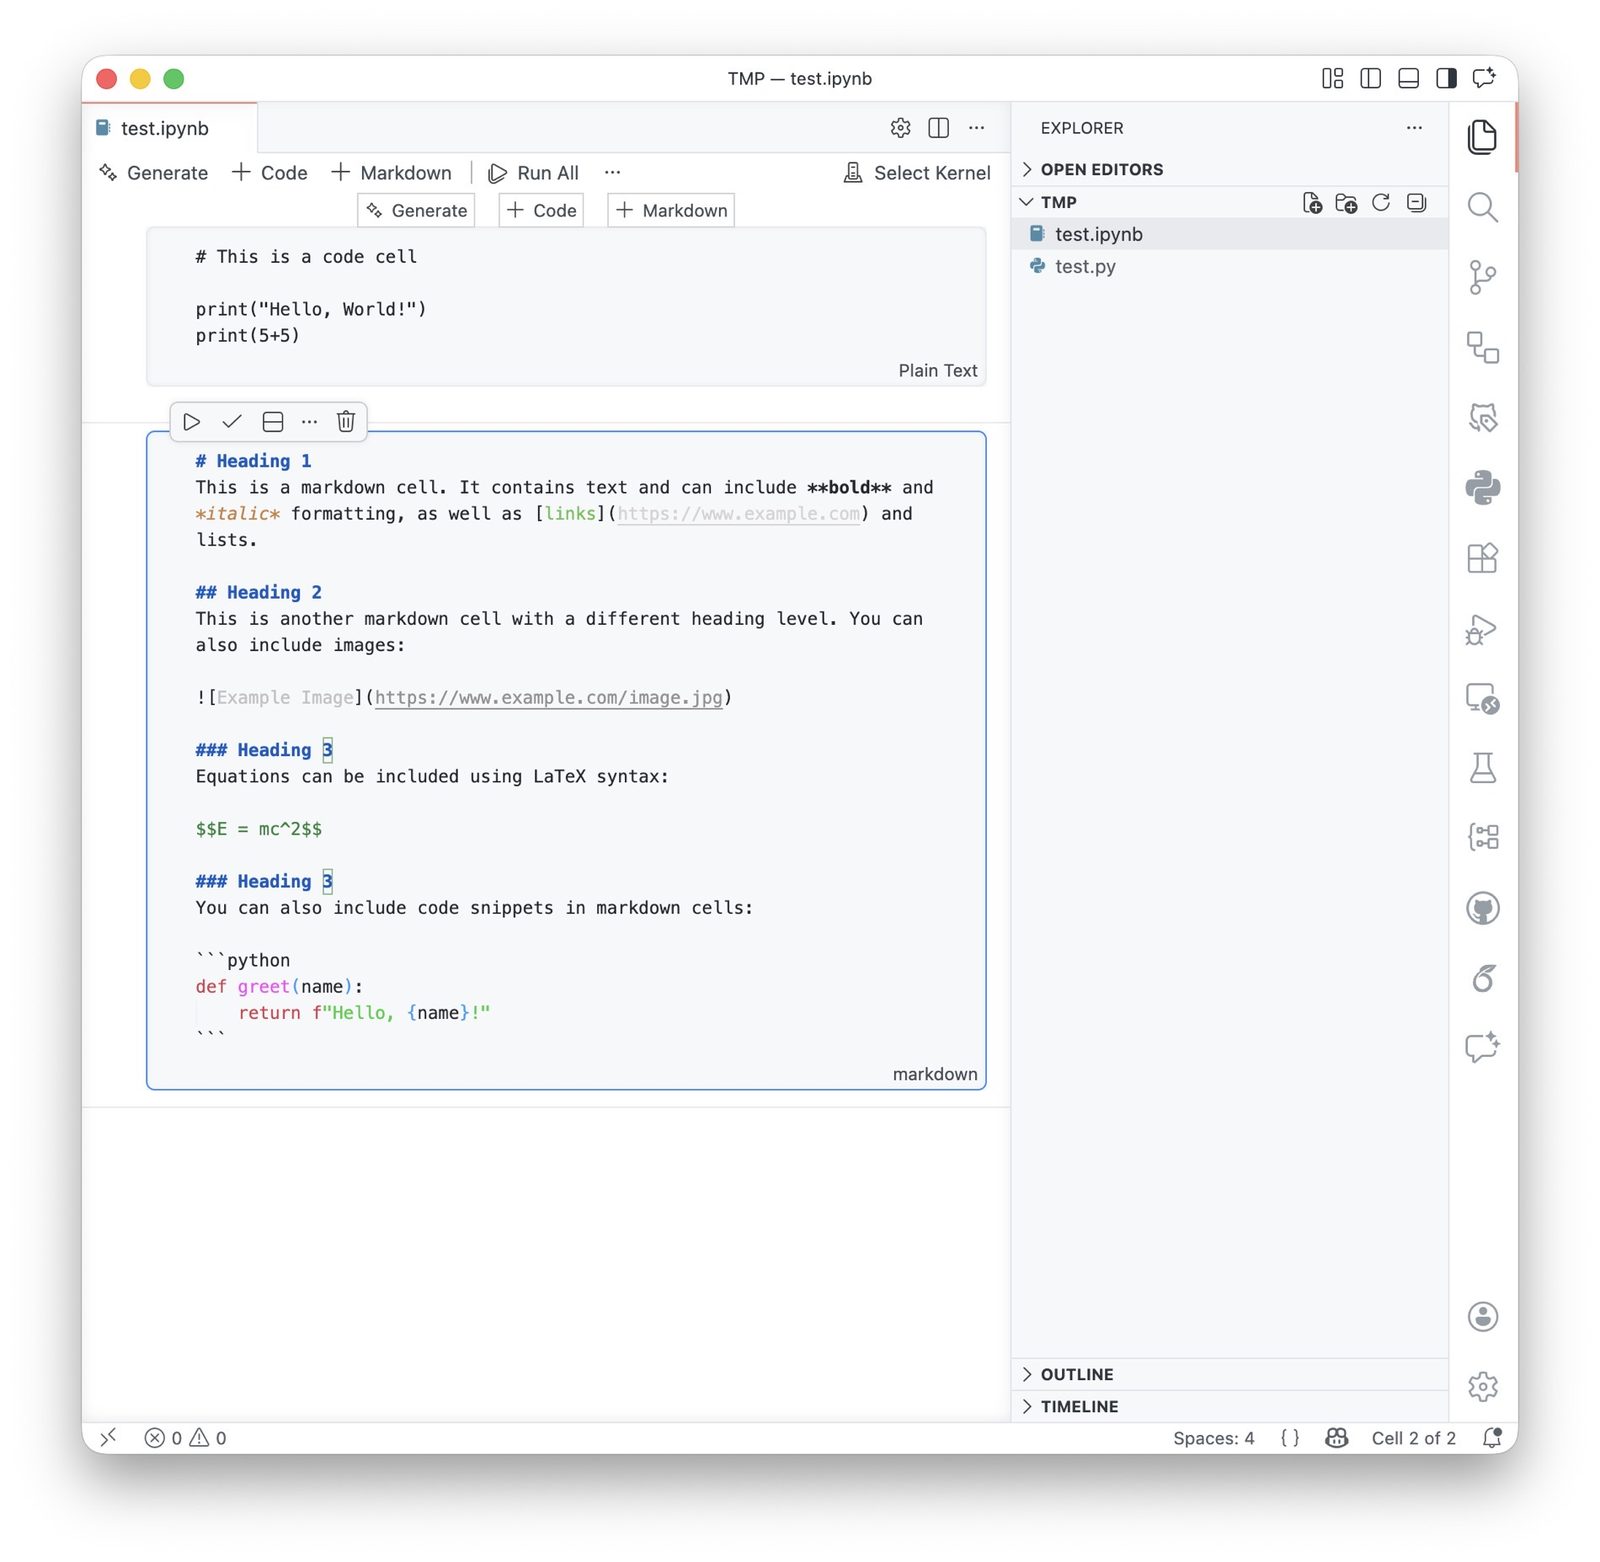
A code and a raw Markdown cell in VS Code Jupyter notebook.
This is one of the main strengths of Jupyter notebooks: They allow you to combine executable code with human readable explanation in a single document.
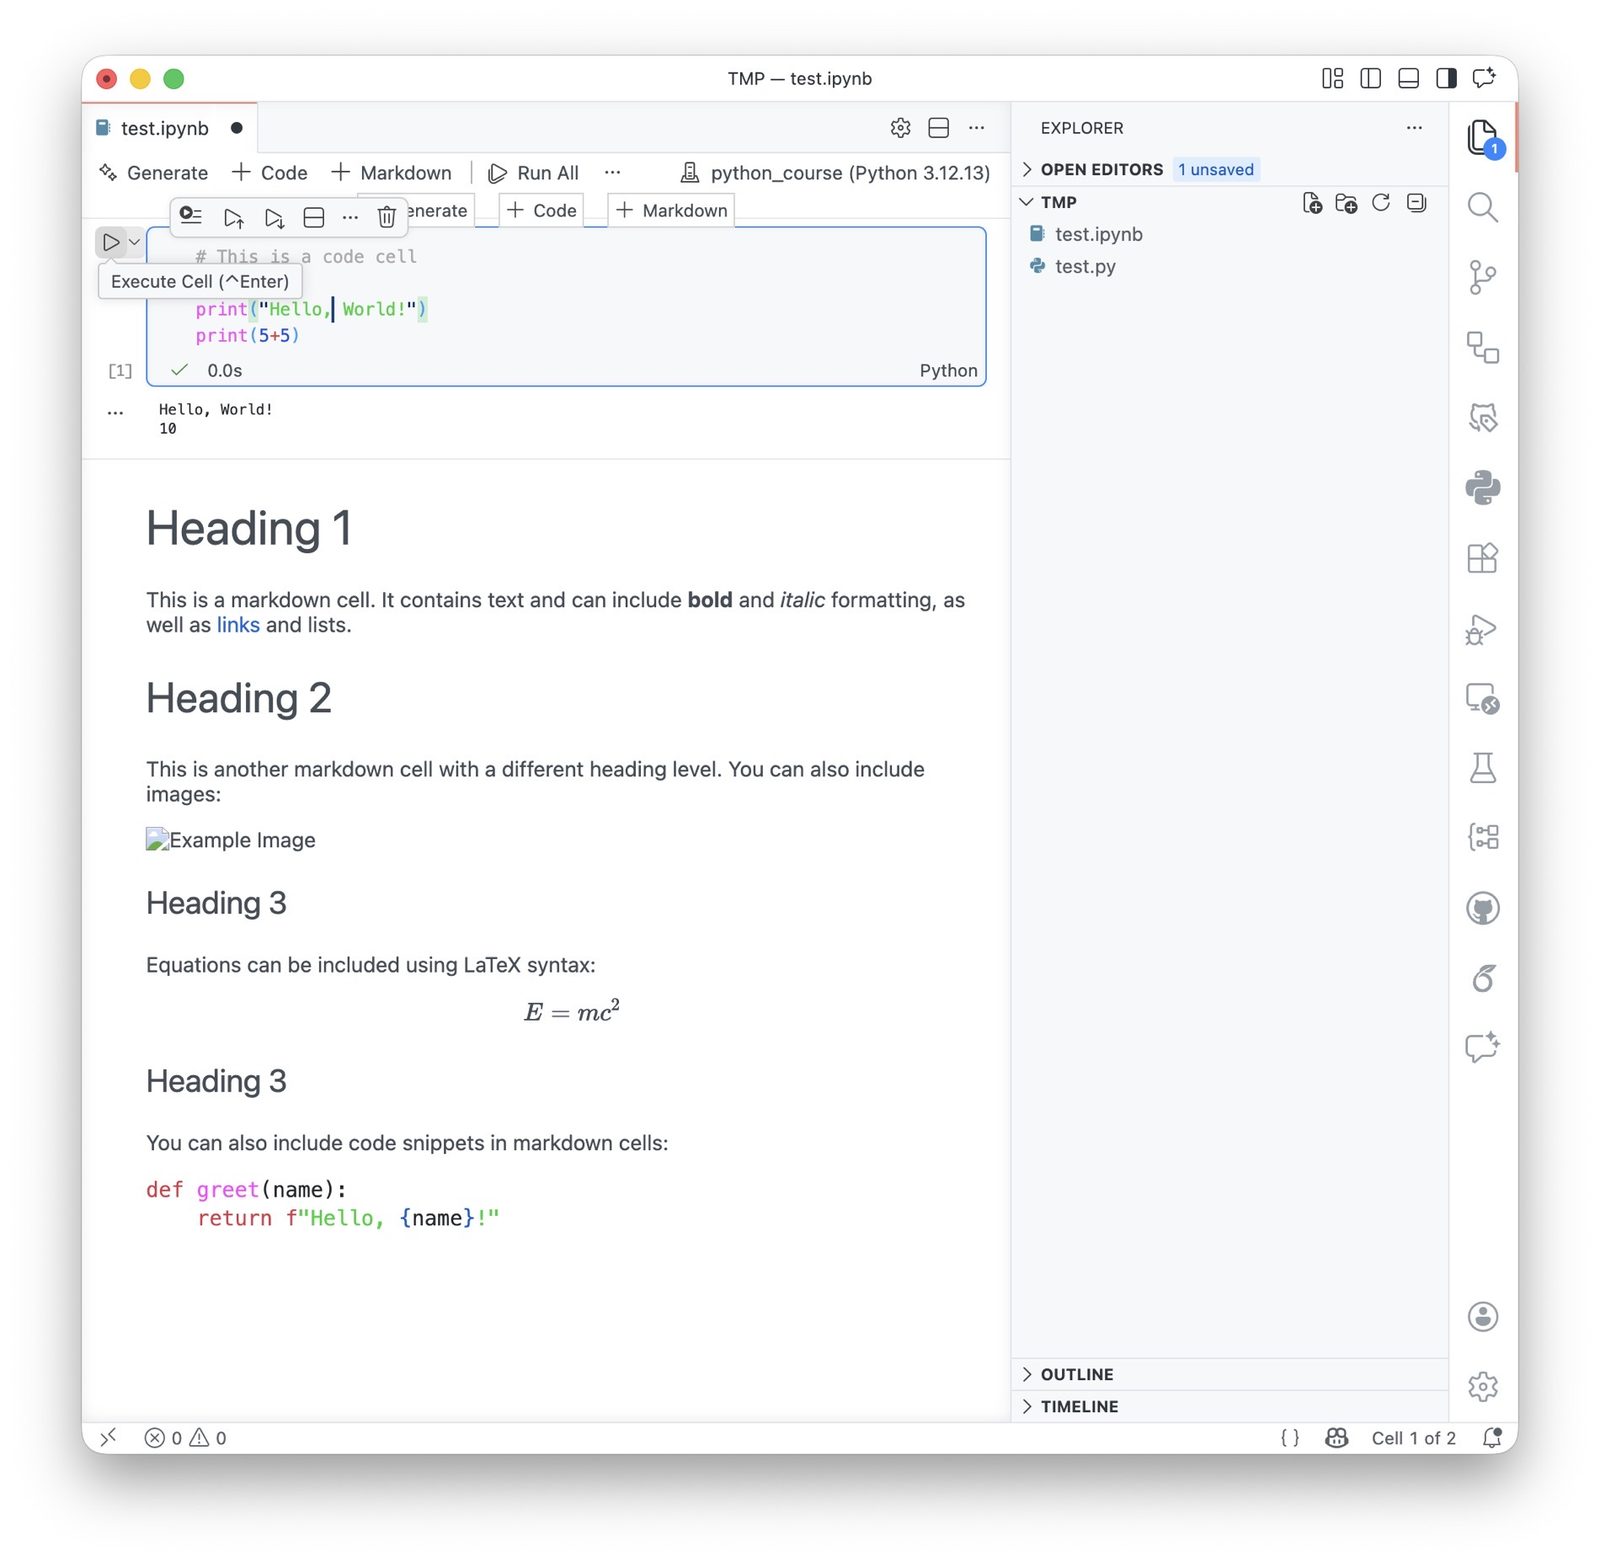
The same Markdown cell rendered.
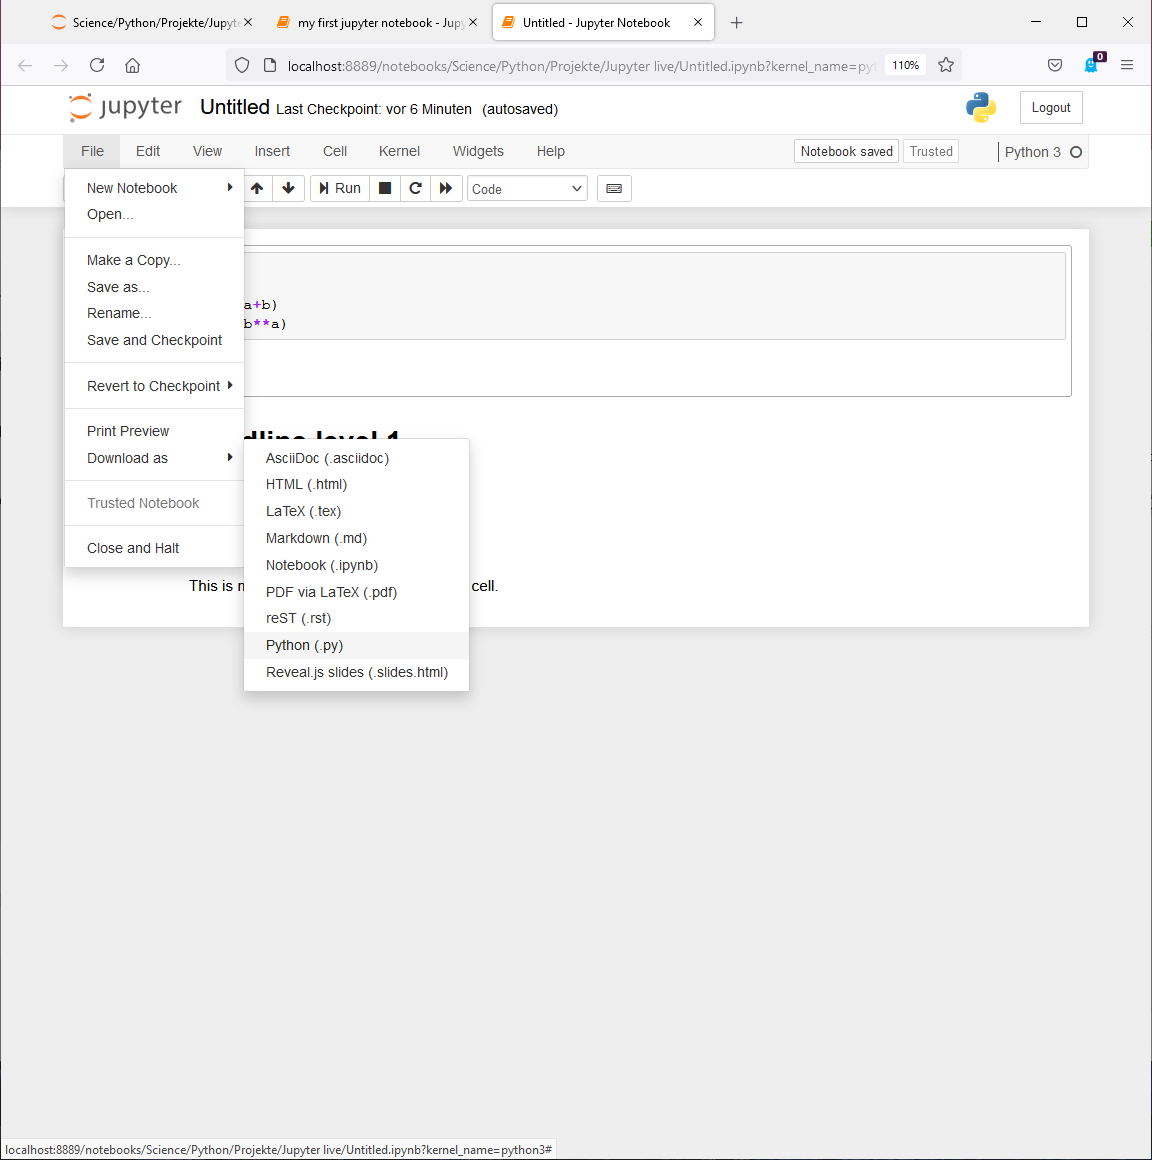
Converting a Jupyter notebook into a Python script
A Jupyter notebook file is not a plain Python script. It stores not only code, but also metadata, cell structure, and outputs. If needed, you can export a notebook as a Python script. In the browser-based Jupyter interface, this can be done via the export or download menu:
Similarly, in VS Code you can export a notebook as a Python script via the Command Palette. The resulting .py file will contain the code of all code cells, but not the Markdown cells or the outputs. The code from different cells will be separated by comments indicating the original cell structure.
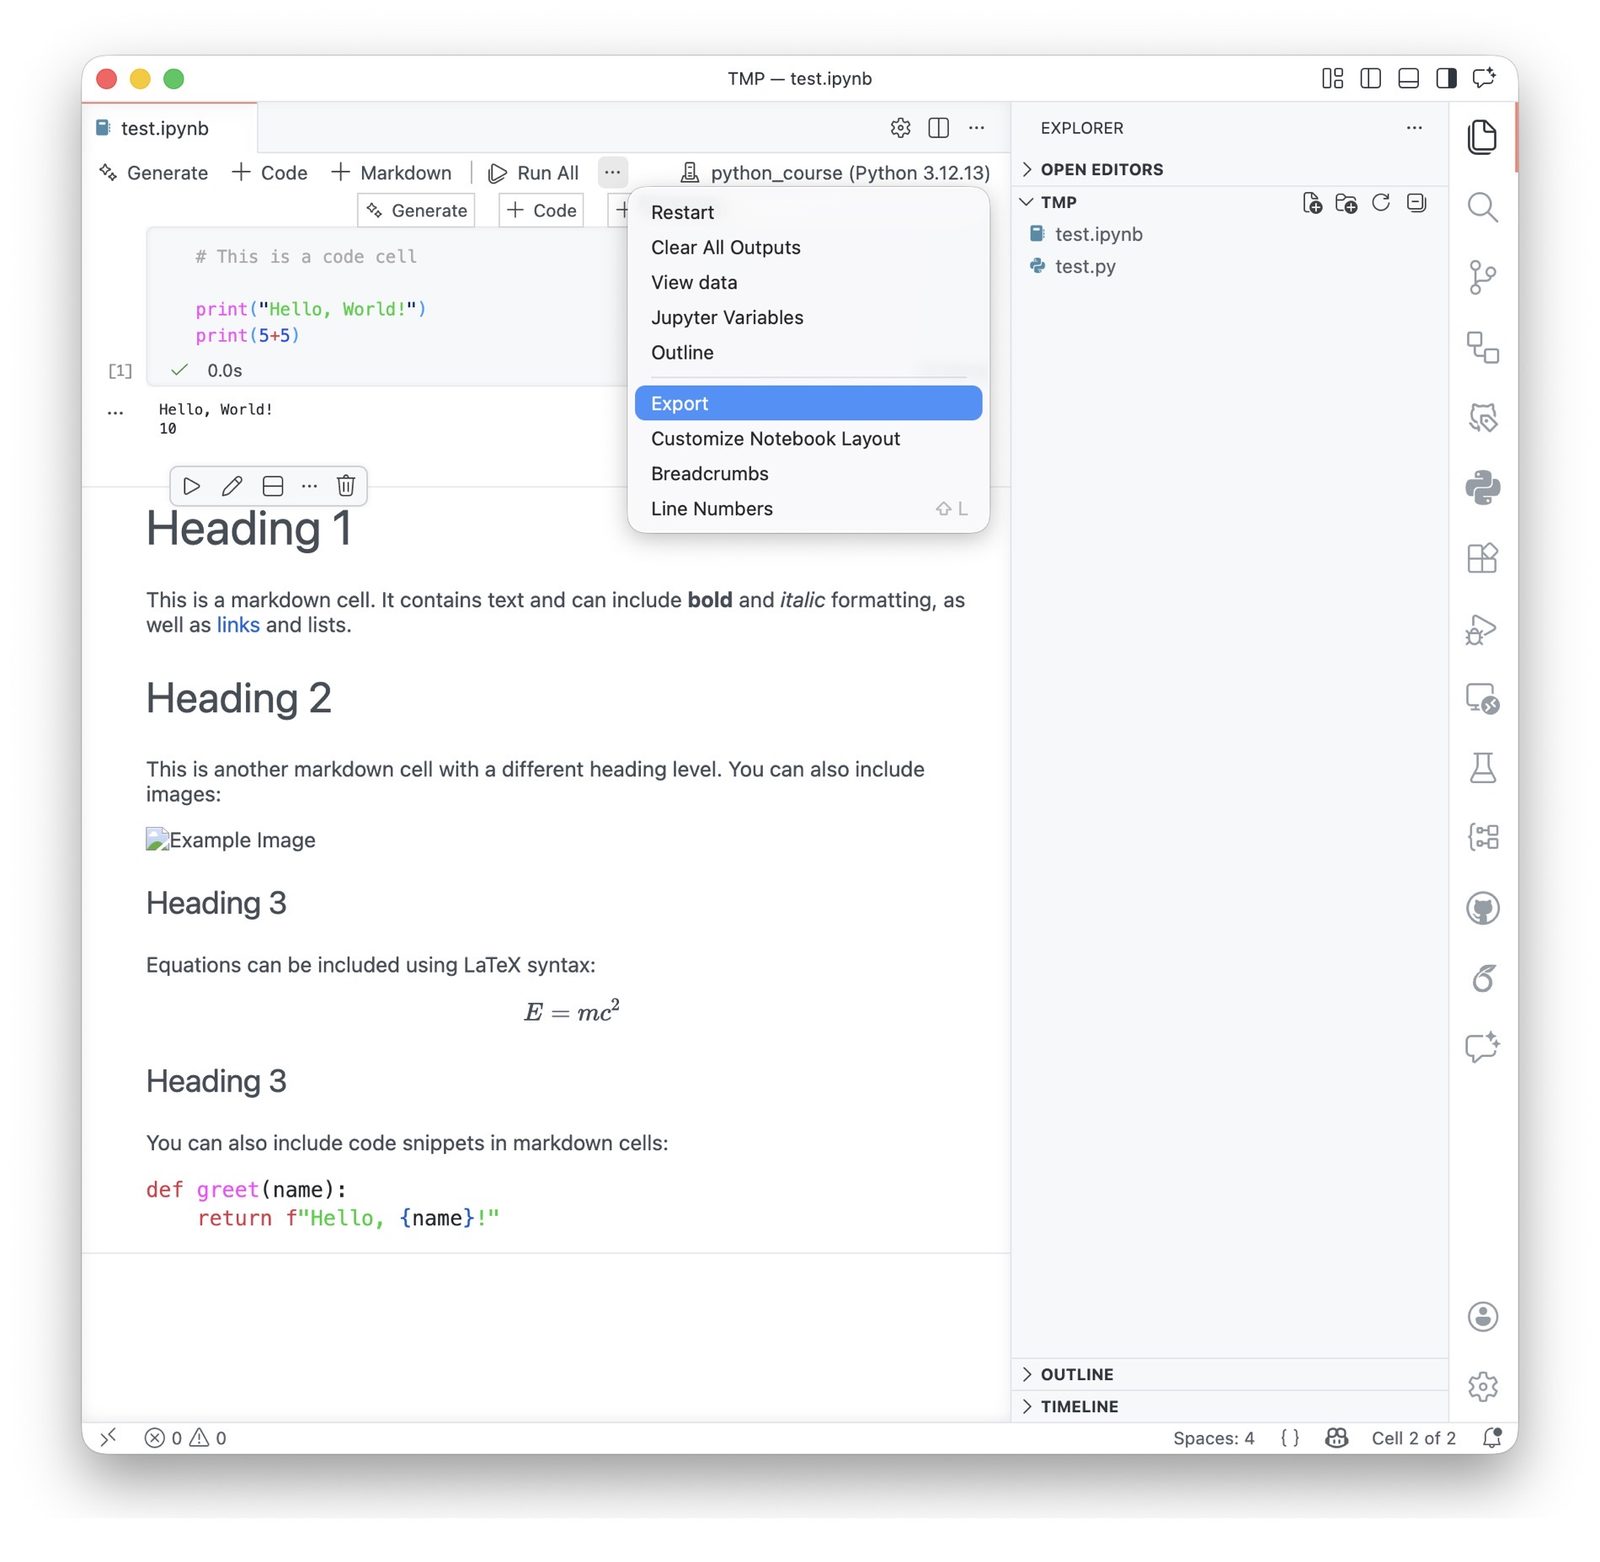

Exporting a Jupyter notebook to a Python script in VS Code.
This can be useful if you want to transform an exploratory notebook into a more standard Python script.
Clearing all cell outputs
Sometimes it is useful to remove all output that has accumulated below the cells. This can make the notebook cleaner and easier to read.
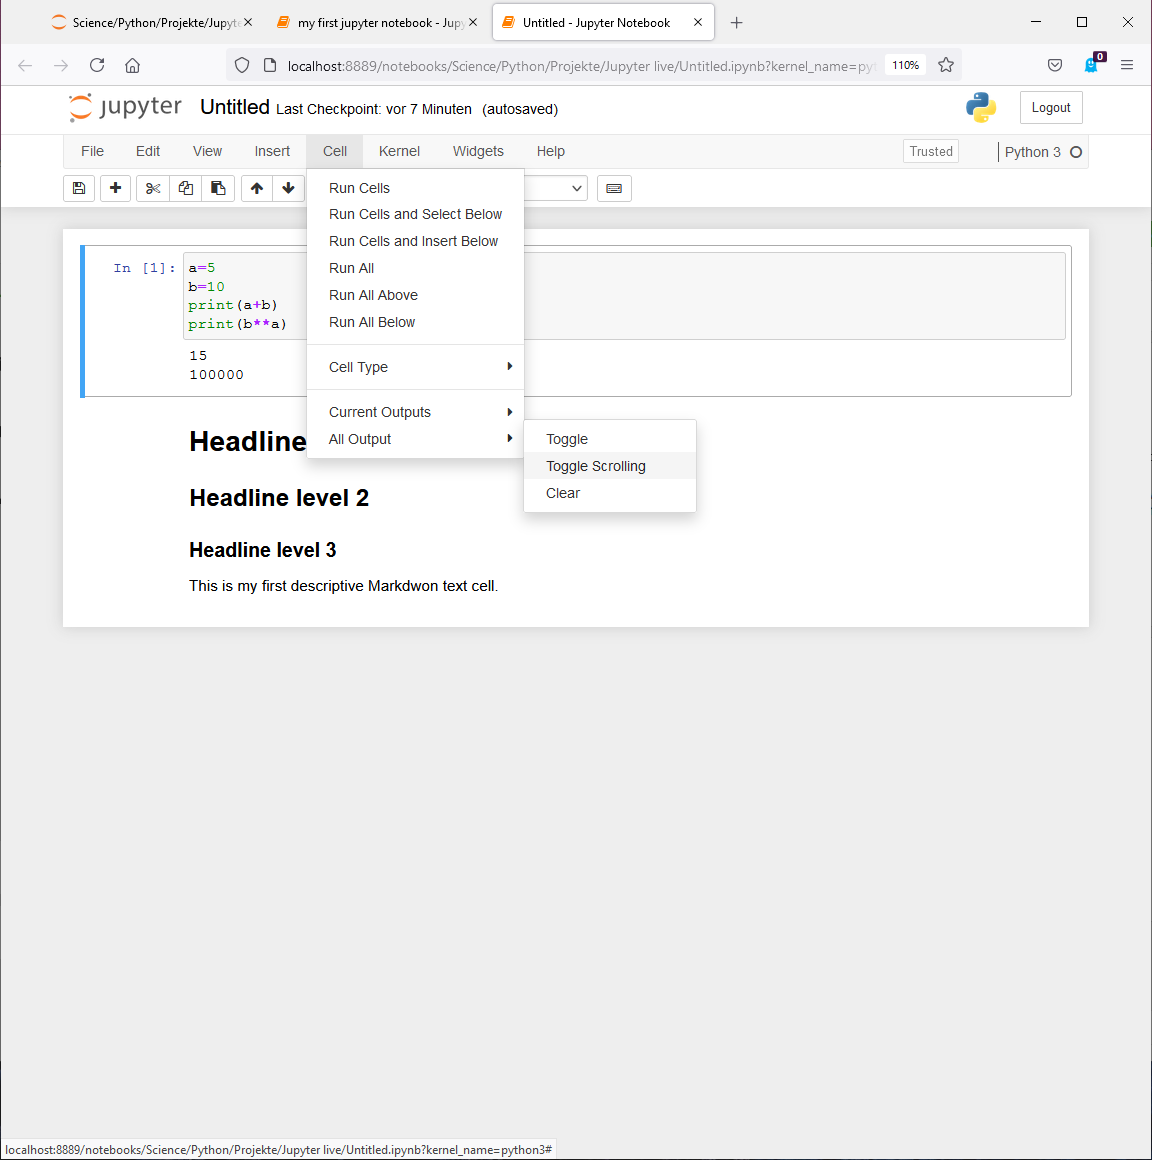
In the browser-based Jupyter interface, you can do this via the menu for clearing outputs:
VS Code also offers corresponding notebook commands for clearing cell outputs.
Useful keyboard shortcuts
The following shortcuts are particularly useful in Jupyter notebooks:
| Shortcut | Description |
|---|---|
| B | creates a new code cell below the current cell |
| X | deletes the selected cell |
| M | converts the selected cell into a Markdown cell |
| Y | converts the selected cell into a code cell |
| Ctrl/CMD + Return | executes the currently selected cell |
| Cursor arrows up/down | navigate between cells |
How to use the provided course notebooks
I will provide all course notebooks through the course GitHub repositoryꜛ. We will now clone it directly in VS Code. This has the advantage that the folder structure remains intact and that it is easier to update the material later if needed.
Cloning the course repository in VS Code
Please open a new VS Code window. In the start window, click on Clone Git Repository. Then paste the repository URLꜛ of the course into the input field.
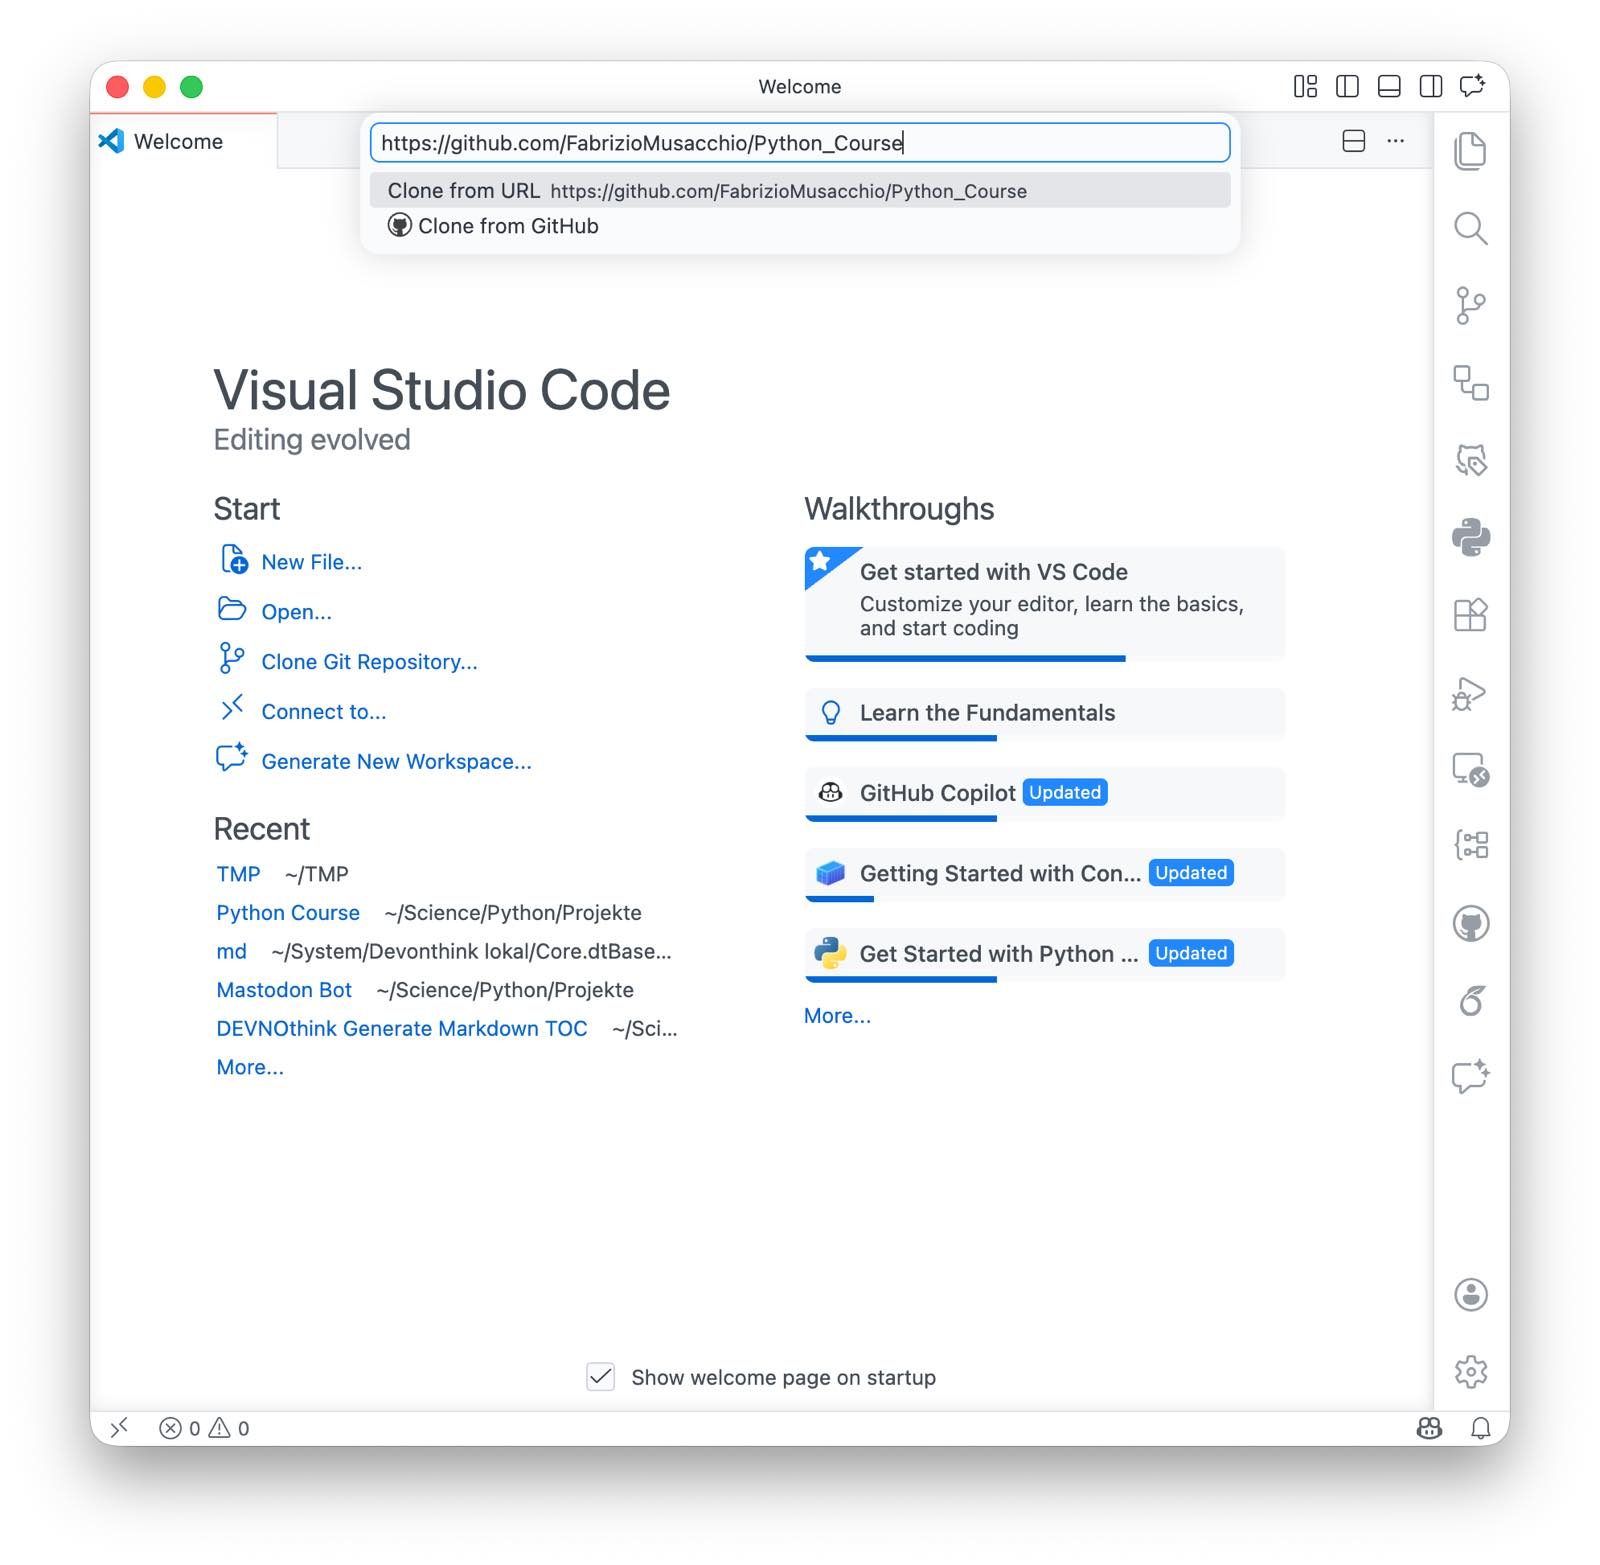
Cloning a GitHub repository using VS Code’s start window.
Next, VS Code will ask you where the repository should be stored on your computer. Choose or create a suitable local folder where you want to keep your course material. For example, you may create a folder such as Documents/python_course/.
After selecting the destination folder, VS Code will download the repository and store a complete local copy there.
Once the cloning process is finished, VS Code will usually ask whether you want to open the cloned repository. Confirm this, so that the course folder opens directly in a new VS Code window.
You should then see the repository and all course files in the Explorer on the left side of VS Code.
"Cloning"? "Repository"? "Git"? "GitHub"?
Since a detailled introduction to Git and GitHub would go beyond the scope of this course, here is a very brief explanation of the most important terms:
- Git is a version control system that allows you to track changes in your code and collaborate with others. It is a tool that runs on your computer.
- GitHub is a web-based platform that hosts Git repositories. It provides a user-friendly interface for managing Git repositories, sharing code, and collaborating with others. Alternative to GitHub are, for example, GitLab, Bitbucket, and Codeberg, which offer similar functionalities.
- A repository is a storage space for your code and its history. It can be hosted on GitHub or stored locally on your computer. A repository contains all the files, folders, and version history of a project.
- Cloning a repository means creating a local copy of a GitHub repository on your computer. This allows you to work with the code, make changes, and later push those changes back to GitHub if you want to share them.
For proceeding with the course material, you do not need to understand Git and GitHub in detail. Just follow the instructions for cloning the repository, and you will have all course files on your computer. If you are interested in learning more about Git and GitHub, here is a brief overview blog post that explains the basics for operating with Git and GitHub.
Opening the notebooks
Inside the cloned repository, navigate to the notebook files with the ending .ipynb and open them directly in VS Code.
Before running any notebook cells, make sure that the correct kernel is selected, namely the kernel from your python_course environment.
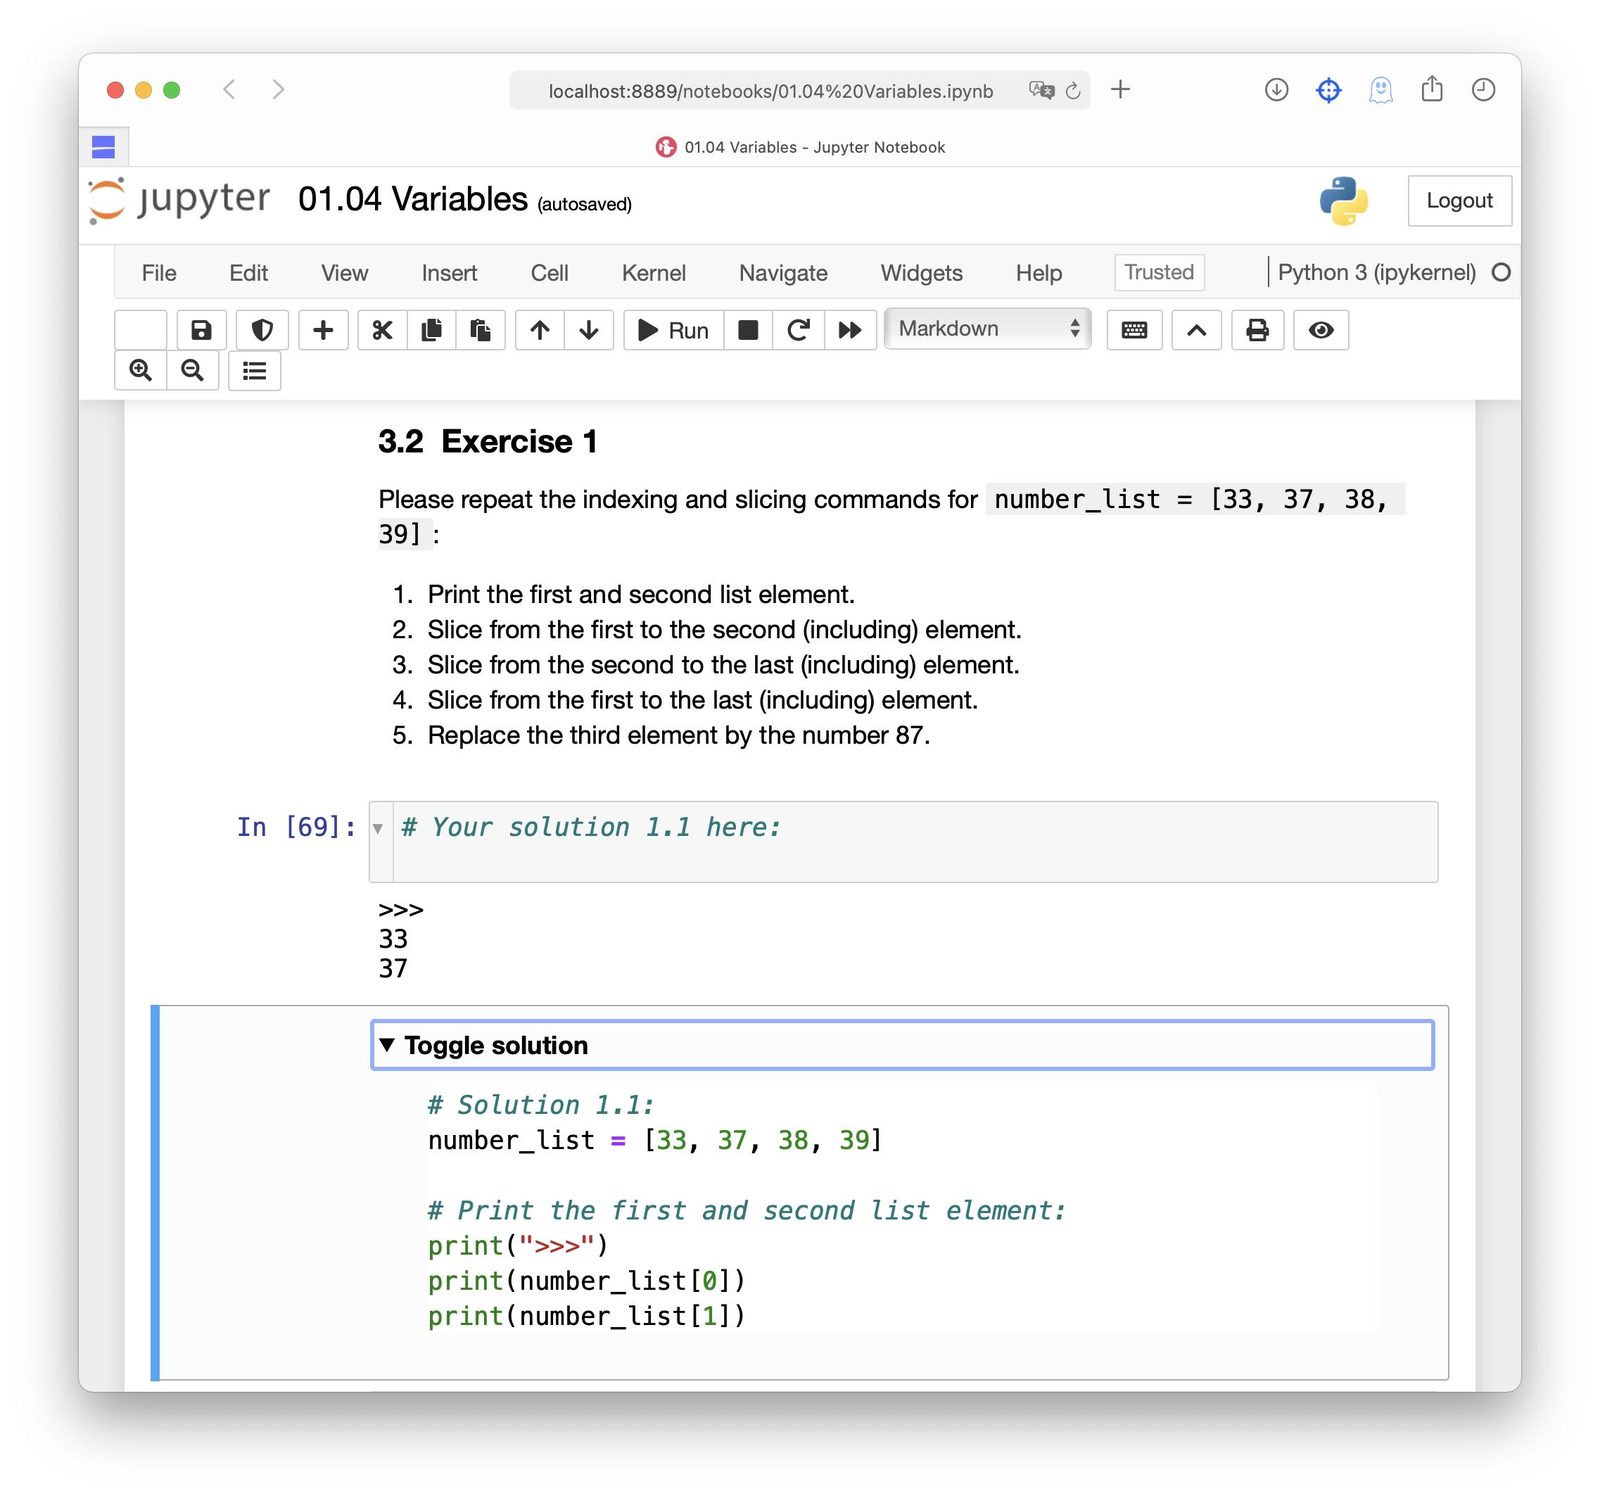
Working on the notebooks
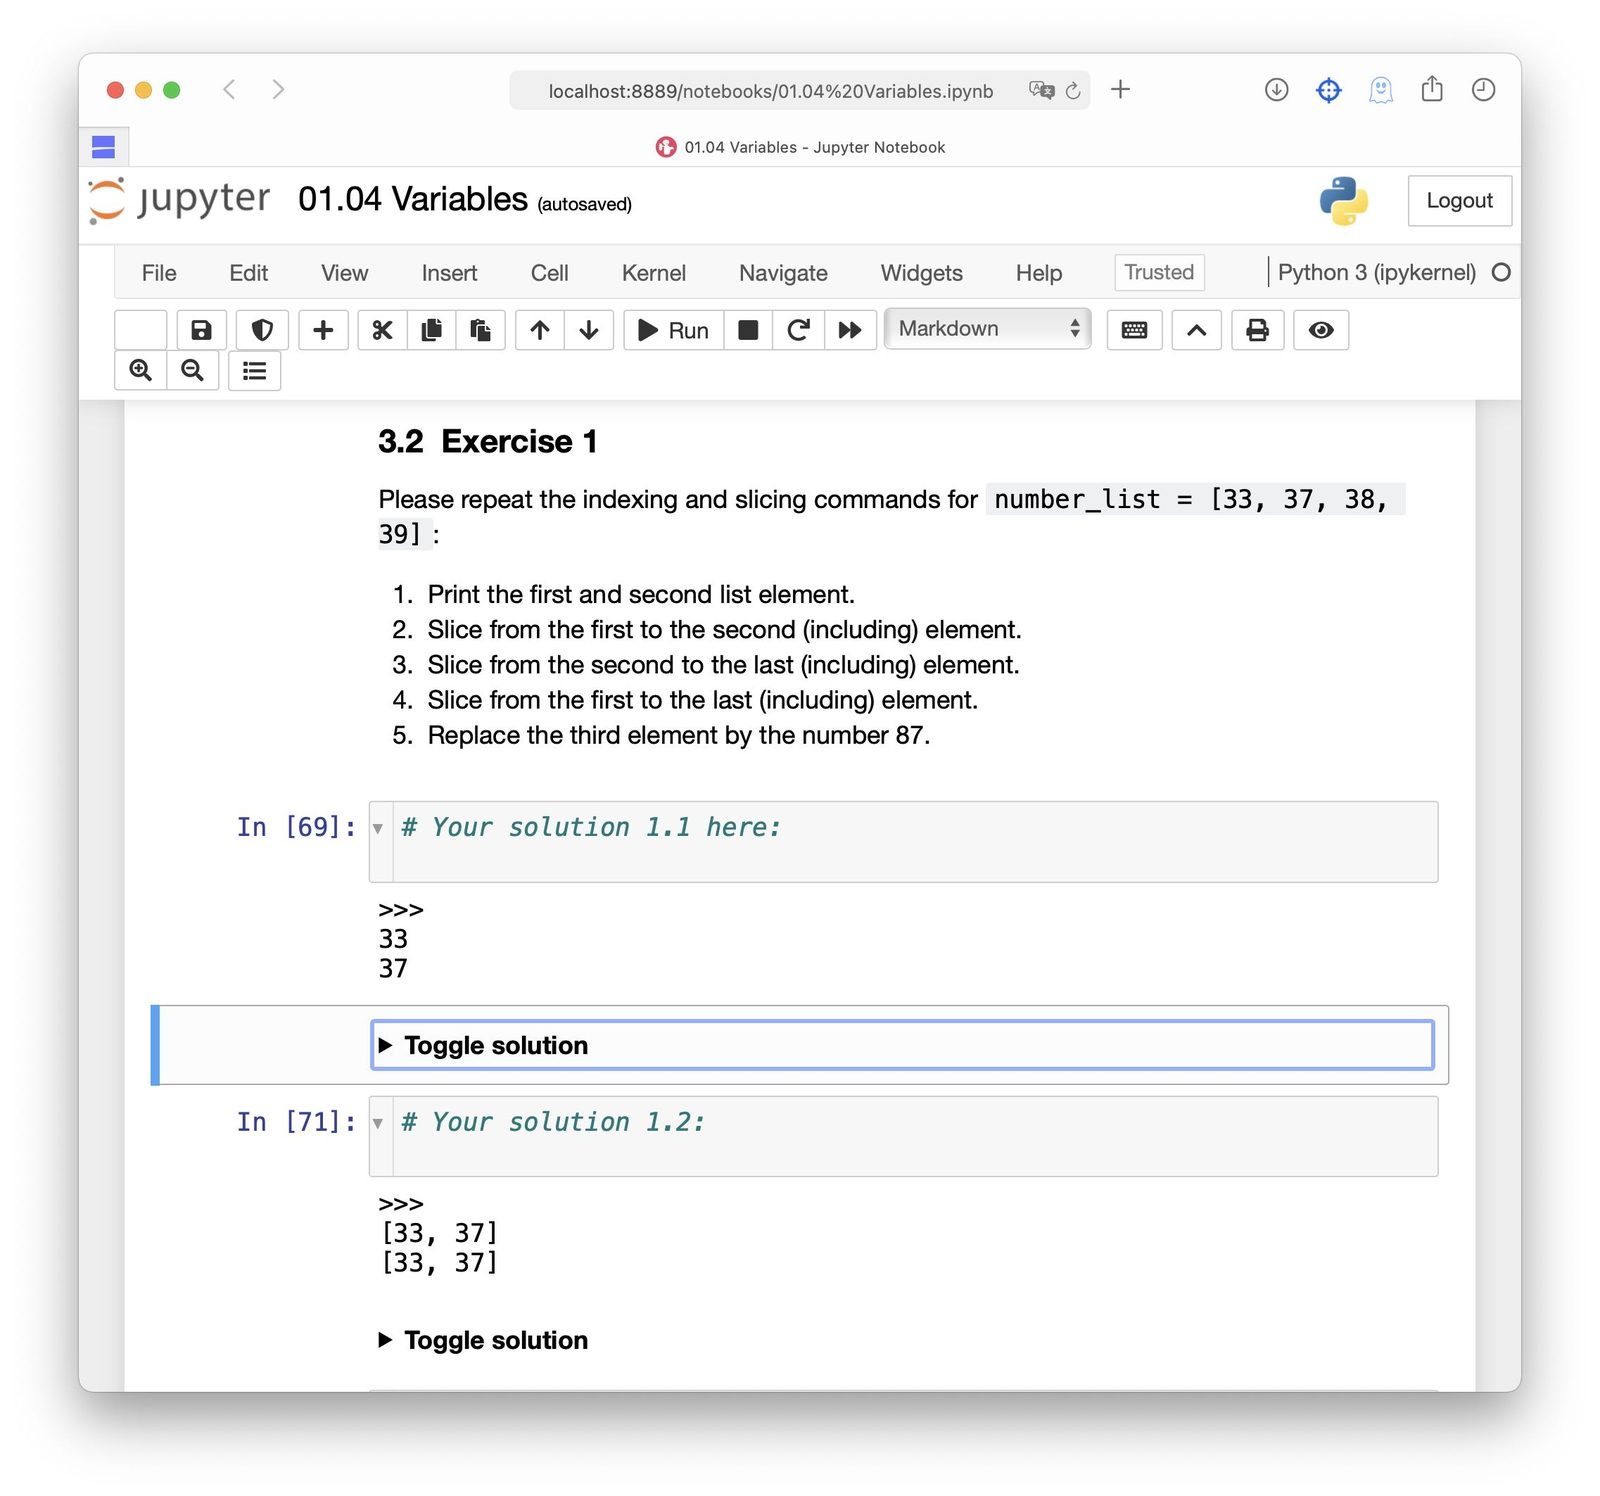
The notebooks contain exercises that you will work on either during the course or as homework. Always attached to an exercise, you can find the corresponding solution. These solutions should be folded by default, and you can unfold them by clicking on Toggle solution.
Please do not unfold these solutions before we have discussed the corresponding exercise in the plenum.
After we have discussed a solution, you may, for example, copy the unfolded solution and paste it into the Your solution here cell if your own solution is not working correctly.
Info: Viewing the Jupyter notebooks on GitHub will not show the Toggle solution button, and the solution therefore cannot be displayed there. In your local Jupyter environment, as well as in Google Colab and Binder, the Toggle solution button is displayed correctly and the solutions can be toggled.
Jupyter notebook extensions expand the functionality of your Jupyter environment with many useful additional functions. To enable them, follow the instructions in this blog post, which also shows how to enable a Variable Explorer.
Install packages from within a Jupyter notebook: You can also install additional packages from within a Jupyter notebook. Just execute the following commands in a code cell once,
import sys
!{sys.executable} -m pip install <package>
and delete or comment them after their execution.
Jupyter vs. and (!) pure Python script
So, we have pure Python scripts using Spyder, and we have Jupyter notebooks, to do the same tasks just in a browser. Which solution should we use now? Which one is the better one?
I think that it’s not a question of choosing between both, but to use both complementary. E.g., the entire course will be held via Jupyter notebooks. You can download the notebooks and write your own comments into it as well as your own solutions. From time to time I will ask you to put your solutions into a pure Python script in order to become more familiar with it. But in general, you can just work with Jupyter notebooks throughout this course and beyond, when you start to solve your own problems.
Nevertheless, you can do all the same also with pure Python scripts. May be not now, but later you will reach a point, where you might think that a pure Python script is more flexible regarding editing, executing and exchanging. Especially when you design huge processing pipelines, I recommend to use pure Python scripts rather than Jupyter notebooks. But this is fully up to you. There is also no restriction to use both at the same time, e.g., write more complex code in pure Python scripts, but run and control your pipeline via a Jupyter notebook.
Feel free to find your own coding workflow and use what suits you best and you feel comfortable with.