Minimal Mistakes Cheat Sheet
This Cheat Sheet gives a quick overview of the available commands and options for creating content with the Jekyll theme Minimal Mistakesꜛ by Michael Roseꜛ. It does not cover default Markdown commands (please refer to the Markdown guide) or the setup of the theme (please refere to the Minimal Mistakes documentation website ꜛ).
![]()
In this post, we will cover the most important commands for styling and customizing our content using the Minimal Mistakesꜛ Jekyll theme developed by Michael Roseꜛ.
kramdown
The theme uses kramdown ꜛ, a library written in Ruby, that renders Markdown for Jekyll websites ꜛ. kramdown allows the usage of block ꜛ and inline ꜛ attributes, which enables custom stylings to standard Markdown commands, e.g.,
Right aligned text.
{: .text-right}
The kramdown magic: What kramdown additionally to the standard Markdown rendering does, is, e.g., to enable the usage of CSS classes defined in the background via a handy command in the foreground. Say, we have the following CSS class defined somewhere:
.green {
  color: green;
}
This class can now be applied via:
This text is rendered in green.
{: .green}
This text is rendered in green.
kramdown commands can include the calls of several CSS style definitions, e.g.:
This text is rendered in green and bold.
{: .green .bold}
This text is rendered in blue and bold.
See more examples, e.g., here ꜛ.
Posts
Add posts in the _posts ꜛ folder by following the naming convention YYYY-MM-DD-name-of-post.extension.
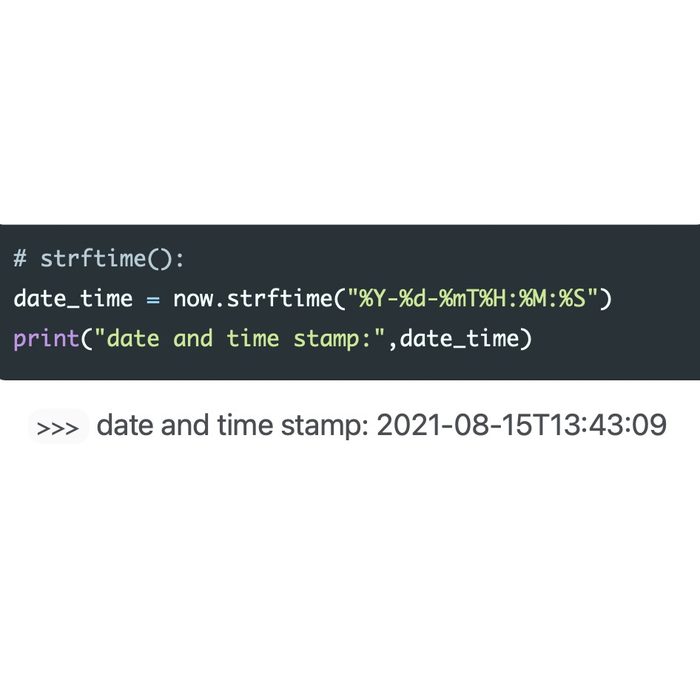
The YAML front matter can include the following date metadata (following the guidelines of strftime):
date:               YYYY-MM-DD HH:mm:S +0000
last_modified_at:   YYYY-MM-DD HH:mm:S +0000
Linking to posts: There is an extra Liquid tag to link to posts: post_url.
Future posts
To create a future post, simply set its date in the YAML front matter into the future. Also, set search: exclude so that the future post is hidden in the search of your website (if you are using Lunr as the search provider). And don’t forget to set future: false in your _config.yml. If you want to view the post in your local built, use the --future flag to build your site.
Fontawesome
Link to fontawesome ꜛ. Usage:
<i class="fab fa-researchgate" aria-hidden="true"></i>
output:
Emojis: As an alternative to fontawesome you can also use Emojis ![]() , which are enabled via the Jemoji plugin. Read here how to install the plugin.
, which are enabled via the Jemoji plugin. Read here how to install the plugin.
Unicode: Another alternative to fontawesome are Unicode letters. Read here how to insert, e.g., some fancy styled Unicode letters on your website.
Images
You can embed images in three different ways:
Via Markdown
You can add kramdown align tags to the default Markdown image inclusion command:
{: .align-center}
{: .align-right}
{: .align-left} You can also place some text right after the image command, and it will nicely wrap around the image.
You can further advance the style settings of your image, .e.g.:
{: .align-center style="width: 5%;"}
[{: .align-center style="width: 10%;"}](/assets/images/pixel_tracker_logo_80px.png "Title shown in gallery view")
Some custom styled caption with a [_link_](#via-markdown).
{: .align-caption}
![]()
![]() Some custom styled caption with a link.
Some custom styled caption with a link.
Via HTML
Embedding images via HTML code enables the setting of further image properties like the image width or a caption:
<figure style="width: 80px" class="align-center">
  <a href="/assets/images/pixel_tracker_logo_120px.jpg" title="The Pixel Tracker logo" alt="The Pixel Tracker logo">
  <img src="/assets/images/pixel_tracker_logo_120px.jpg" alt=""></a>
  <figcaption>Image caption.</figcaption>
</figure>
You can create galleries by adding more images to the HTML code. Please, note the class assignments half and third that control the gallery grid layout:
<figure class="half">
  <a href="/weekend_stories_pics/2021/2102_Corona_Fruehling/2102 Corona Fruehling 8170-1v (21. Feb. 2021).jpg">
  <img src="/weekend_stories_pics/2021/2102_Corona_Fruehling/2102 Corona Fruehling 8170-1v (21. Feb. 2021).jpg"></a>

  <a href="/weekend_stories_pics/2021/2102_Corona_Fruehling/2102 Corona Fruehling 8171-1v (21. Feb. 2021).jpg">
  <img src="/weekend_stories_pics/2021/2102_Corona_Fruehling/2102 Corona Fruehling 8171-1v (21. Feb. 2021).jpg"></a>

  <figcaption>Gallery with a two image per row grid.</figcaption>
</figure>
_1600px.jpg)
_1600px.jpg)
<figure class="third">
  <a href="/weekend_stories_pics/2021/2102_Corona_Fruehling/2102 Corona Fruehling 8156-1v (16. Feb. 2021).jpg">
  <img src="/weekend_stories_pics/2021/2102_Corona_Fruehling/2102 Corona Fruehling 8156-1v (16. Feb. 2021).jpg"></a>

  <a href="/weekend_stories_pics/2021/2102_Corona_Fruehling/2102 Corona Fruehling 8170-1v (21. Feb. 2021).jpg">
  <img src="/weekend_stories_pics/2021/2102_Corona_Fruehling/2102 Corona Fruehling 8170-1v (21. Feb. 2021).jpg"></a>

  <a href="/weekend_stories_pics/2021/2102_Corona_Fruehling/2102 Corona Fruehling 8171-1v (21. Feb. 2021).jpg">
  <img src="/weekend_stories_pics/2021/2102_Corona_Fruehling/2102 Corona Fruehling 8171-1v (21. Feb. 2021).jpg"></a>

  <a href="/weekend_stories_pics/2021/2102_Corona_Fruehling/2102 Corona Fruehling 8161-1v (21. Feb. 2021).jpg">
  <img src="/weekend_stories_pics/2021/2102_Corona_Fruehling/2102 Corona Fruehling 8161-1v (21. Feb. 2021).jpg"></a>

  <a href="/weekend_stories_pics/2021/2102_Corona_Fruehling/2102 Corona Fruehling 8164-1v (21. Feb. 2021).jpg">
  <img src="/weekend_stories_pics/2021/2102_Corona_Fruehling/2102 Corona Fruehling 8164-1v (21. Feb. 2021).jpg"></a>

  <a href="/weekend_stories_pics/2021/2102_Corona_Fruehling/2102 Corona Fruehling 8175-1v (25. Feb. 2021).jpg">
  <img src="/weekend_stories_pics/2021/2102_Corona_Fruehling/2102 Corona Fruehling 8175-1v (25. Feb. 2021).jpg"></a>

  <figcaption>Gallery with a three image per row grid.</figcaption>
</figure>
_1600px.jpg)
_1600px.jpg)
_1600px.jpg)
_1600px.jpg)
Centered figure captions: Add the line text-align: center; to the figcaption section in _base.css if you prefer centered figure captions.
Via Liquid
You can embed images also via Liquid tags:
---
title: "Title of my page"
date: 2021-08-10
gallery1:
  - url: /weekend_stories_pics/2021/2102_Corona_Fruehling/2102 Corona Fruehling 8170-1v (21. Feb. 2021).jpg
    image_path: /weekend_stories_pics/2021/2102_Corona_Fruehling/2102 Corona Fruehling 8170-1v (21. Feb. 2021).jpg
    alt: "placeholder image 1"
    title: "Image 1 title caption"
  - url: /weekend_stories_pics/2021/2102_Corona_Fruehling/2102 Corona Fruehling 8164-1v (21. Feb. 2021).jpg
    image_path: /weekend_stories_pics/2021/2102_Corona_Fruehling/2102 Corona Fruehling 8164-1v (21. Feb. 2021).jpg
    alt: "placeholder image 2"
    title: "Image 2 title caption"
gallery2:
  - url: /weekend_stories_pics/2021/2102_Corona_Fruehling/2102 Corona Fruehling 8175-1v (21. Feb. 2021).jpg
    image_path: /weekend_stories_pics/2021/2102_Corona_Fruehling/2102 Corona Fruehling 8175-1v (21. Feb. 2021).jpg
    alt: "placeholder image 3"
    title: "Image 3 title caption"
---
{% include gallery id="gallery1" caption="This is a sample gallery with **Markdown support**." %}

{% include gallery id="gallery2"  caption="This is a sample gallery with **Markdown support**." %}
Header and teaser images
---
title: "Title of my page"
date: 2021-08-10
header:
  teaser: /weekend_stories_pics/2021/2102_Corona_Fruehling/2102 Corona Fruehling 8170-1v (21. Feb. 2021).jpg
  header: /weekend_stories_pics/2021/2102_Corona_Fruehling/2102 Corona Fruehling 8170-1v (21. Feb. 2021).jpg
  og_image: /weekend_stories_pics/2021/2102_Corona_Fruehling/2102 Corona Fruehling 8170-1v (21. Feb. 2021).jpg
---
The so-called OpenGraph ꜛ image defined in the og_image variable will be used in social media previews, e.g., on Twitter ꜛ or Facebook ꜛ, if no header image is set. If also no og_image is set, the site’s og_image (site.og_image) defined in the _config.yml will be used as a fallback. Read more about in the Minimal Mistakes documentation ꜛ.
Feature images in RSS feeds: The assigned og_image or teaser image also serves as a teaser for posts in your RSS feeds. Read here how to activate RSS or Atom feeds for your Jekyll website. I’ve experienced, that the defined teaser image won’t always show up in online RSS readers. feedly and inoreader use instead the first occurring image within the post; if the post contains no image, both online reader just display a blank placeholder.
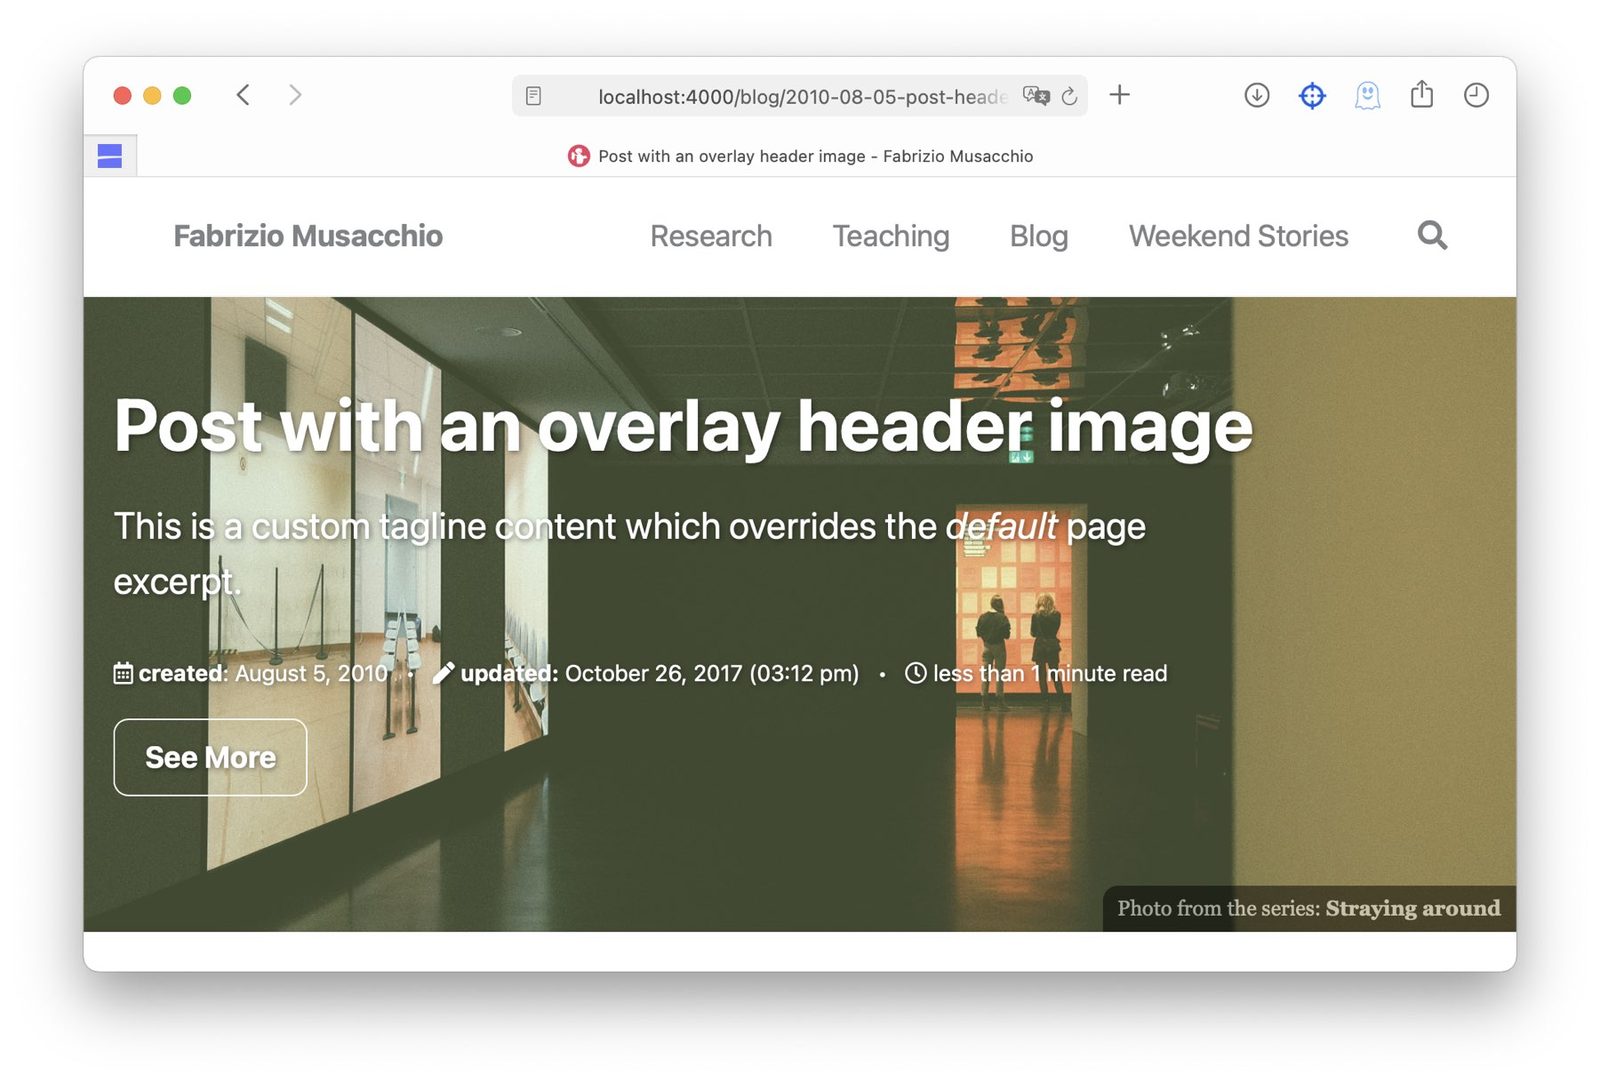
You can also define overlay header images:
---
title: "Post with an overlay header image"
date: 2021-08-10
header:
  overlay_image: /weekend_stories_pics/2020/2010_Berlin/2010 Berlin 7578-1v (02. Okt. 2020).jpg
  og_image: /weekend_stories_pics/2020/2010_Berlin/2010 Berlin 7578-1v (02. Okt. 2020).jpg
  caption: "Photo from the series: [**Straying around**](/weekend_stories/2021/2021-03_Stray_around_3/)"
  actions:
    - label: "See More"
      url: /weekend_stories/2021/2021-03_Stray_around_3/
excerpt: "This post has an overlay header image"
tagline: "This is a custom tagline content which overrides the *default* page excerpt."
---

You can even define a header overlay just filled with a solid color:
---
title: "Layout: Header Overlay with Background Fill"
header:
  overlay_color: "#333"
---
Adding the extra setting overlay_filter: o# adjusts the opacity of the overlay image. Replace the placeholder o# with any opacity value between 0 and 1 (e.g., overlay_filter: 0.5) or use the even more complex parameter rgba(R#, G#, B#, o#) (e.g., overlay_filter: rgba(255, 0, 0, 0.25)).
---
title: "Post with an overlay header image and some overlay filter"
date: 2021-08-10
header:
  overlay_image: /weekend_stories_pics/2020/2010_Berlin/2010 Berlin 7578-1v (02. Okt. 2020).jpg
  overlay_filter: rgba(205, 239, 154, 0.30)
---
Videos
You can embed videos both in the header as well as within your pages’ content. The following parameters are required for the embedding:
| Parameter | Description |
|---|---|
id |
ID of the video |
provider |
Hosting provider of the video (youtube, vimeo or google-drive) |
For example, the YouTube video with the url https://www.youtube.com/watch?v=XsxDH4HcOWA (short url: https://youtu.be/XsxDH4HcOWA) can be embedded via:
{% include video id="XsxDH4HcOWA" provider="youtube" %}
a Vimeo video, e.g., https://vimeo.com/212731897, via:
{% include video id="212731897" provider="vimeo" %}
and a video from Google Drive, e.g.,
https://drive.google.com/file/d/1u41lIbMLbV53PvMbyYc9HzvBug5lNWaO/preview
via:
{% include video id="1u41lIbMLbV53PvMbyYc9HzvBug5lNWaO" provider="google-drive" %}
To embed a video in the header of a page add the following commands to its YAML front matter:
---
title: Post with a video header
header:
  video:
    id: 212731897
    provider: vimeo
---
Text alignment and styling
Besides the default Markdown text alignment commands, you can also use the following kramdown tags:
Left aligned test.
{: style="text-align: left;"}

Center aligned text.
{: style="text-align: center;"}

Right aligned test.
{: style="text-align: right;"}

Justified aligned test.
{: style="text-align: justify;"}
You can further advance the text styling by expanding the kramdown tag, e.g.:
**Some custom styled text with a [_link_](#text-alignment-and-styling).**
{: style="text-align: center; font-size:1.75em; color: #f78c6c;"}

This is *red*{: style="color: red"}.
Some custom styled text with a link.
This is red.
Footnotes
If your page contains footnotes, they will be placed at the end of your page by default. To place the footnotes anywhere else on your page, create an ordered or unordered list and add the kramdown tag {:footnotes} to it:
test1[^1]
[^1]: Test 1

{:footnotes}
*

test2[^2]
[^2]: Test 2
test11
test22
In-text anchors
In addition to the default Markdown in-text anchor definition syntax you can use:
Text with a [text anchor](#myid1).
{: #myid1}

Text with a [text anchor](#myid2) and a title.
{:title="The blockquote title"}
{: #myid2}
Text with a text anchor.
Text with a text anchor and a title.
Definition lists
Definition term 1
: Description of term 1

Definition term 2
Definition term 3
: Description of term 3
: Another Description tio term 3
- Definition term 1
- Description of term 1
- Definition term 2
- Definition term 3
- Description of term 3
- Another Description tio term 3
Notice boxes
To create notice boxes, simply attach the kramdown tag {: .notice} to your paragraph:
**Notice:** This is an important info notice.
{: .notice}
| Available notice box types |
|---|
{: .notice} |
{: .notice--primary} |
{: .notice--info} |
{: .notice--warning} |
{: .notice--danger} |
{: .notice--success} |
Notice: This is an important info notice.
Primary Notice: This is an important info notice.
Info Notice: This is an important info notice.
Warning Notice: This is an important info notice.
Danger Notice: This is an important info notice.
Success Notice: This is an important info notice.
To wrap several paragraphs or other elements, use the following Liquid and HTML commands:
{% capture notice-2 %}
**Extended notice box**:
* You can include lists
* and even fenced code blocks:

```html
<html>
  <body>Some body.<body>
</html>
```
{% endcapture %}

<div class="notice">{{ notice-2 | markdownify }}</div>
Extended notice box:
- You can include lists
- and even fenced code blocks:
<html>
  <body>Some body.<body>
</html>
You can also apply the following HTML-only solution:
<div class="notice--primary" markdown="1">
**Primary Notice with code block:** Some Text...
<p>Some more text....</p>

```html
<html>
  <body>Some body.<body>
</html>
```
</div>
Primary Notice with code block: Some Text…
Some more text....
<html>
  <body>Some body.<body>
</html>
Buttons
Add buttons by using the kramdown tag {: .btn} or use HTML code:
[Button name](#link){: .btn .btn--success}
<a href="#link" class="btn btn--success">Button name</a>
| Button Type | Example | Class | Markdown command |
|---|---|---|---|
| Default | Text | .btn |
[Text](#link){: .btn} |
| Primary | Text | .btn .btn--primary |
[Text](#link){: .btn .btn--primary} |
| Success | Text | .btn .btn--success |
[Text](#link){: .btn .btn--success} |
| Warning | Text | .btn .btn--warning |
[Text](#link){: .btn .btn--warning} |
| Danger | Text | .btn .btn--danger |
[Text](#link){: .btn .btn--danger} |
| Info | Text | .btn .btn--info |
[Text](#link){: .btn .btn--info} |
| Inverse | Text | .btn .btn--inverse |
[Text](#link){: .btn .btn--inverse} |
| Light Outline | Text | .btn .btn--light-outline |
[Text](#link){: .btn .btn--light-outline} |
| Button Size | Example | Class | Markdown command |
|---|---|---|---|
| X-Large | X-Large Button | .btn .btn--primary .btn--x-large |
[Text](#link){: .btn .btn--primary .btn--x-large} |
| Large | Large Button | .btn .btn--primary .btn--large |
[Text](#link){: .btn .btn--primary .btn--large} |
| Default | Default Button | .btn .btn--primary |
[Text](#link){: .btn .btn--primary } |
| Small | Small Button | .btn .btn--primary .btn--small |
[Text](#link){: .btn .btn--primary .btn--small} |
To center a button, just add common center alignment options:
Markdown:
[Button name](#link){: .btn .btn--success}
{: .text-center}
HTML:
<center>
<a href="#link" class="btn btn--success">Button name</a>
</center>
Table of Contents
Enable the table of contents by adding the following settings to the YAML front matter of your page:
---
toc: true
toc_label: "Unique Title" # default: Content
toc_icon: "heart"  # corresponding Font Awesome icon name without the "fa" prefix
toc_sticky: true   # enables sticky toc
---
Syntax highlighting
The Minimal Mistakes theme supports GitHub Flavored Markdown (GFM) ꜛ fenced code blocks. Styling and highlight colors can be edited in /_sass/syntax.scss.
Inline code snippets have to be surrounded by ` (they are not able to show syntax highlighting). Fenced code blocks can be realized either by using ~ or ` or by using the Liquid {% highlight %} tag:
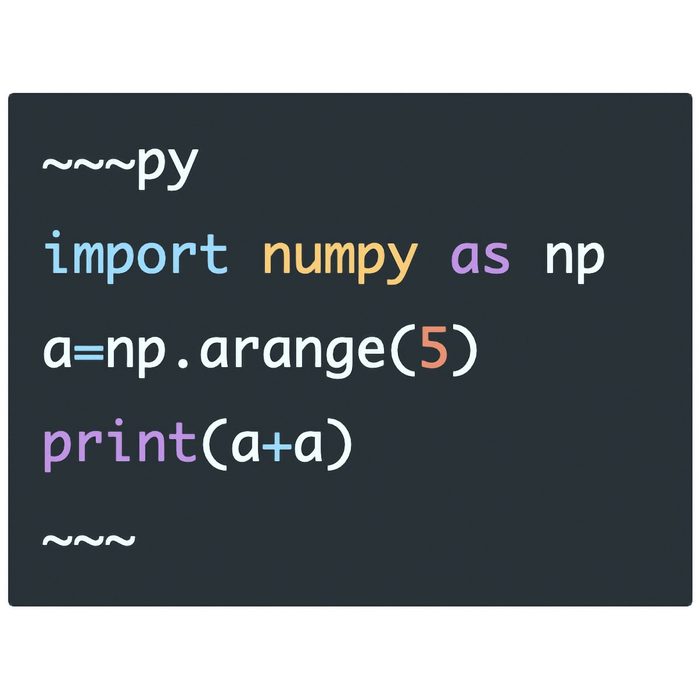
~~~py
import numpy as np
a=np.arange(5)
print(a+a)
~~~
```
import numpy as np
a=np.arange(5)
print(a+a)
```
{% highlight python %}
import numpy as np
a=np.arange(5)
print(a+a)
{% endhighlight %}
render all to
import numpy as np
a=np.arange(5)
print(a+a)
Supported languages: An overview of programming languages supported for syntax highlighting can be found in this post.
Fenced code blocks without syntax highlighting can be achieved by initializing the code block without a language declaration (~~~ ... ~~~). In the Liquid highlight tag, use output as language ({% highlight output %}).
You can add the extra option linenos to the {% highlight %} tag in order to display line numbers:
{% highlight python linenos %}
import numpy as np
a=np.arange(5)
print(a+a)
{% endhighlight %}
1
2
3

import numpy as np
a=np.arange(5)
print(a+a)
If you want to display raw Liquid tags, enclose them with the raw/endraw tag:

You can also embed GitHub Gist:
<script src="https://gist.github.com/mmistakes/77c68fbb07731a456805a7b473f47841.js"></script>
External plugins and solutions I use
Here is a list of additional external plugins and solutions I have added to the theme:
-
Making Jekyll related posts really related!ꜛ from WebJedaꜛ
See, e.g., Related Posts section below. -
Using Google Forms for Jekyll Commentsꜛ by JD PorterfieldꜛSince November 2022, I’m using WalineꜛSince August 2023, I’m using a Mastodon-powered comment system
See, e.g., Comments section below. - Easy image slide show for Jekyll static sitesꜛ by Peter Nobleꜛ
- Image gallery ꜛ from Jekyll Codex ꜛ → Example
- jekyll-flickr-photoset plugin
- The box-shadow Property from bitsofco.deꜛ
- Instructions on how to make the Masthead navigation bar “sticky” ꜛ by Quentin Fortierꜛ → Example ꜛ
- A collapsible section containing Markdownꜛ by Pierre Joubert ꜛ → Example
- Using GitHub Pages with Custom Domain from 1&1 IONOSꜛ by Melissa Hie ꜛ
- New window fix ꜛ from Jekyll Codexꜛ
-
Jekyll Feed pluginꜛ → Example
Here is a quick tutorial on how to configure the plugin. - Password protection for static pagesꜛ by Matteo Brusaꜛ
- Plausible Analytics, an open source and privacy-friendly website analytics tool


comments