Setting up Visual Studio Code for Python
Basically, Microsoft’s Visual Studio Codeꜛ (VS Code) is a general multi-purpose source-code editor. However, it takes only a few steps to turn it into a powerful code editor specifically targeted for both, pure Python code and Jupyter Notebooks.

IDE vs. code editor
First of all, what’s the difference between a code editor and an IDE?
An IDE, which stands for Integrated Development Environment, is a fully equipped programming environment, which usually comes with a set of tools for writing code, compiling and executing the code, debugging and version control integration – all combined into a single user interface. IDE can be either single-language-specific or support many or generally all programming languages. Examples for Python IDE are: PyCharmꜛ, Spyder, PyDevꜛ, KDevelopꜛ, Geanyꜛ or Wingꜛ.
A code editor, on the other hand, is basically a text editor, that helps to write the code more efficiently. I.e., unlike default text editors, code editors come along with integrated tools like syntax recognition and highlighting, auto-indentation, auto-completion and brace-matching. A code editor is an essential part of an IDE, but it can also be a stand-alone or a web app. Code editors are usually a bit more lightweight compared to an IDE. This accounts both the technical side – they consume less memory – and coding: especially for beginners, code editors can be a good choice to start with as they are less overwhelming than an IDE, regarding the functionality and the GUI. Examples for Python code editors are: Atom editorꜛ1, Sublime Textꜛ, Vimꜛ, NeoVimꜛ, TextWranglerꜛ, Kateꜛ – or VS Codeꜛ.
The good thing about VS Code is, that it comes along as such lightweight, multi-language code editor. But since it is highly extensible and customizable, we can extend it with more and more features, so that in the end we may not even notice a difference to a fully equipped IDE. And this is fully up to us, depending on what we currently want or need.
Setting up VS Code for Python
Basically, we need only two extensions to turn VS Code into a powerful Python editor:
- Microsoft’s official Python extensionꜛ, and, for convenience,
- the Python Environment Manager developed by Don Jayamanneꜛ.
If not already done, you also need a Python interpreterꜛ on your machine. I additionally recommend to install conda (e.g., via miniforge) as well.
Starting from scratch:
- install a Python interpreterꜛ and miniforge
- install VS Codeꜛ
- open VS Code
- go to the Extension menu and search for “Python” and install Microsoft’s official Python extension.
- search and install the Python Environment Manager as well.
 The extension menu in VS Code.
The official Python extension
Microsoft’s official Python extension comes – besides the actual Python support – along with IntelliSense, linting2, debugging, code navigation, code formatting, refactoring, variable explorer, test explorer, and more.
 IntelliSense. Source: code.visualstudio.comꜛ
The following extensions are automatically co-installed:
- Pylance (language support for Python)
- isort (import organizer for Python packages)
- Jupyter (Jupyter Notebook support)
- Jupyter Cell Tags (purpose not described)
- Jupyter Keymap (provides keymaps for Jupyter Notebooks to match the keybindings in Jupyter browser version)
- Jupyter Notebook Renderers (provides renderers for outputs of Jupyter Notebooks)
- Jupyter Slide Show (purpose not described, but the title may be self-descriptive)
The Python Environment Manager extension
Don Jayamanne’sꜛ Python Environment Manager extension provides the ability to manage the virtual environments that we have installed on our machine, including those created with conda.
 The Python Environment Manager. To activate an existing environment, simply click on the thumbs-up icon right to the environment’s name.
Python code in VS Code
VS Code is now ready for Python programming. I suggest to work in projects, i.e., create a separate folder (called “workspace” in VS Code, also see below) for each of your Python projects:
 Go to the Explorer menu and click on “Open Folder”, or click in the menu
 File->Open Folder..., where you can open an existing project folder or create a new one.
Create a new Python script (important: use .py as file extension, so that VS Code recognizes the file correctly) and write your program. E.g.:
 A Python script in VS Code.
By clicking on the “run” button in the upper right corner of the editor, the script will be executed in VS Code’s main terminal.
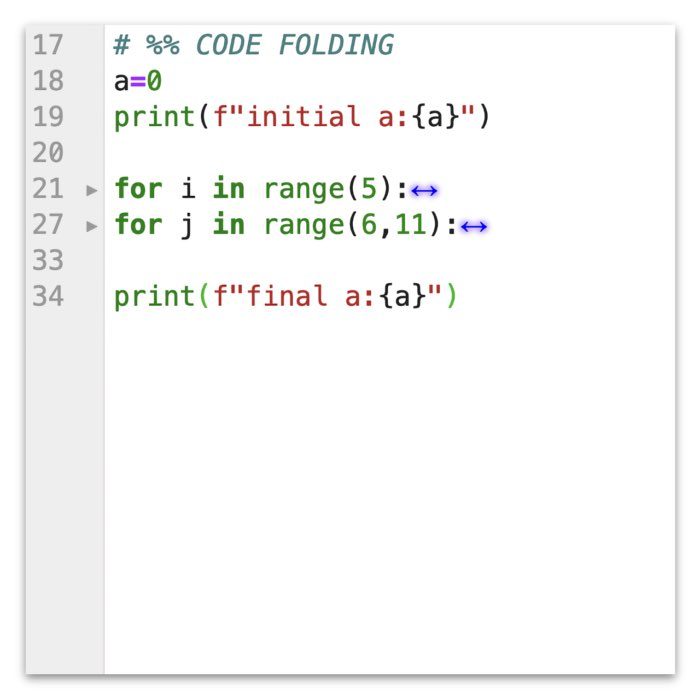
VS Code also supports code cells:
 Code cells in VS Code.
Code cells can be run individually by clicking on “Run cell” above each cell, or all at once by right-clicking on the script in the Explorer and selecting “Run Current File in Interactive Window” or by right-clicking in the script itself and selecting “Run All Cells”:
 Execute an entire script in the Interactive Window.
The cells will be executed in VS Code’s Interactive Windowꜛ for Python, which provides interactive Python support based on the IPython Kernel for Jupyterꜛ (IPykernel). The first time you run code in an Interactive Window you will be asked to additionally install the corresponding ipykernel package (if not already done):
 Prompt for installing the
 ipykernel package for running the Interactive Window.
Jupyter Notebooks in VS Code
Creating Jupyter Notebooks in VS Code is also pretty easy. Just create an empty notebook file (add the extension .ipynb to it) and then write your code:
 Jupyter Notebooks in VS Code.
The notebook support of VS Code is extremely good and you might not notice any difference to the notebook browser version. VS Code comes with a built-in notebook variable explorer: just click on Variable in the top menu of the notebook.
Working with conda and virtual environments
As usual, I highly recommend to work with virtual environments. We can create them, e.g., with conda, which can be used and executed from within VS Code’s main terminal. Just type in there:
conda create -n my_test_venv -y python=3.9
You can activate that environment via
conda activate my_test_venv
or by selecting it in the Python Environment Manager. You can also change the virtual environment by clicking on the currently selected Python interpreter in the bottom status bar of the VS Code main window. Once activated, the chosen environment will be used in both, the terminal and the Interactive Window.
Troubleshooting on Windows
While conda often works immediately after installation on Unix-based systems such as macOS or Linux, Windows can require a few additional steps before conda is available inside PowerShell or the integrated terminal in VS Code. This does not necessarily mean that the installation itself failed. In many cases, Miniforge or Anaconda is installed correctly, but PowerShell is not yet configured to initialize conda properly. Fortunately, we can fix it:
Common error #1: conda is not available in Windows’ PowerShell
When you try to verify your conda installation, e.g., by typing
conda --v
in Windows’ PowerShell or in the VS Code main terminal, you might receive an error message telling you, that conda wouldn’t be available, e.g.,
conda : The term 'conda' is not recognized as the name of a cmdlet, function, script file, or operable program.
To fix this:
- open the Anaconda Powershell Prompt from the Start menu, and
- execute:
conda init powershell
This initializes conda for PowerShell.
Afterwards, close the terminal completely and open a new PowerShell or VS Code terminal.
Common error #2: UnauthorizedAccess
If you receive an error message like
...
+ CategoryInfo          : SecurityError: (:) [], PSSecurityException
+ FullyQualifiedErrorId : UnauthorizedAccess
while trying to execute a conda command from within VS Code’s main terminal, PowerShell may be blocking the execution of the Conda initialization script. To fix this:
- Open a PowerShell, and
- execute:
Set-ExecutionPolicy RemoteSigned
or, if you want to fix this issue just for the current user account:
Set-ExecutionPolicy -ExecutionPolicy RemoteSigned -Scope CurrentUser
You may be asked to confirm the change. Confirm it with “Y”.
Then:
- Close the terminal completely, for example via the trash icon in VS Code.
- Open a new terminal.
- Test again.
This allows locally created scripts to run on your Windows system, which is usually sufficient for Conda initialization in PowerShell.
Common error #3: conda is not recognized as an internal or external command
If you receive an error message like
conda is not recognized as an internal or external command
which can happen when you install miniconda instead of Anaconda, you need to add the miniconda path to the environmental variables of Windows. To do so, please follow the instructions of this YouTube tutorialꜛ:
- Search for the “Anaconda prompt” app in the windows search bar and open it.
- Type in the “Anaconda prompt” the following command and hit enter:
where conda. This will show you three paths to the conda executable which we now need to add to the environmental variables. - Search for “environmental variables” in the windows search bar and open the corresponding search result. A new settings window opens. In the “Advanced” tab, click on the “Environmental Variables” button. In the “User variables for …” list, select the entry
Pathand press the “Edit” button. Now, add, one after another, the three conda paths you’ve seen in step 2. The paths can look like this: “C:\ProgramData\miniconda3\Library\bin", “C:\ProgramData\miniconda3\Scripts" and “C:\ProgramData\miniconda3\condabin". When you’re done, press “Ok” and close all windows.
Working in projects
Among others, the advantage of working in separate project folders, each associated with its own virtual environment, is, that we can open, manage and run them in separate windows in VS Code. Simply select File->New Window and open the desired project folder from within the newly opened VS Code window.
 To projects opened side-by-side in separate window instances in VS Code.
What’s next?
In a follow-up post I will present some further useful VS Code extensions. Stay tuned.
Footnotes
-
GitHub announcedꜛ that they will sunset the Atom editor on December 15, 2022. ↩
-
According the VS Code documentation: “Linting highlights syntactical and stylistic problems in your Python source code, which often helps you identify and correct subtle programming errors or unconventional coding practices that can lead to errors. For example, linting detects use of an uninitialized or undefined variable, calls to undefined functions, missing parentheses, and even more subtle issues such as attempting to redefine built-in types or functions. Linting is thus distinct from Formatting because linting analyzes how the code runs and detects errors whereas formatting only restructures how code appears.” ↩


comments