Using VS Code as LaTeX editor
It doesn’t take much to convert Visual Studio Code into a powerful $\LaTeX$ editor. Here is how to enable the $\LaTeX$ support and which features are available.
 The cover image for this post was created with DALL·E 2 (Sourceꜛ)
Enable $\LaTeX$ support
It actually takes only two steps to enable $\LaTeX$ support in VS Code:
- If not already done, install TeX Liveꜛ on your machine. If you’d like to use a $\LaTeX$ installation other than TeX Live, please follow the instructions on this Wikiꜛ.
- In VS Code, install the LaTeX Workshop extensionꜛ
That’s it.
Basic usage
Create your $\LaTeX$ documents including the file-extension “.tex” and VS Code will correctly recognize these files as $\LaTeX$ files. To compile your file, either click on the green play-button in the upper panel of the editor window, or press CMD/Ctrl+Alt+B. After the first compilation, every time you save changes to your $\LaTeX$ file, the auto-compilation of the document will be triggered and you don’t have to take any further action.
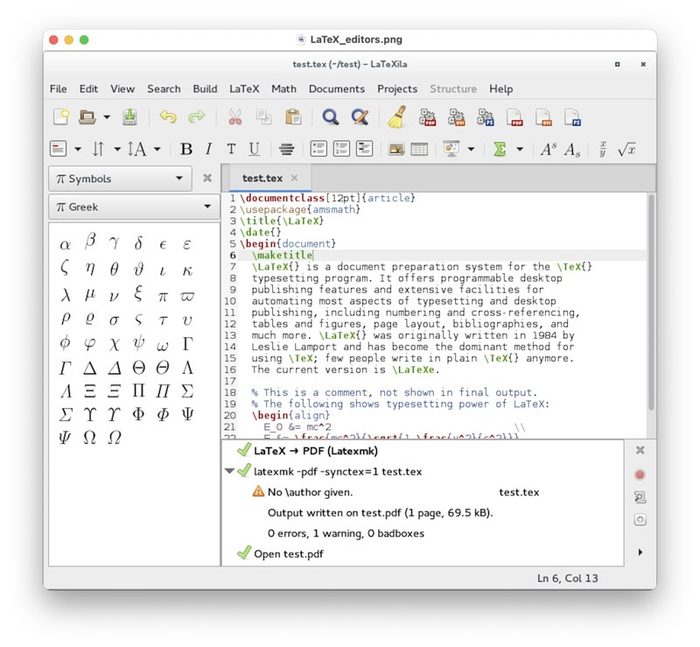
 A $\LaTeX$ document in VS Code.
The current built-progress is indicated in the status-bar at the bottom of the editor. If there are any problems causing the compilation to stop, you will see a red “X”. Additionally, VS Code provides the option to open the $\LaTeX$ compiler log, showing you what caused the build-interruption and the line of potential error in your document.

 Error log.
On VS Code’s side panel you will find a new menu called “$\TeX$” (only appears if the current document in the editor is a .tex-file). Clicking on it will open a new menu-tab, split into three panels: Commands, Structure, and Snippet view. In the Commands panel, you have some further compilation options for building and cleaning up your $\LaTeX$ project. In the Structure panel, you see the hierarchical structure of your document based on the headings within the document. And from the Snippet view panel, you can insert pre-defined $\LaTeX$ snippets such as Greek letters or mathematical constructs.
 The $\TeX$ menu in the side panel.
You can view your current $\LaTeX$ document and the compiled PDF side-by-side. Just hit the split-view button in the upper panel of the editor.
 Split view: View your $\LaTeX$ and the compiled PDF side-by-side.
Other useful features
Below are my favorite features of the LaTeX Workshop extension. You can find a detailed description of all features on their Wikiꜛ.
Intellisense
Intellisenseꜛ is supported for citations, commands, environments, labels, and file names:
 Intellisense in $\LaTeX$ files. (Image sourceꜛ)
There are three different ways to insert environments:
1. Type \begin and choose “\beginend” from the pop up window to autocomplete the command. A multi-cursor inside the braces of \begin{} and \end{} will be enabled and a list of environments pops up:
 Intellisense for environments, method 1. (Image sourceꜛ)
2. Type \begin{ and directly choose the environment name from the pop up list:
 Intellisense for environments, method 2. (Image sourceꜛ)
3. Type \ plus the environment name (and only the name, skip “begin”) and autocomplete the command by choosing the desired environment from the pop up list:
 Intellisense for environments, method 3. (Image sourceꜛ)
Surround text feature
You can quickly insert already written text into a $\LaTeX$ command by selecting it, entering the desired command and using autocompletion:
 Insert written text into a $\LaTeX$ command. (Image sourceꜛ)
This works for environments as well:
 Insert written text into a $\LaTeX$ environment. (Image sourceꜛ)
Hovering and previewing feature
You can hover over $\LaTeX$ expressions and a corresponding preview will show up. This works for packages, environments, citations, graphics and references.
 Hover over a package name to get a View documentation link. (Image sourceꜛ)
 Hover over an equation to get a rendered preview of it. (Image sourceꜛ)
Greek letters shortcuts
With the trigger characterꜛ @ followed by the corresponding letter from the table below you can quickly insert Greek letters:
 Autocompletion of a Greek letter shortcut. (Image sourceꜛ)
| Shortcut | Completes to | Shortcut | Completes to | |
|---|---|---|---|---|
@a |
\alpha |
@o |
\omega |
|
@b |
\beta |
@& |
\wedge |
|
@c |
\chi |
@x |
\xi |
|
@d |
\delta |
@y |
\psi |
|
@e |
\epsilon |
@z |
\zeta |
|
@f |
\phi |
@D |
\Delta |
|
@g |
\gamma |
@F |
\Phi |
|
@h |
\eta |
@G |
\Gamma |
|
@i |
\iota |
@Q |
\Theta |
|
@k |
\kappa |
@L |
\Lambda |
|
@l |
\lambda |
@X |
\Xi |
|
@m |
\mu |
@Y |
\Psi |
|
@n |
\nu |
@S |
\Sigma |
|
@p |
\pi |
@U |
\Upsilon |
|
@q |
\theta |
@W |
\Omega |
|
@r |
\rho |
@ve |
\varepsilon |
|
@s |
\sigma |
@vf |
\varphi |
|
@t |
\tau |
@vs |
\varsigma |
|
@u |
\upsilon |
@vq |
\vartheta |
Mathematical helpers
As for Greek letters, you can also trigger the autocompletion of some mathematical expressions:
 Autocompletion of a mathematical shortcut. (Image sourceꜛ)
| Shortcut | Completes to | Shortcut | Completes to | |
|---|---|---|---|---|
@( |
\left( $1 \right) |
@; |
\dot{$1} |
|
@{ |
\left\{ $1 \right\} |
@: |
\ddot{$1} |
|
@[ |
\left[ $1 \right] |
@= |
\equiv |
|
@. |
\cdot |
@* |
\times |
|
@8 |
\infty |
@< |
\leq |
|
@6 |
\partial |
@> |
\geq |
|
@/ |
\frac{$1}{$2} |
@2 |
\sqrt{$1} |
|
@% |
\frac{$1}{$2} |
@I |
\int_{$1}^{$2} |
|
@^ |
\Hat{$1} |
@| |
\Big | |
|
@_ |
\bar{$1} |
@+ |
\bigcup |
|
@@ |
\circ |
@- |
\bigcap |
|
@0 |
^\circ |
@, |
\nonumber |
Additional mathematical shortcuts are:
| Shortcut | Completes to | Shortcut | Completes to | |
|---|---|---|---|---|
__ |
_{$1} |
MBF |
\mathbf{${1}} |
|
** |
^{$1} |
MBB |
\mathbb{${1}} |
|
... |
\dots |
MCA |
\mathcal{${1}} |
|
MRM |
\mathrm{${1}} |
MIT |
\mathit{${1}} |
|
MSF |
\mathsf{${1}} |
MTT |
\mathtt{${1}} |
Environment shortcuts
Some environments have a dedicated shortcutsꜛ in the form BXY where “XY” are the two first letters of the environment name. Just type the corresponding capital letter shortcut, and a window pops up, where you can select the desired environment. For the starred versions use the prefix BSXY. There are snippets available for inserting sections as wellꜛ.
 Autocompletion of an environment shortcut. (Image sourceꜛ)
| Shortcut | Environment name | Shortcut | Environment name | |
|---|---|---|---|---|
BEQ |
equation |
BIT |
itemize |
|
BSEQ |
equation* |
BEN |
enumerate |
|
BAL |
align |
BSPL |
split |
|
BSAL |
align* |
BCAS |
cases |
|
BGA |
gather |
BFR |
frame |
|
BSGA |
gather* |
BFI |
figure |
|
BMU |
multline |
BTA |
table |
|
BSMU |
multline* |
Font command shortcuts
Similar to the environment shortcuts, there are shortcutsꜛ that toggle font commands:
| Shortcut | Font command |
|---|---|
fontsize |
opens font size select |
FNO |
\textnormal{${1}} |
FRM |
\textrm{${1}} |
FEM |
\emph{${1}} |
FSF |
\textsf{${1}} |
FTT |
\texttt{${1}} |
FIT |
\textit{${1}} |
FSL |
\textsl{${1}} |
FSC |
\textsc{${1}} |
FUL |
\underline{${1}} |
FUC |
\uppercase{${1}} |
FLC |
\lowercase{${1}} |
FBF |
\textbf{${1}} |
FSS |
\textsuperscript{${1}} |
FBS |
\textsubscript{${1}} |
Spell check
You can enable integrated spell checking in $\LaTeX$ files via the Code Spell Checker (C Spell)ꜛ plugin. Just add both $\TeX$- and $\LaTeX$ to C Spell’s enabled filetypes:
 C Spell file types settings panel.
Version control with git
VS Code comes with an integrated version control system based on gitꜛ. And of course you can version control $\LaTeX$ files like any other file in VS Code. If you’re not familiar with git in VS Code yet, you can start on the VS Code documentation website ꜛ or with this video tutorialꜛ.
 The source control panel in VS Code.
Collaborative editing
Once you enabled version control for your $\LaTeX$ project, you can upload it into a public or private repository on GitHub. If you have a paid Overleaf account, you could then synchronizeꜛ the repository with Overleaf and start collaborative editing of your documents via Overleaf’s share feature. The synchronization works for both private and public repositories. Alternatively, you could also use Microsoft’s Live Share pluginꜛ, which enables collaboratively editing as well. And it is free.
 Synchronize your $\LaTeX$ projects version controlled on GitHub with Overleaf and start collaborative editing via Overleaf’s share feature.
Your opinion
If you have other highlight features, further hints or additional plugins that would improve the $\LaTeX$ experience in VS Code, please feel free to leave a comment in the comment section below.


comments